Planning With Orientation Constraints
Tutorial Level: Intermediate
For certain applications, motion plans that are generated require orientation constraints on things like the robot’s gripper. One example of this is moving a glass of water - the robot’s gripper needs to be oriented in a way that doesn’t spill any water while moving the glass.
This tutorial will walk through an example Objective that executes a motion plan with orientation constraints, and explain how to enforce orientation constraints when building Objectives.
Launch MoveIt Pro
We assume you have already installed MoveIt Pro to the default install location. Launch the application using:
cd $HOME/moveit_pro
./moveit_pro run -c picknik_ur_mock_hw_config
1. Run the “Constrained Pick and Place” Objective
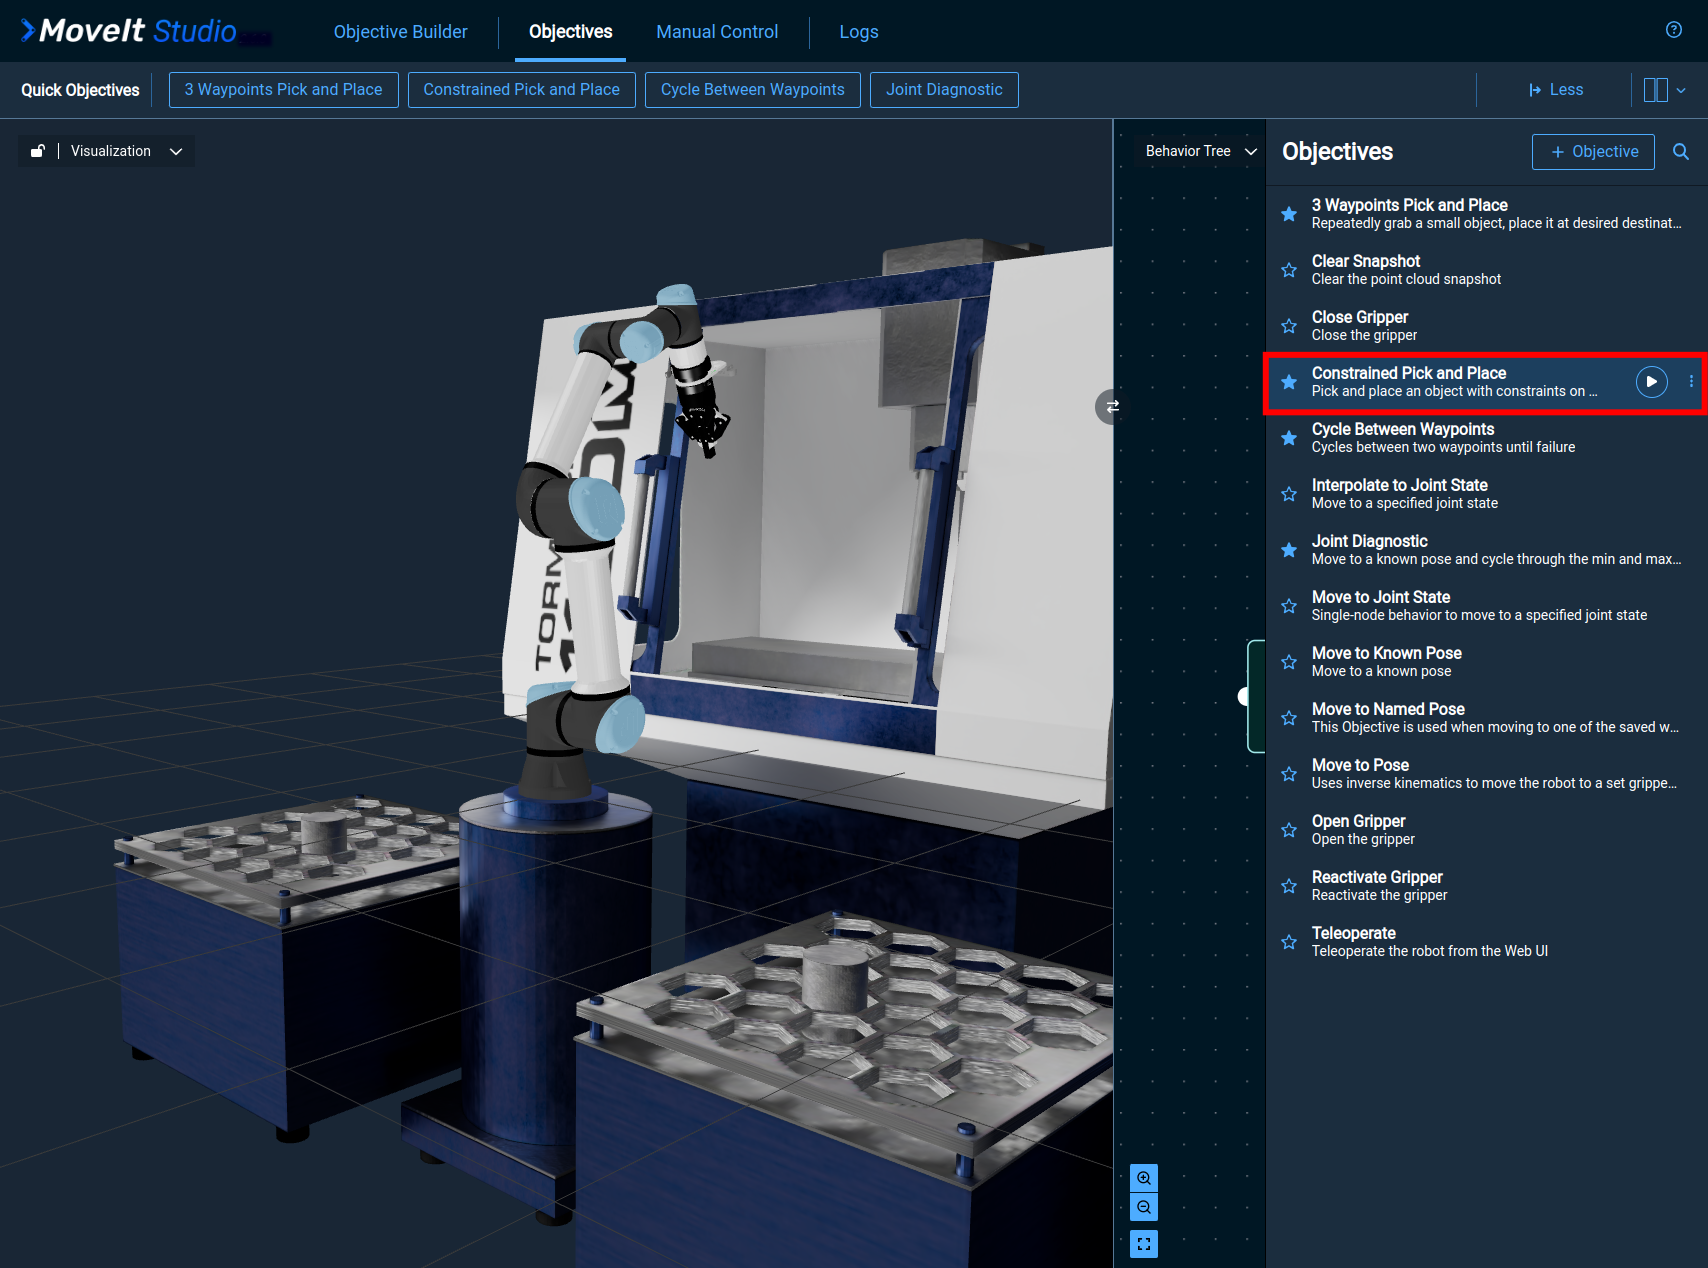
To get an understanding of what orientation constrained motion planning looks like in practice, run the Constrained Pick and Place Objective.
This Objective emulates the glass of water example application that was mentioned previously.
You’ll see that the robot gripper stays pointed down throughout the motion plan, avoiding any sideways tilt so that no water is spilled:
2. Inspecting the Orientation Constraints in the “Constrained Pick and Place” Objective
After running the Objective, open the Behavior Tree to learn about how the orientation constraints are implemented. Select the “Objective Builder” tab, click on the Objective, and then select “Edit” in the top right:
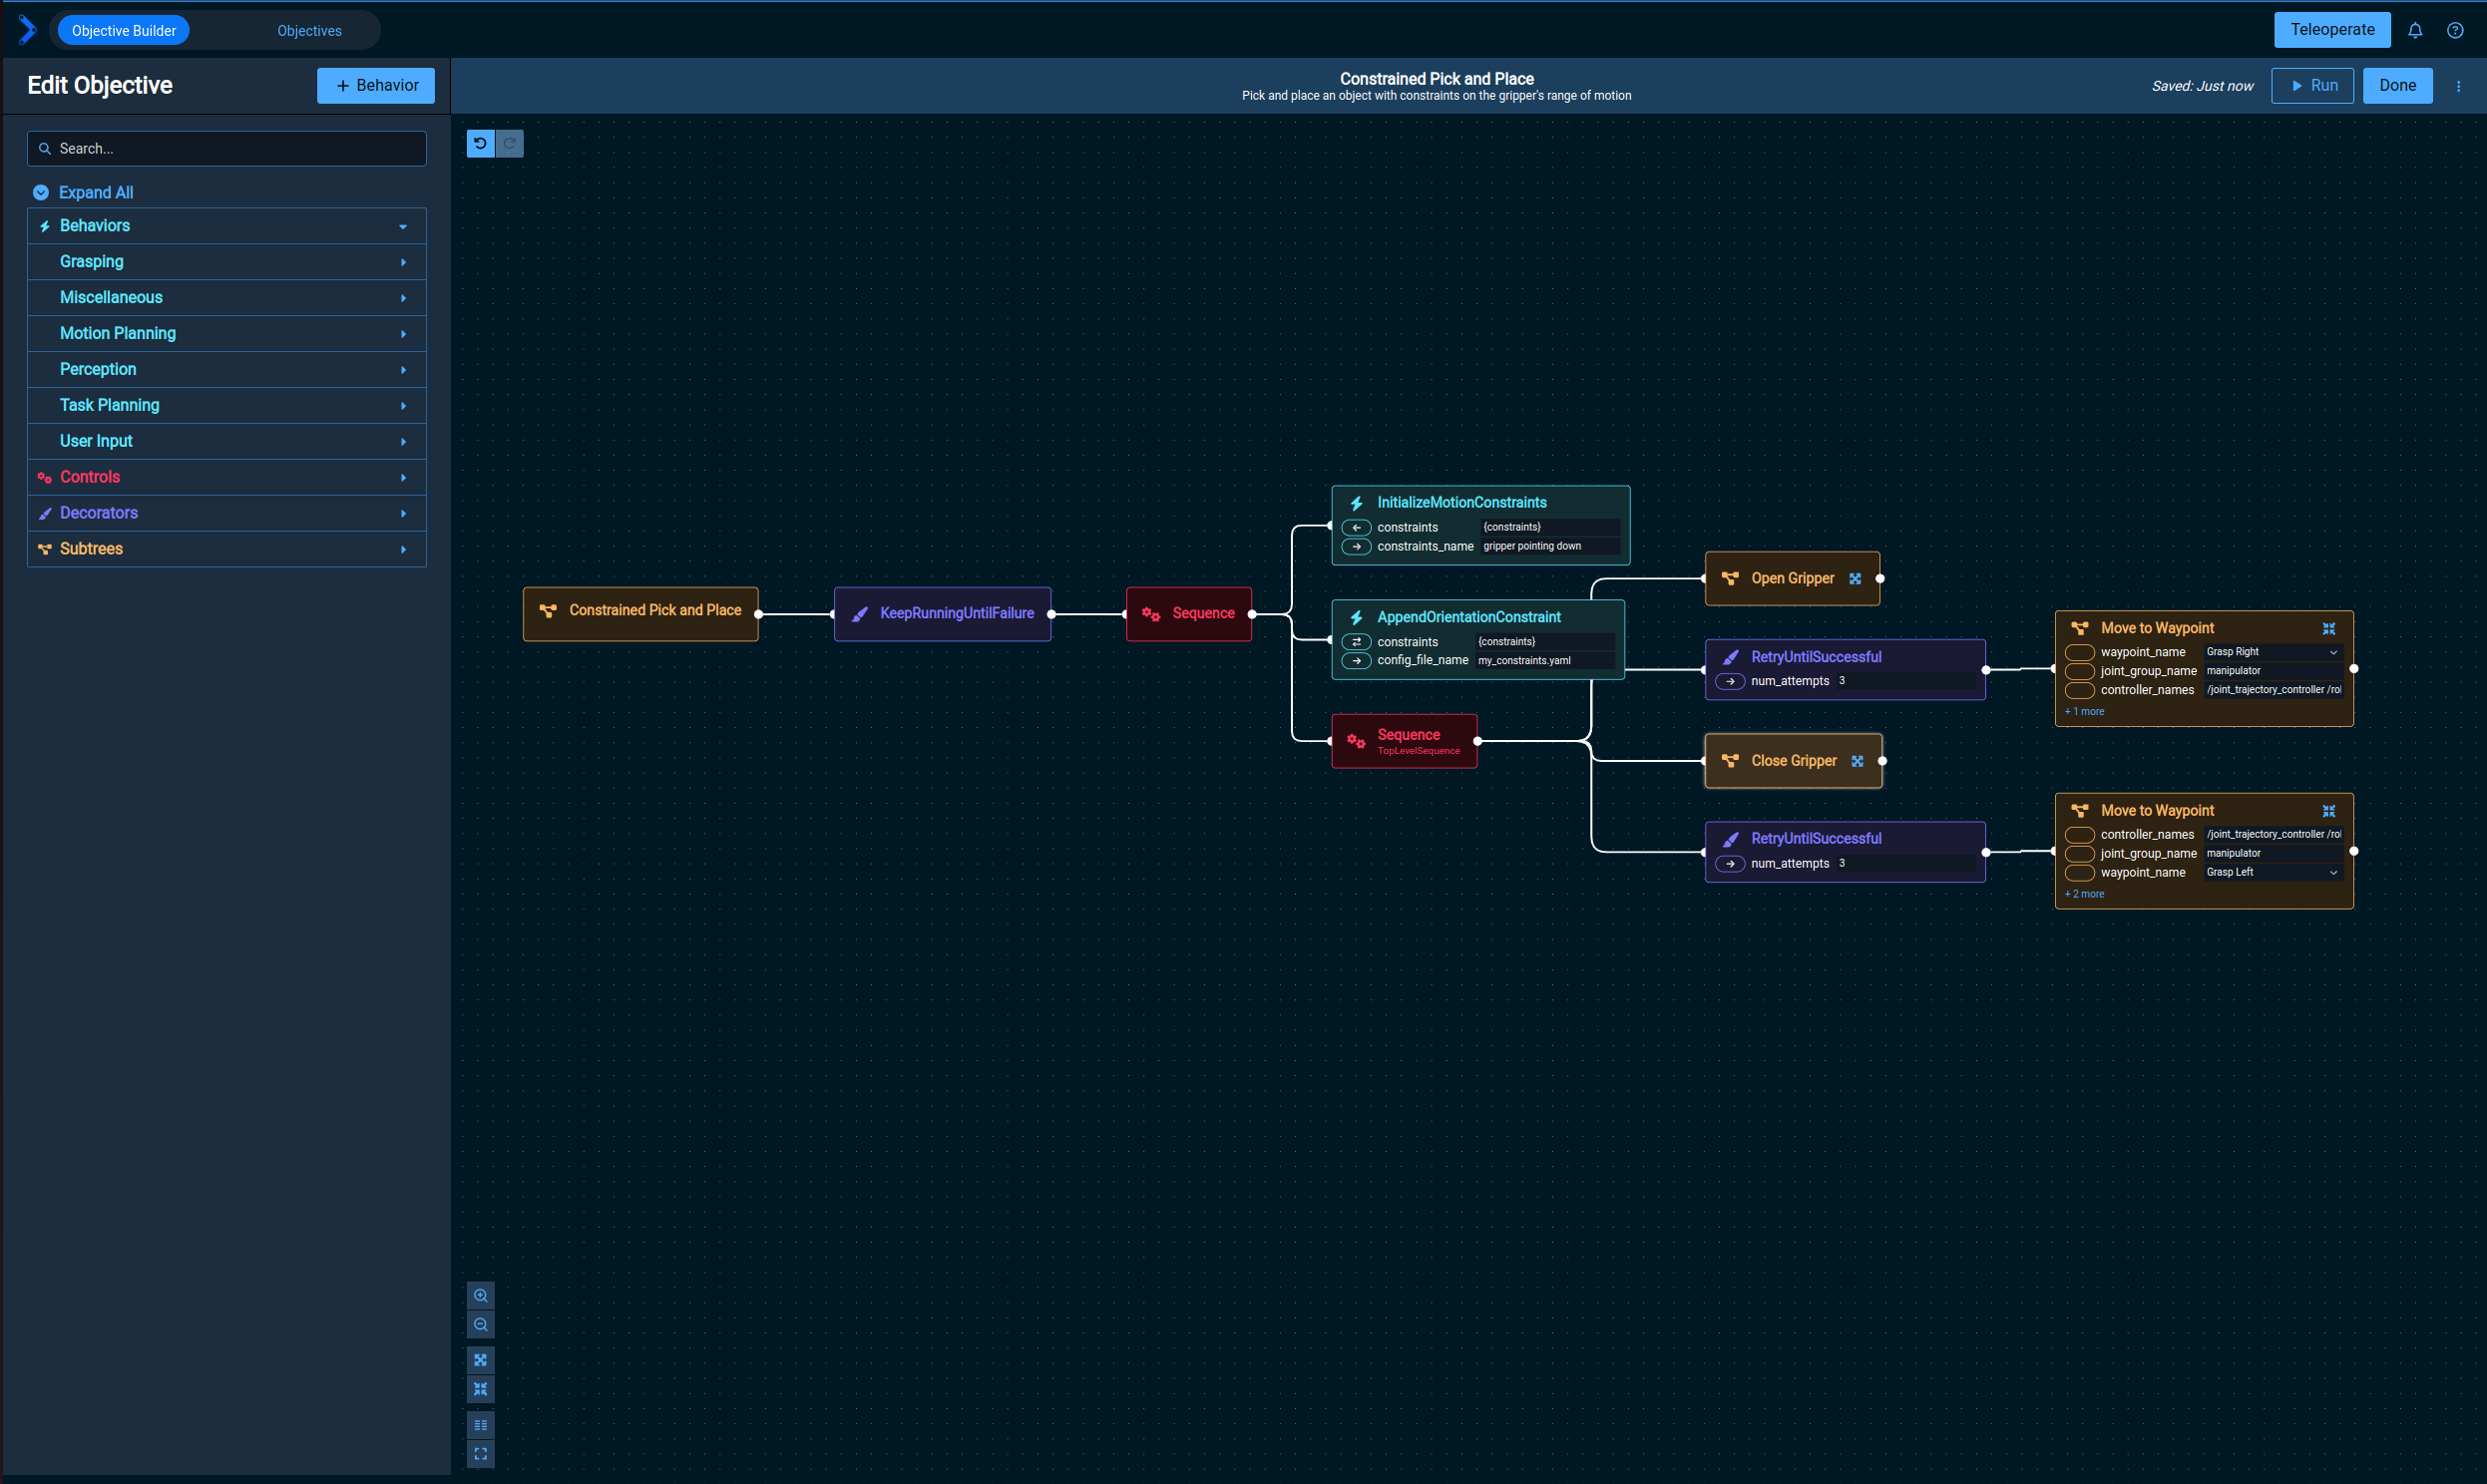
There are two Behaviors that are needed to create orientation constraints:
Initialize Motion Constraints: Creates an empty moveit_msgs/Constraints message that can be modified/used as needed by other Behaviors.Append Orientation Constraint: Adds orientation constraints to the moveit_msgs/Constraints message that was created by theInitialize Motion ConstraintsBehavior.
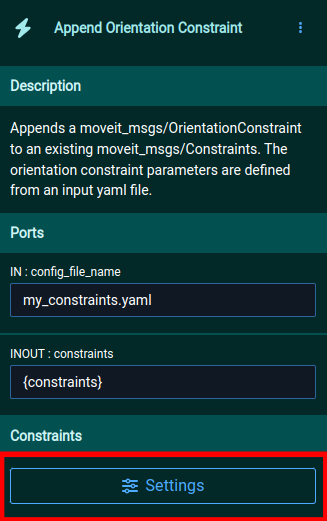
The constraint values in the Append Orientation Constraint Behavior are defined by a YAML file.
This Behavior expects the orientation constraint YAML file to be located at ${HOME}/.config/moveit_pro/<ROBOT_CONFIG_PACKAGE>/objectives/ on the host machine.
The my_constraints.yaml file that’s being used in this Objective’s Append Orientation Constraint behavior is located at ${HOME}/.config/moveit_pro/picknik_ur_mock_hw_config/objectives/,
since this Objective belongs to the picknik_ur_mock_hw_config robot configuration.
orientation is defined in constraint_frame, and is applied to link_frame.
So, in this case, we are constraining grasp_link to be pointed straight down (i.e., rotated -3.14 radians about world’s x axis).
The tolerances indicate the +/- deviation that can occur from the target orientation.
For this objective, since we don’t want the robot to spill the glass of water, we set tolerances that are close to 0 about the x and y axes, but allow free rotation about the z axis.
3. Using Orientation Constraints in Motion Plans
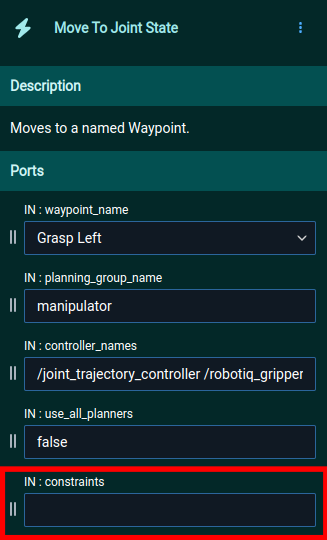
Once an orientation constraint has been defined, it can be applied to a Move To Joint State Behavior through the constraints input port.
The first Move To Waypoint SubTree in the Constrained Pick and Place Objective does not use constraints, since the robot hasn’t “picked” the glass of water yet:
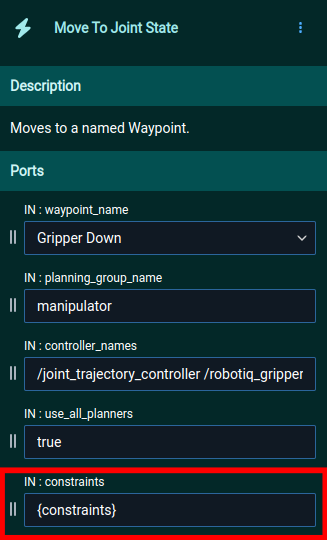
The other Move To Waypoint SubTree does use constraints to ensure that the glass of water isn’t spilled while moving it to the other table:
4. Modifying Orientation Constraints
While orientation constraints can be modified by changing the corresponding YAML file directly, there’s also a constraint editor in the web app.
With the Behavior Tree still open for the Constrained Pick and Place Objective, click on the Append Orientation Constraint Behavior.
The Settings button will open the interactive constraint editor:
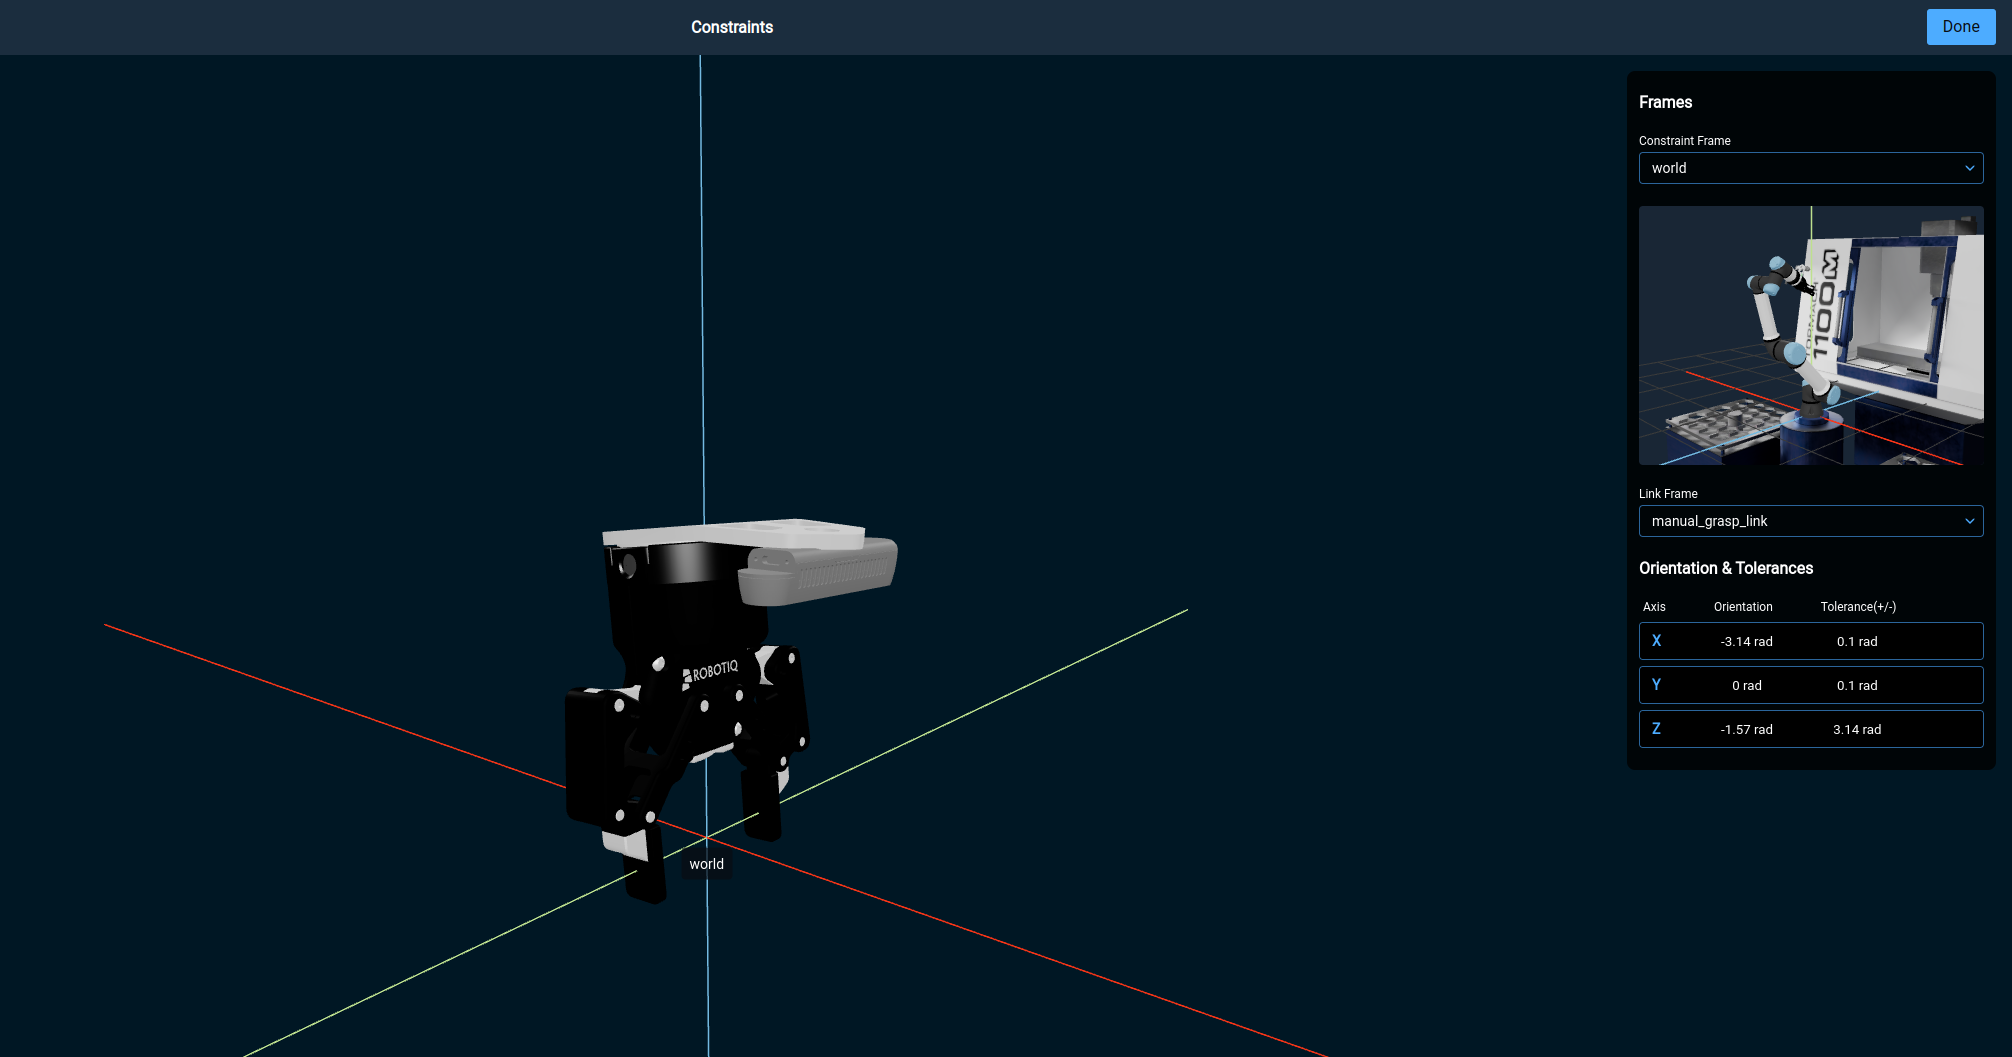
The constraint editor is a nice way to visualize the target orientation and tolerances that are being enforced.
Try setting the y axis orientation to 1.57 radians so that the gripper is horizontal (be sure to click Done in the top-right after changing this);

Now, try running the Constrained Pick and Place Objective again.
The Objective should fail when trying to execute the second Move To Waypoint SubTree since the desired waypoint (Gripper Down) violates the new constraints.