Keepout Zones and Saving/Loading Planning Scene
The Keepout Zones feature is designed to quickly define regions in the workspace where the robot(s) is prohibited from entering or interacting. This is crucial for avoiding obstacles and ensuring safe operation in dynamic environments. This guide informs on how to create, manipulate, and manage keepout zones within the planning scene.
Keepout zones are implemented as 3D cubes in the planning scene. This how-to guide will walk through:
- Creating and visualizing keepout zones in the 3D planning scene.
- Manipulating keepout zones, including moving, rotating, and deleting them.
- Saving and loading keepout zone configurations to the planning scene.
Creating a Keepout Zone
You can create a keepout zone in the 3D planning scene by defining its size, orientation and position. This keepout zone will prevent the robot from moving into this region.
To create a keepout zone:
- Open the Keepout Zones panel in the UI by clicking the box on the top left hand side of the Visualization view.

- Click the + Keep-Out Zone button to create a new keepout zone.
- Use sliders to adjust size, position, and orientation parameters of the keepout zone. The parameters are as follows:
- Size: Adjust the width, height, and length of the keepout zone using the sliders.
- Position: Set the x, y, and z coordinates to position the keepout zone in the workspace.
- Orientation: Use roll, pitch, and yaw sliders to rotate the keepout zone around its axes.
Manipulating Keepout Zones
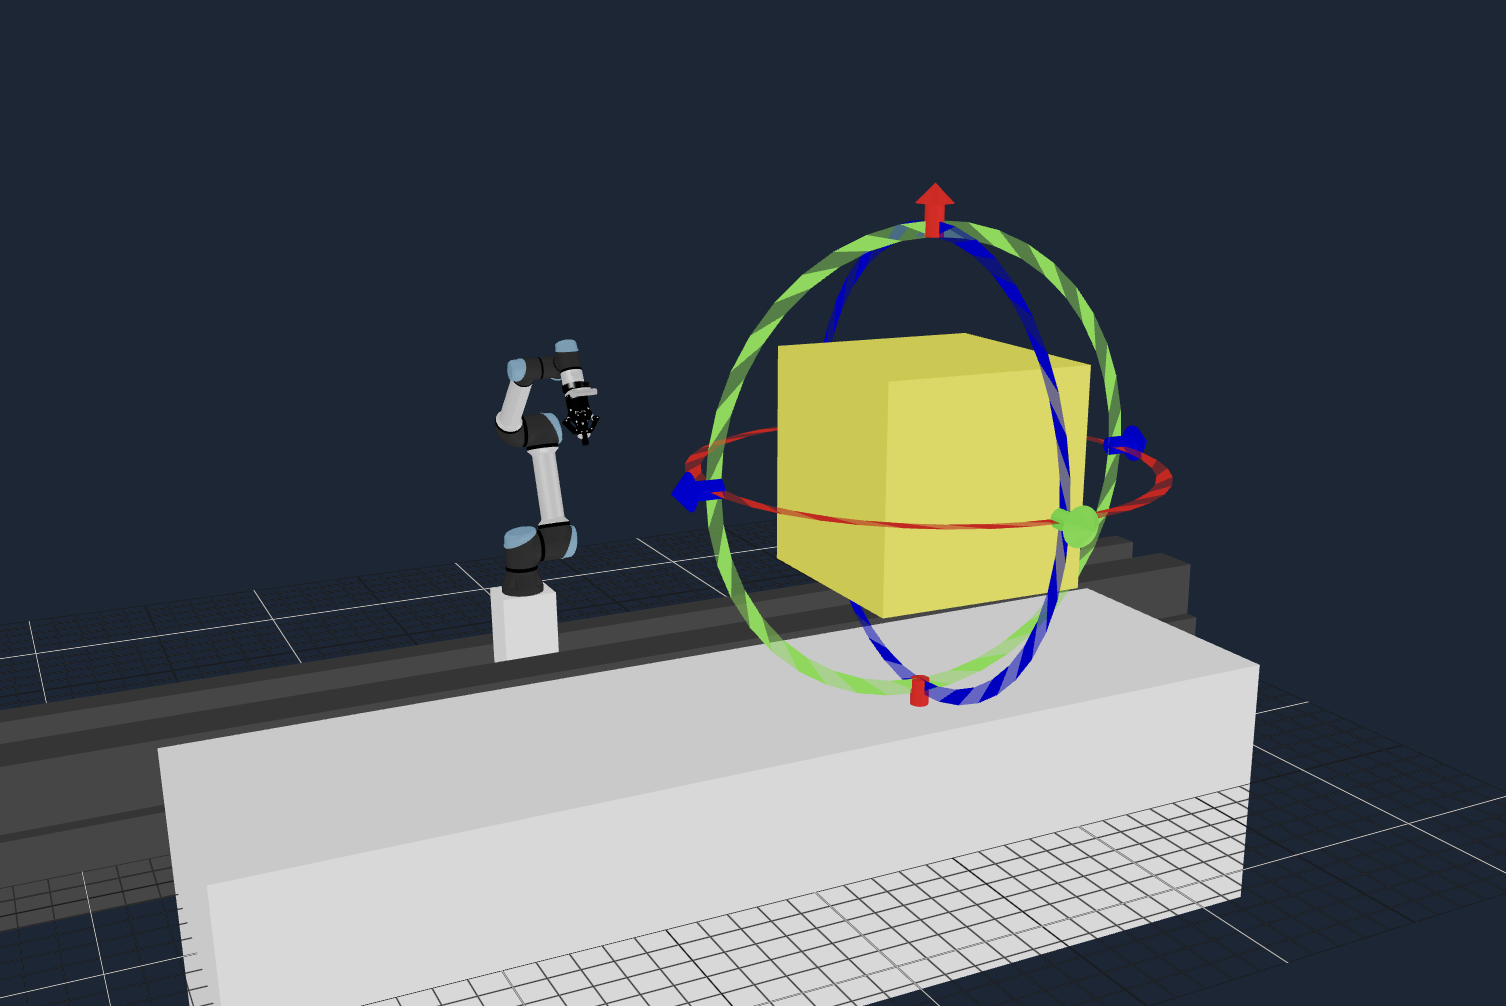
Once a keepout zone has been created, you can manipulate it further. It initially appears already selected as a yellow cube. You can move, rotate, or delete the keepout zone using the interactive marker that appears when the zone is selected. A deselected keepout zone will appear green, and when selected again it will turn yellow and the interactive marker will reappear.
- Move: Click and drag the keepout zone to a new position using the arrows on the outside of the interactive marker.
- Rotate: Use the circular interactive marker that appears on the edges of the keepout zone to adjust its rotation. Click and drag the circular handles to rotate the keepout zone around its axes.
- Delete: To remove a keepout zone, select it and press the Delete or Backspace key. Alternatively, click the delete button in the side panel.
Saving and Loading Keepout Zones
After defining your keepout zones, you can save them to a configuration file:
- Click the Export Scene button in the Plan Scene Editor pane.
- Provide a file name and click save.
To load previously saved planning scene, including keepout zones:
- Click the Load Scene button in the Plan Scene Editor pane.
- Select the configuration file to be uploaded.
- Click the Load button. (ensure that the current planning scene is saved as this load will overwrite it)