Create a Pick and Place Objective
Tutorial Level: Beginner
This tutorial will walk you through how to use the Objective Builder and the waypoints editor to create a basic pick and place application. The demo will use pre-saved waypoints to move to different locations.
The high-level plan is to have the robot execute a sequence of four steps:
- Open the gripper.
- Move to the “Pick” position.
- Close the gripper.
- Move to the “Place” position.
The sequence will repeat indefinitely unless canceled by the user, or until one of the Behaviors fails (in planning or execution).
Launch MoveIt Pro
We assume you have already installed MoveIt Pro to the default install location. Launch the application using:
cd $HOME/moveit_pro
./moveit_pro run -c picknik_ur_mock_hw_config
1. Create and Edit Waypoints
Recall from the teleoperation tutorial that a waypoint is a saved robot joint pose that the arm can be commanded to move to using the buttons from the “Endpoint” tab.
For this tutorial, there is an existing waypoint: Place, and one that needs to be created: Pick.
Using the teleoperation tools, drive the robot to a desired pose and save a new Pick waypoint for use in this Objective.
2. Create New Objective
Once the Pick and Place waypoints have been made and updated, open the “Objective Builder” screen and click the “+ Objective” button to create a new Objective.
Enter the following information and click the “Create” button.
- Name: Waypoints Pick and Place
- File Name: waypoints_pick_and_place
- Description: Pick and Place at given positions.
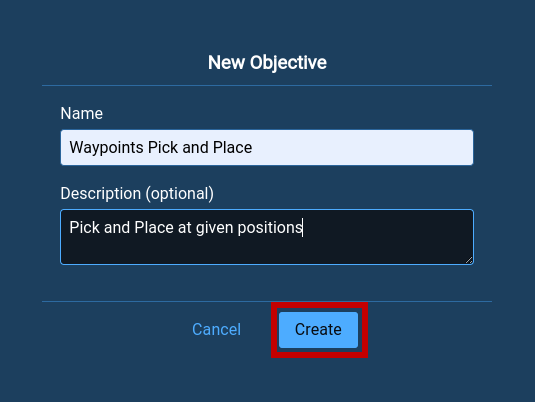
The Objective has been created and can now be edited or run in the UI.
A new Objective will be created and displayed as a node called “Waypoints Pick and Place”.
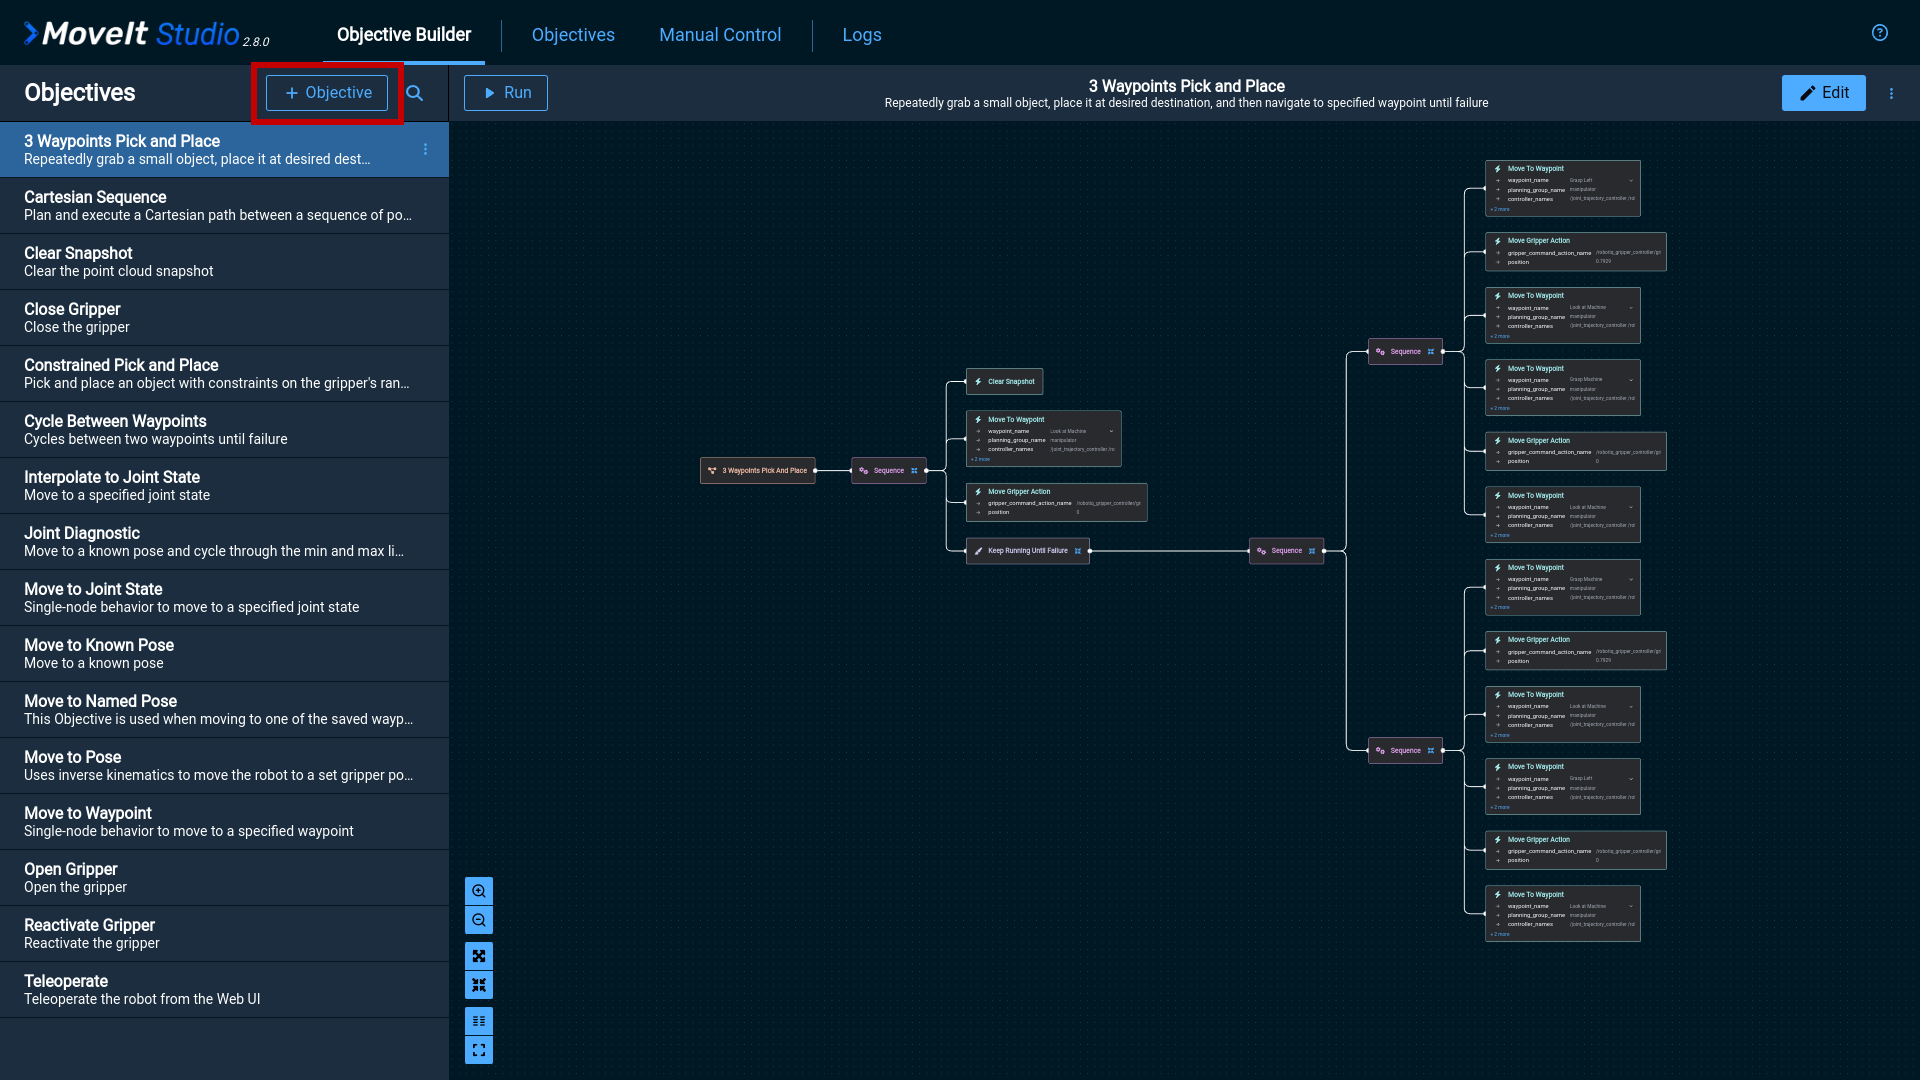
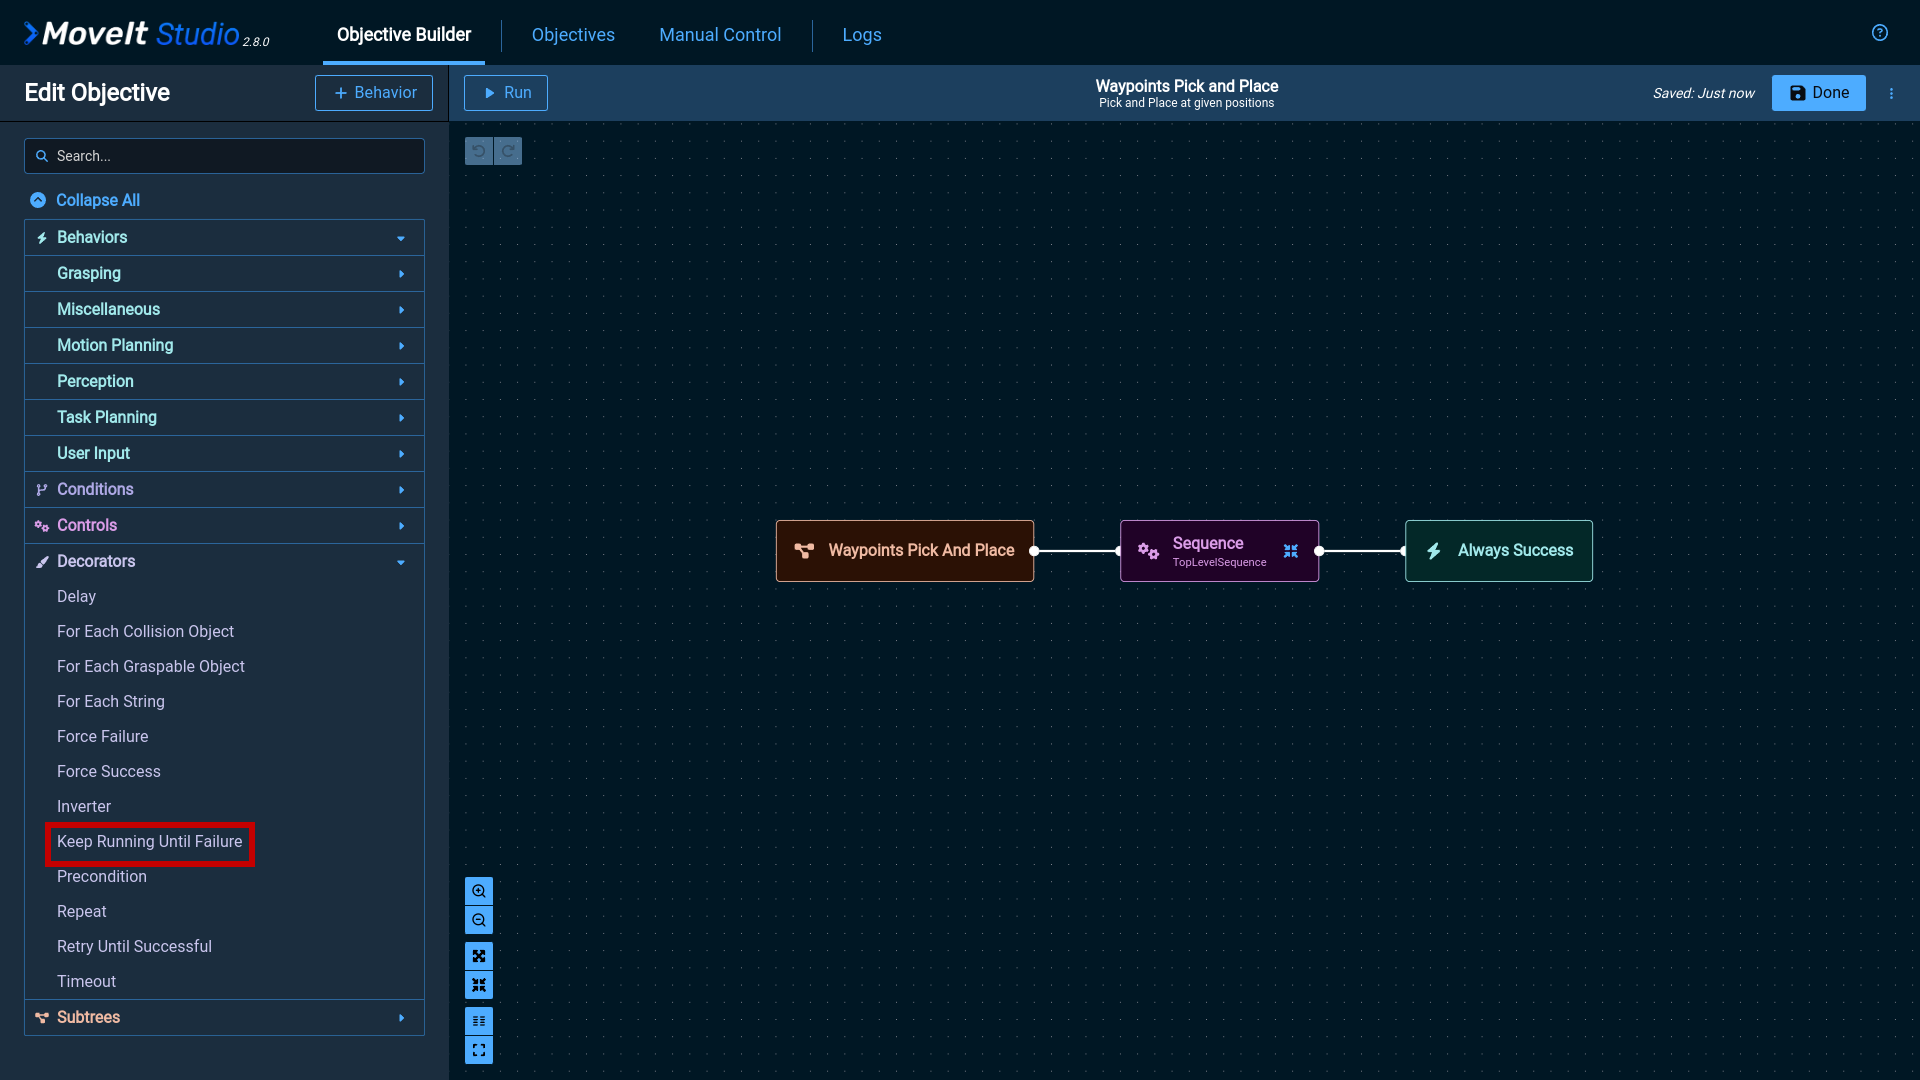
3. Add Behaviors
While editing an Objective in the Objective Builder, the full list of Behaviors available for inclusion is provided in the left panel. Additional information about each Behavior is available by selecting one, and hovering the cursor over the info icon.
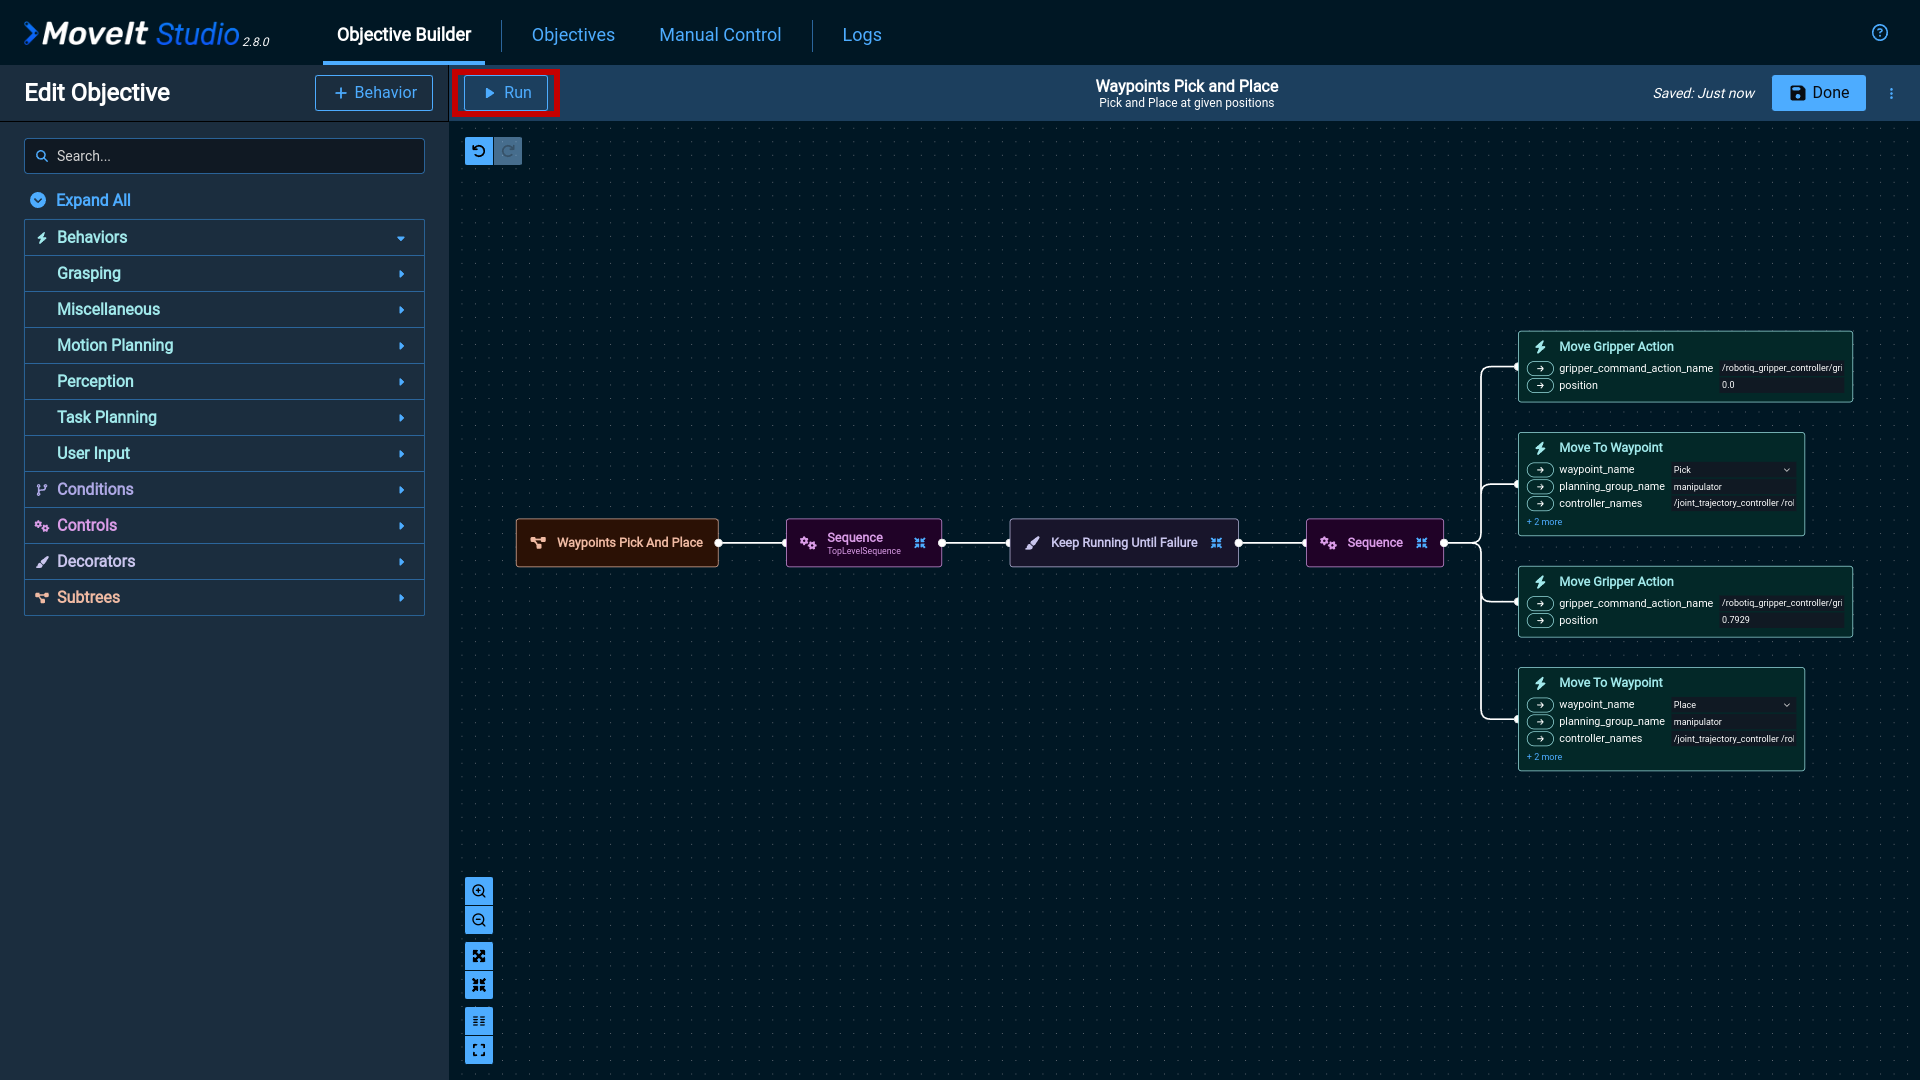
The first Behavior needed is Keep Running Until Failure, which causes an Objective to be run forever.
From the Behavior pane on the left, add the Decorator node called Keep Running Until Failure and connect it to the existing tree.
Next, add a Control node called Sequence,
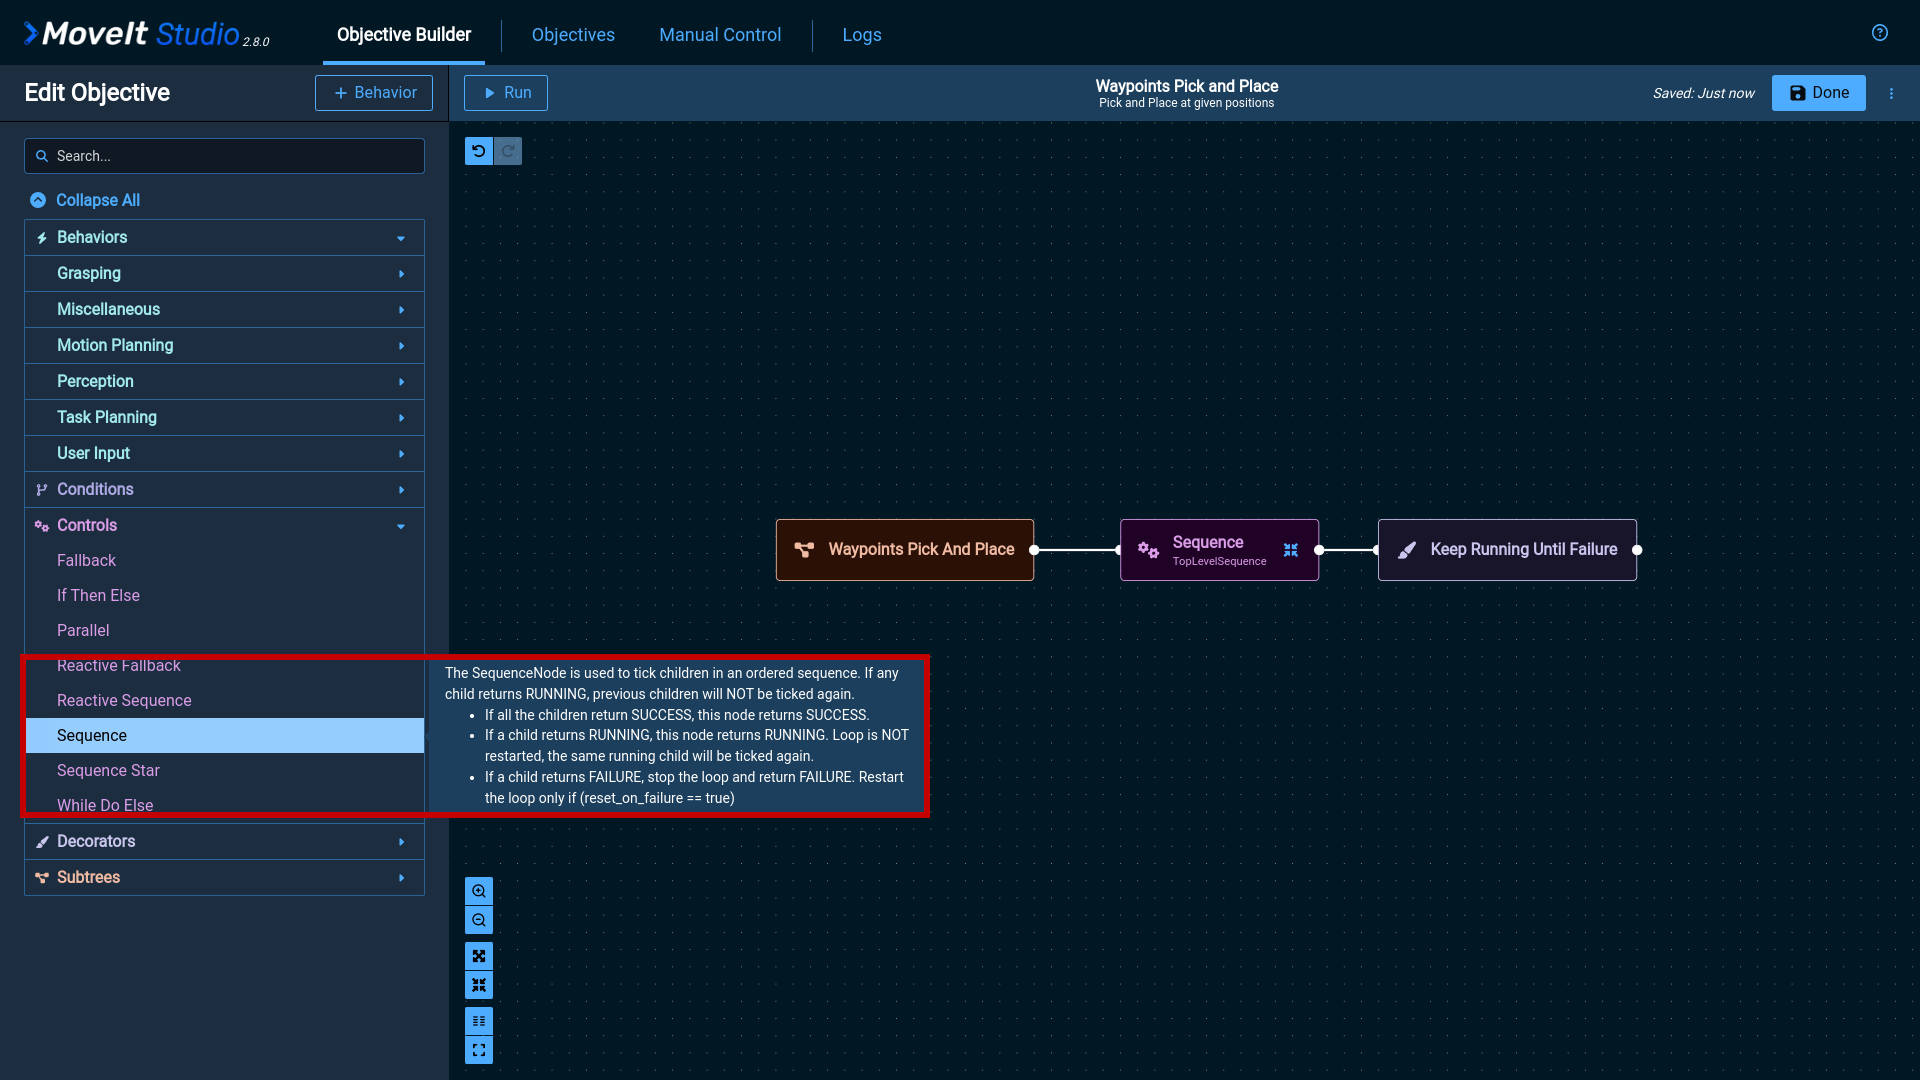
All of the following nodes will descend from the Sequence Behavior.
Add children to this node to encapsulate the desired Pick and Place motion.
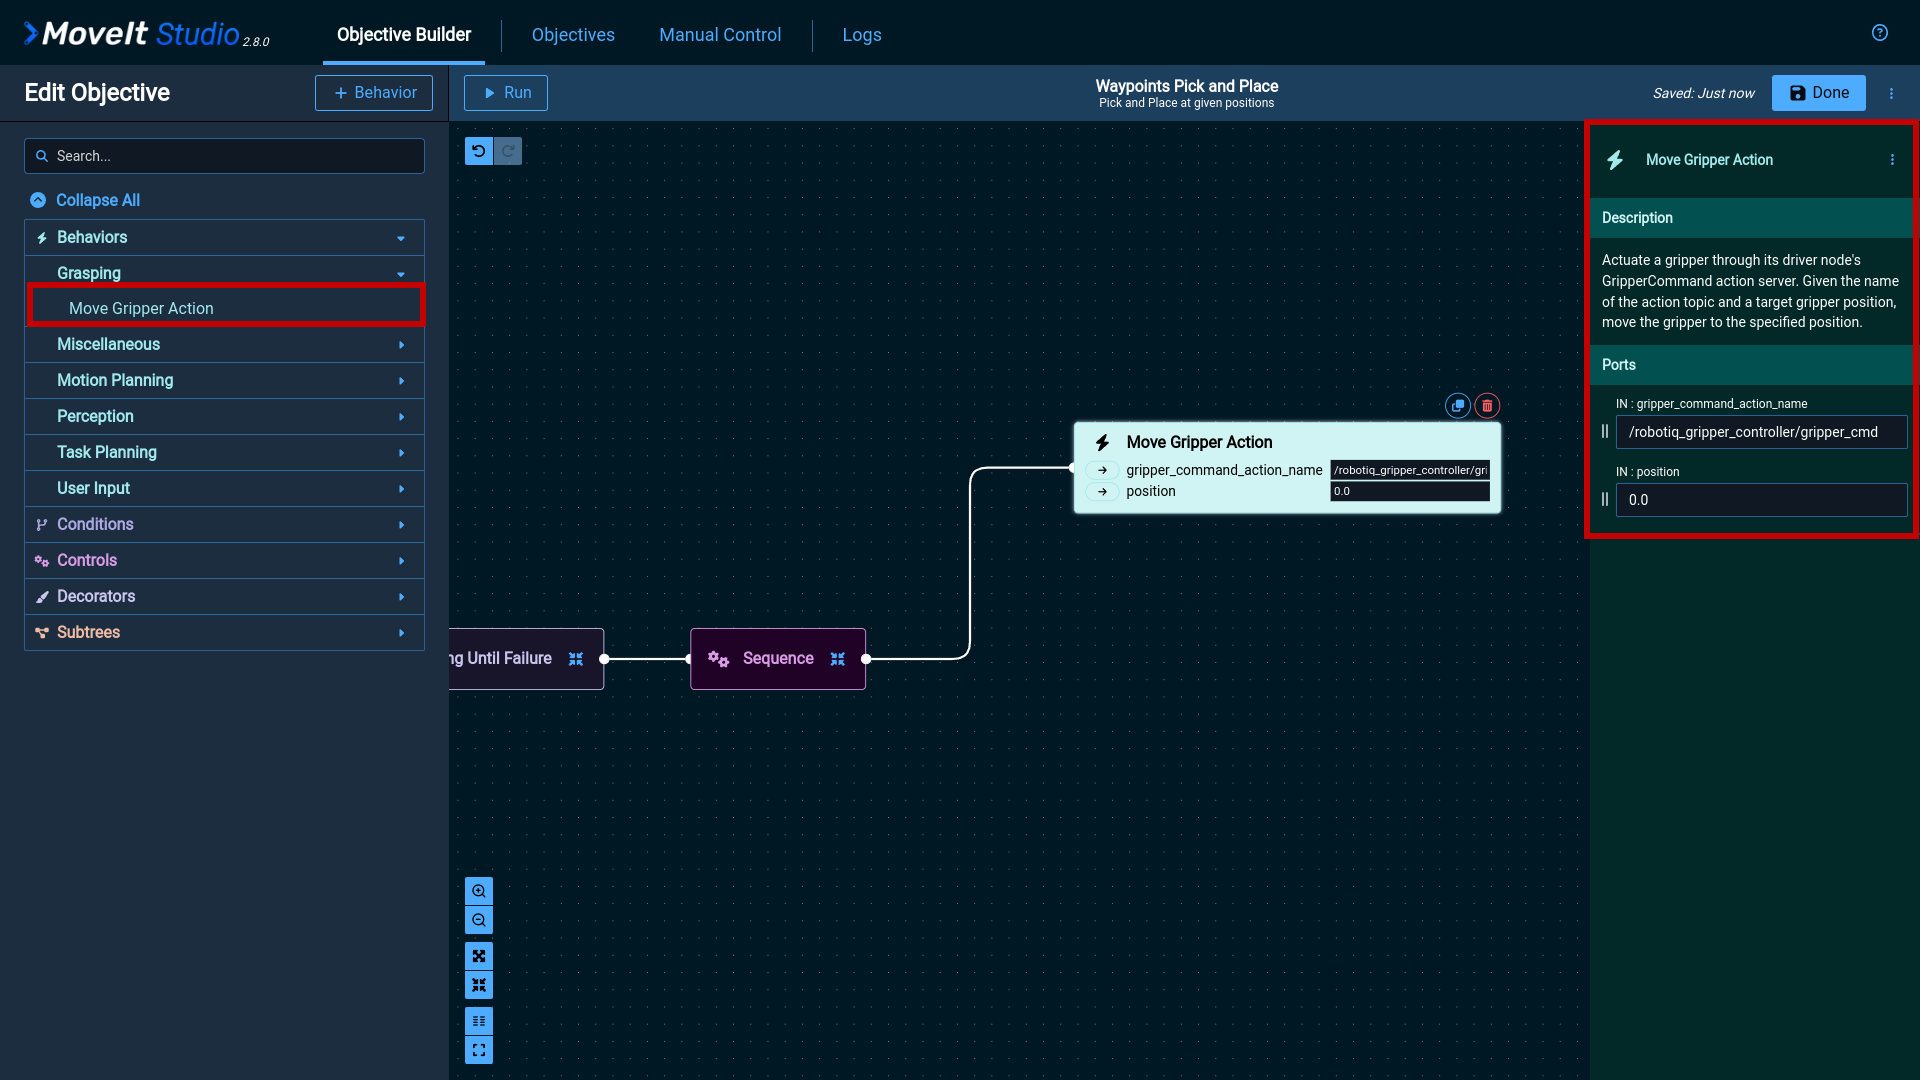
The first is a Behavior to open the gripper.
Add a Move Gripper Action node as the first child of the Sequence.
This node requires the following input parameters:
- gripper_command_action_namme: /robotiq_gripper_controller/gripper_cmd
- position: 0
Zero is the position for the open gripper.
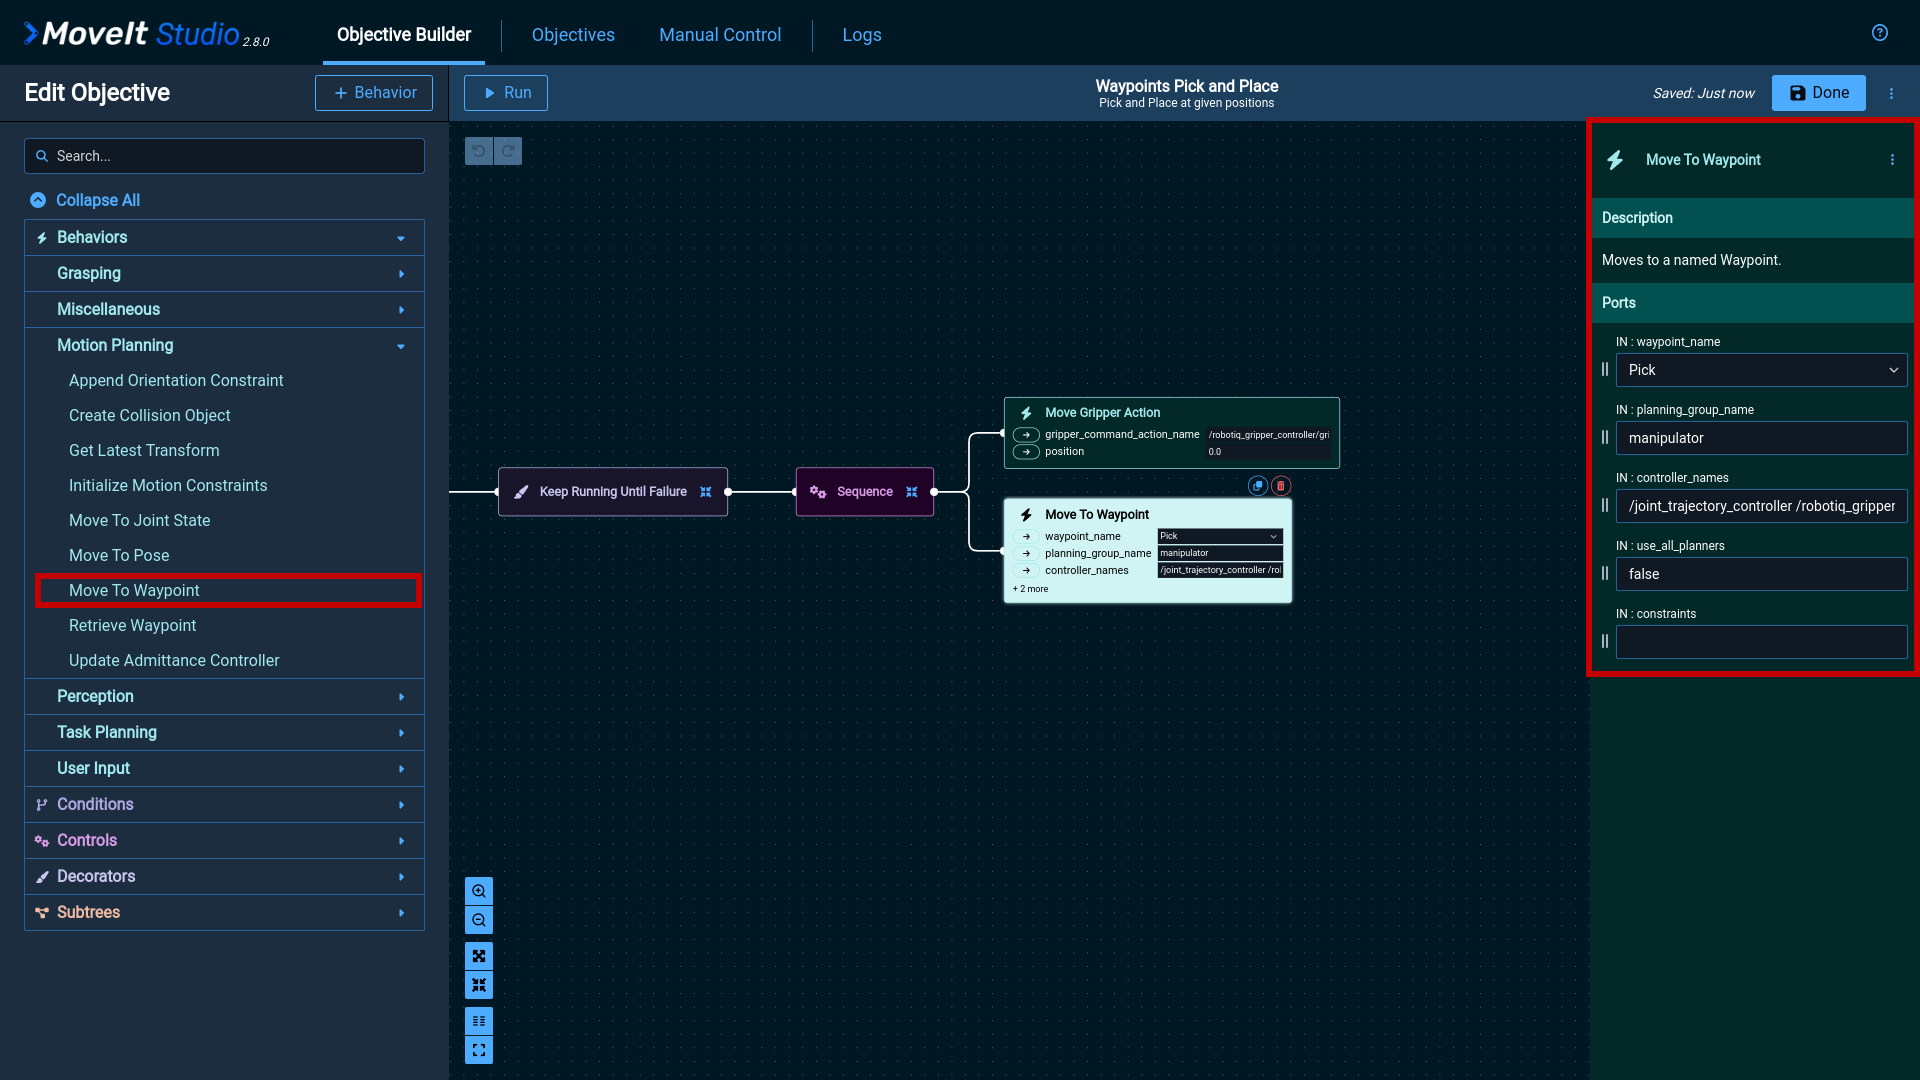
Then, add a Move to Waypoint node to move the robot to the “Pick” position.
This node requires the following input parameters:
- waypoint_name: Pick
- planning_group_name: manipulator
- controller_names: /joint_trajectory_controller /robotiq_gripper_controller
Optionally, it is possible to change the value use_all_planners of the port. If its value is true,
a portfolio of planners instead of a single one will be used to search for in parallel. Depending on the planning problem,
this can increase the likelihood of finding a high quality solution.
More information about the concept of parallel planning in MoveIt can be found in PickNik’s blog.
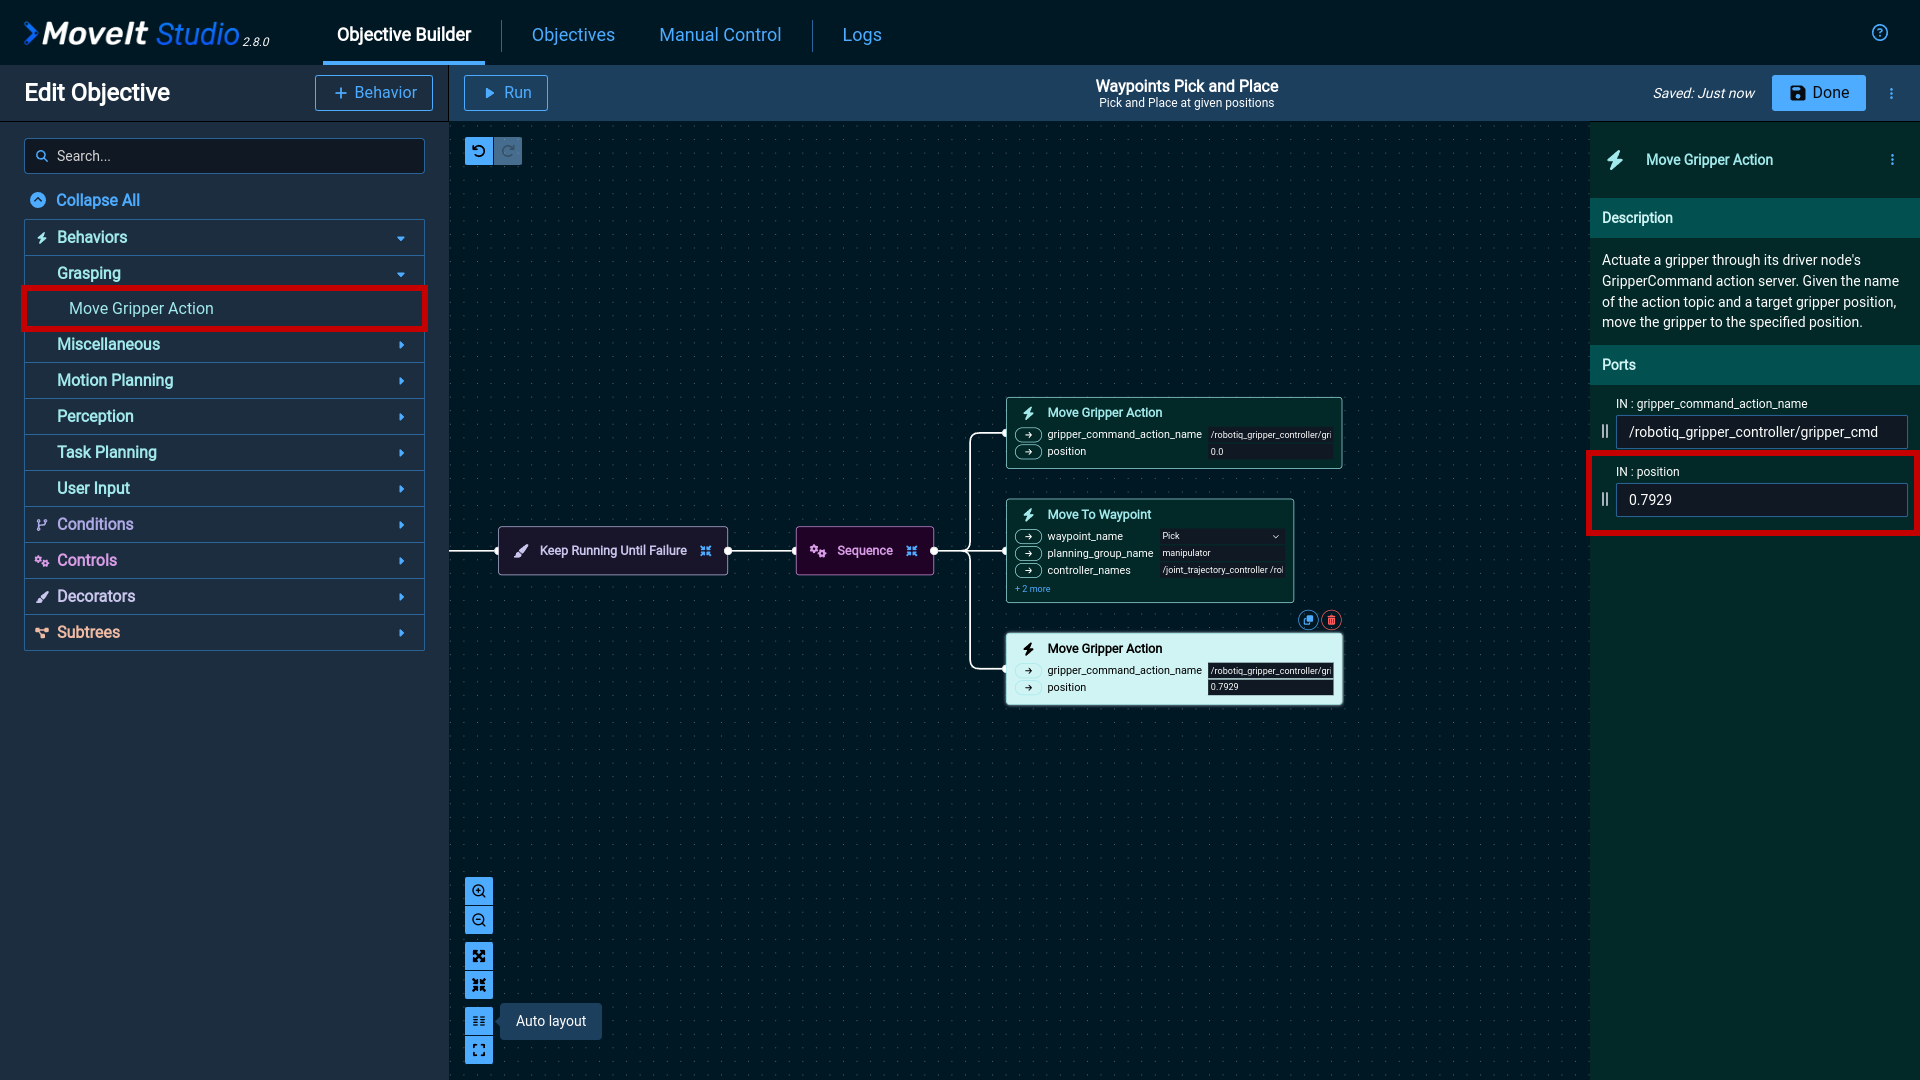
Again, add a Move Gripper Action to close the gripper.
The parameters are the same as the ones used in the previous node except for the position of the gripper:
- gripper_command_action_namme: /robotiq_gripper_controller/gripper_cmd
- position: 0.7929
0.7929 is the position for the closed gripper.
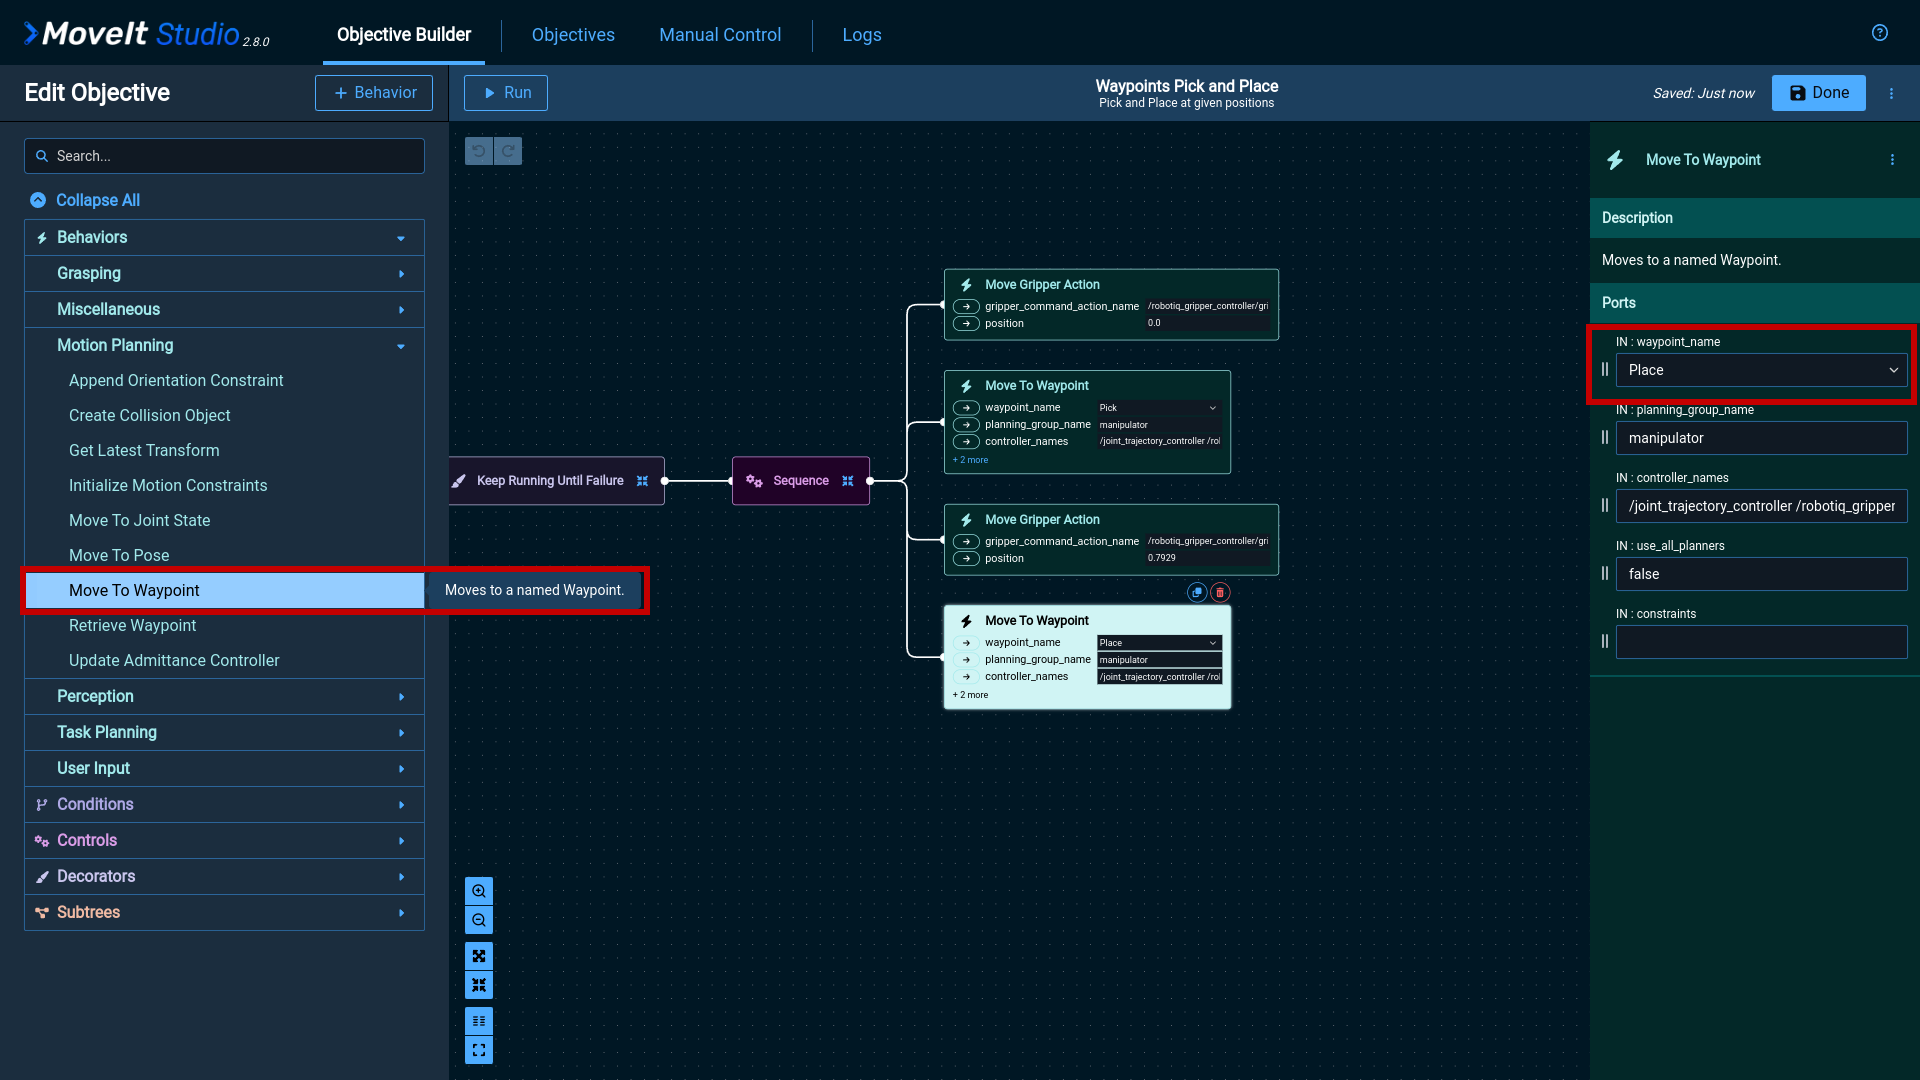
Finally, we add a Move to Waypoint node to move the robot to the “Place” position.
This node requires the following input parameters:
- waypoint_name: Place
- planning_group_name: manipulator
- controller_names: /joint_trajectory_controller /robotiq_gripper_controller
4. Run the New Objective
The last step is running the new Objective by clicking the “Run” button on the menu.
Your robot should now be running the Waypoints Pick and Place Objective. Great job!