Teleoperating the Robot
While running your robot, you may encounter situations where you need to manually move the robot because:
- You would like to move the arm to a specific configuration to save as a waypoint for future use (A waypoint is a named configuration of joint states)
- You would like to apply fine-grained motions to the joints or end effector
- The arm gets stuck and cannot retreat automatically
For cases like the ones listed above, MoveIt Pro offers several ways to teleoperate a robot.
The teleoperation modes can be accessed from the Teleoperate button on the top right corner in the web app.

The teleoperation panel can also be enabled by running the Teleoperation Objective.
Waypoint Control Mode
Waypoints provide a method of returning the robot to previously saved joint poses.
To access this control mode, select Waypoints tab after enabling the teleoperation panel.
This control mode will provide some quick waypoints to which the robot can move to.

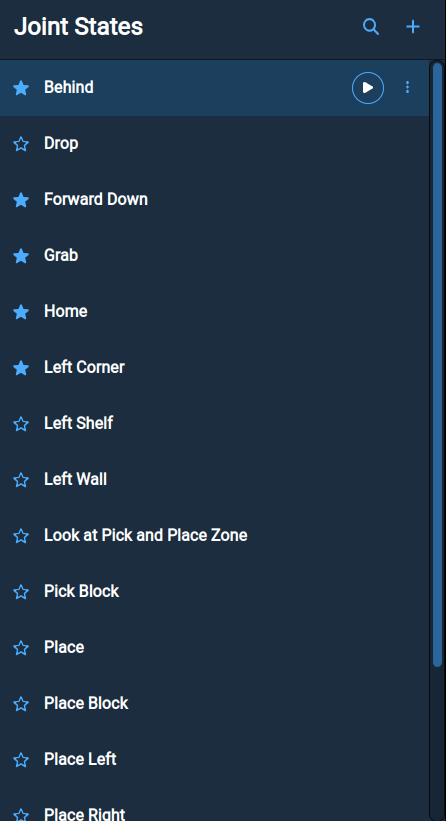
All the saved waypoints can be accessed by clicking the All Waypoints button which will open a collapsilble sidebar.
The Waypoints sidebar can:
- Mark a waypoint as favorite by using the star (favoriting a waypoint adds it to the Move to Pose hotbar).
- Move to a waypoint by using the play button.
- Add a waypoint by using the + button.
- Remove a waypoint by using the three dots next to the play button.
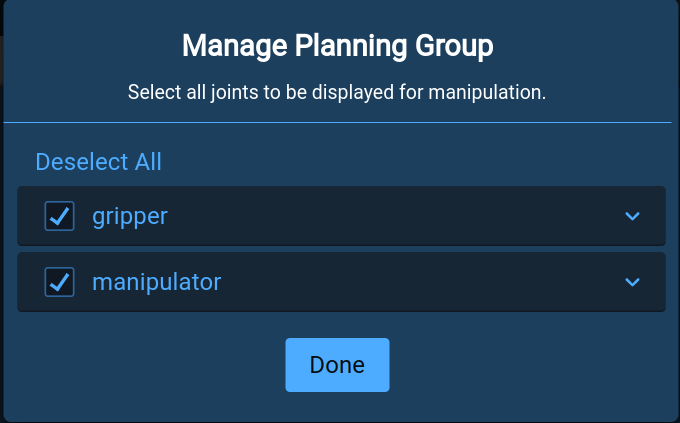
Note that waypoints can be saved for an individual planning group or a combination of planning groups.
This can be set by clicking the Select Joint Group button when adding a new waypoint.
The planning groups are defined in your robot’s SRDF file.
Interactive Marker Control Mode
The IMarker mode allows users to move the robot’s end effector using an interactive marker.

The marker can be used to move the end effector to a desired pose. This can be done by clicking and dragging the marker’s arrows and discs. Dragging an arrow will translate the marker along that direction while turning a disc will rotate the marker in that direction.
Before trajectory planning begins, a preview will show the inverse kinematics solver solution, if one exists.
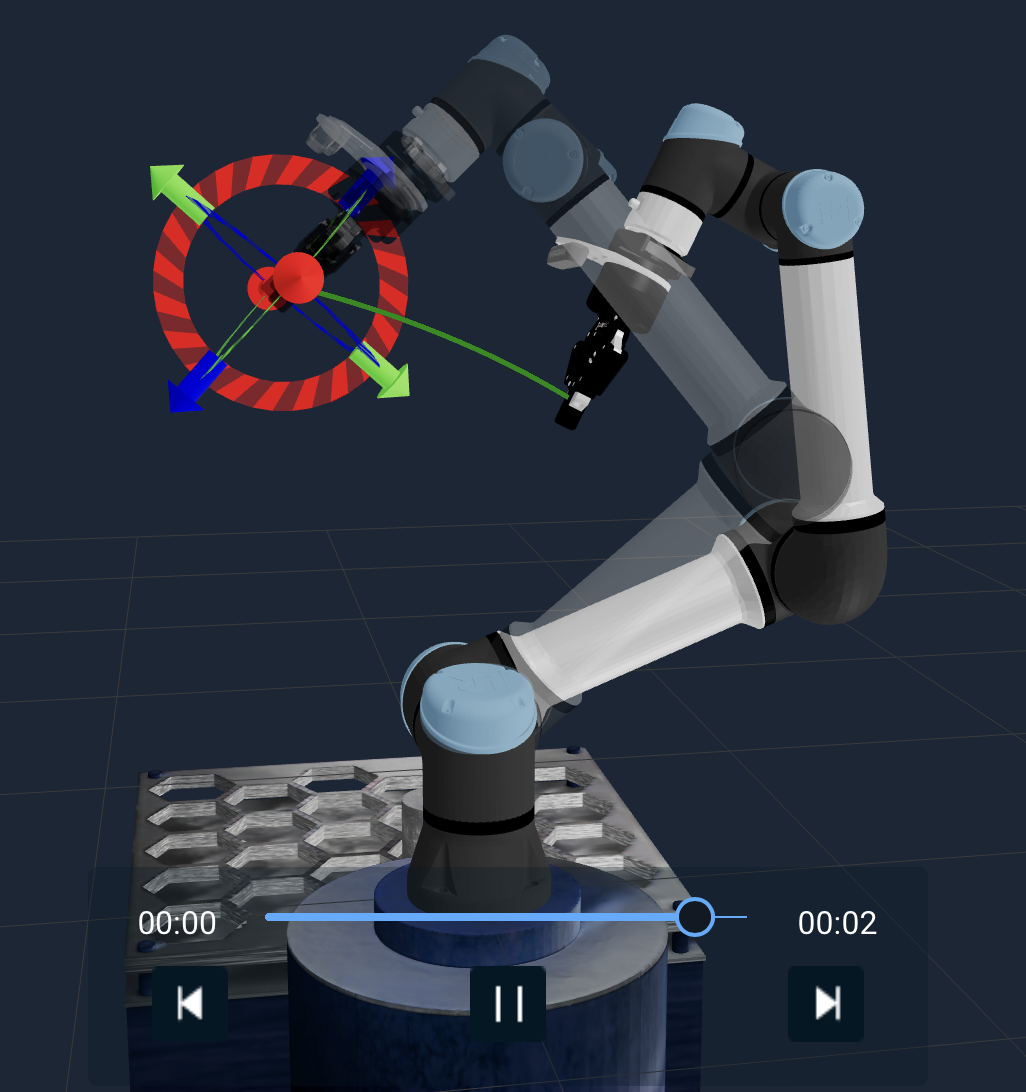
No preview means that there is no valid inverse kinematics solution for the desired pose.
Once the marker is in the desired pose, a motion will be planned that brings the end effector from the current pose to the markers pose. A preview of the trajectory will play, and if it is acceptable, the green check button can be pressed to start the motion.
If the marker is in an undesirable state, the “Reset Marker” button will bring the marker back to the end effector.
Cartesian Pose Jogging Control Mode
The Pose Jog control option enables the user to translate or rotate the end-effector along different planes or axes.
In the Visualization pane, there are a number of buttons around the edge.
For example, the arrow on the left will translate the end effector in the positive direction along its x axis and the arrow on the right will rotate the end effector in the positive direction on the x axis plane.

On the top right of the Visualization pane are some additional buttons which can be used to translate and rotate the end effector on the z axis and z axis plane.

Gripper Control
On the bottom left of the Visualization pane are buttons that can be used to open and close the gripper.

Joint Control
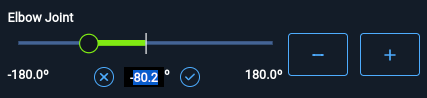
The Joints Jog mode can be used to move individual joints.
In the Visualization pane, there is an area that shows the current state and min/max limits of each joint, as well as +/- buttons to manipulate each joint. The joint states can be represented in degrees or radians and can also be copied to the clipboard.
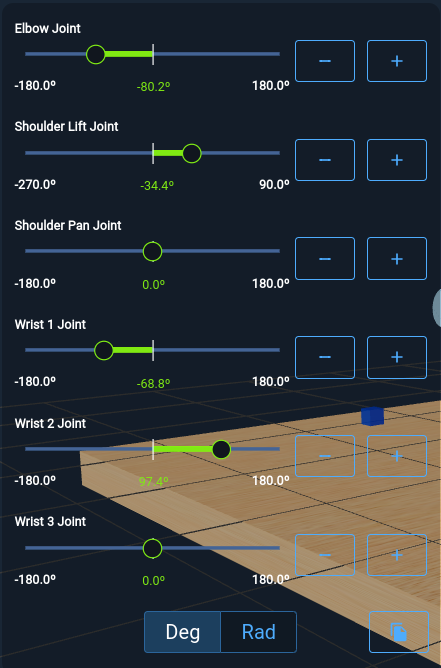
Joint Movement
There are a three ways to move a joint:
- Jogging using the +/- buttons. Clicking the + button will increase the joint state and clicking on the - button will decrease the joint state. When using the +/- buttons, a joint can be jogged up to the min or max limit of the joint or until a collision is detected.
- Trajectory movement by clicking and dragging the slider to move to the desired joint state.
- Trajectory movement by clicking the current joint state’s numerical value and entering the desired value.
Gripper Control
In the hotbar area above the Visualization pane, there are the “Open Gripper” and “Close Gripper” buttons.

note:: Teleoperating the gripper to joint values other than “Open” or “Close” is not currently supported.
Jog Collision Checking and Speed
The settings icon in the top right right will bring up some settings pertinent to jogging the robot while in the Pose Jog and Joints Jog mode.
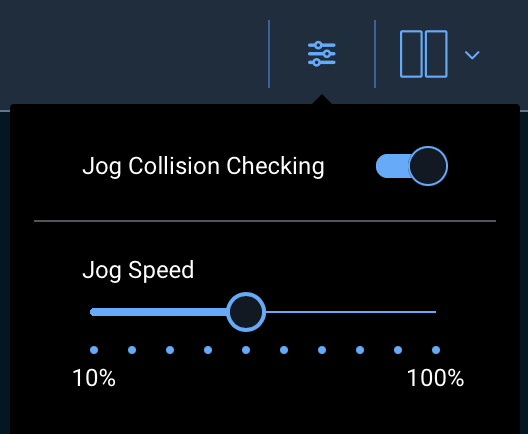
The Jog Collision Checking toggle informs the simulation if it should be checking for collisions between different solid entities.
There can be situations where the robot collides with an object during an Objective and is unable to be teleoperated because the beginning of the trajectory is in a collision. In that case, Jog Collision Checking can be turned off so that the robot can be teleoperated.
The Jog Speed slider adjusts the normalized speed at which the end effector/joints moves, meaning at 100% each joint is moving at its max speed, as dictated by the specified joint limits.
Note
The Jog Collision Checking and Jog Speed parameters are only used when jogging a joint via the +/- buttons in the Joints Jog view or when using the endpoint jog buttons around the Visualization pane in the Pose Jog view.
This is because those two methods use MoveIt Servo (and the respective servo parameters in the robot configuration package), whereas the other modes (such as the slider in Joints Jog view and Interactive Marker in IMarker view) use a regular motion planner.
Congratulations! You have successfully learned how to teleoperate the robot using MoveIt Pro!