Simulator Keyframes Setup
Introduction
A keyframe is a named state of your entire simulation world.
They are commonly used to record states of interest in your simulation, similarly to waypoints.
They differ from waypoints in that they may include uncontrolled elements of your simulation in addition to your robot.
This means they can be used to put your robot in different environmental situations simply by choosing a different keyframe.
A keyframe contains the position, velocity, and control inputs of all mobile joints in some desired configuration of your simulation world.
The positions of joints are stored in qpos, the velocities in qvel, and the control inputs in ctrl.
See here for more information on keyframes.
If you are following this guide with example_robot_ws, your workspace should look like branch step10.
scene.xml
To add a keyframe to your simulation, you add it to your robot's scene.xml.
A good example of this in action can be seen in the MoveIt Pro example workspace here.
Resetting to Keyframes
There are two ways to reset the simulation to a Keyframe in your scene.xml:
- Manually reset the Key in the MuJoCo Interactive Viewer, or
- Use the
ResetMujocoKeyframeBehavior.
To manually reset the Key in the MuJoCo Interactive Viewer:
- Enable the MuJoCo Interactive Viewer.
- In the "Simulation" tab, load keyframes by Key number by clicking on Key 0 and dragging to the right or left. The Key number corresponds to the order of the keyframes in the
scene.xml.
To use the ResetMujocoKeyframe Behavior, follow the steps described in Tutorial 3.
Example
For an example, we will again turn to the MoveIt Pro example workspace, its scene.xml file in particular.
We see that it has a view_tag keyframe and a default keyframe.
Looking at the config.yaml file, we see that the default keyframe being used is this view_tag keyframe.
This keyframe starts with a good view of the tag and a small angular velocity, perfect for testing visual servoing applications.
What if we want to see how far our vision system can operate at?
Let's add a new keyframe, called far_keyframe.
Since we don't know how far our system will operate at, let's give the satellite a small velocity toward ours.
Then, we can test the operational range of our system by waiting until it moves to a functional point.
To do this, all we have to do is modify the position of the client satellite to be far in front of the ego satellite and give it a small velocity in the opposite direction (toward the ego satellite).
In our scene.xml file, let's add the following
    <key
      name="far_keyframe"
      qpos="
        30 0.5 1.7 1 0 0 0
        0 0 0 0 0 0
        -1.5708 1.8326 0 -2.3562 0 0.2618 1.5708 0
        0 0 0 0 0 0 0"
      qvel="
        -1 0 0 0 0 0
        0 0 0 0 0 0
        0 0 0 0 0 0 0 0
        0 0 0 0 0 0 0"
      ctrl="
        -1.5708 1.8326 0 -2.3562 0 0.2618 1.5708 0
        0 0 0 0 0 0"
    />
This removes the angular velocity (components 3-6 of the first line of qvel) and puts the client satellite 30 meters away, moving toward the ego satellite at 1 m/s.
However, this does not complete the task.
Now, in our config.yaml file, let's change our mujoco_keyframe to "far_keyframe".
With these steps completed, let's see the results.
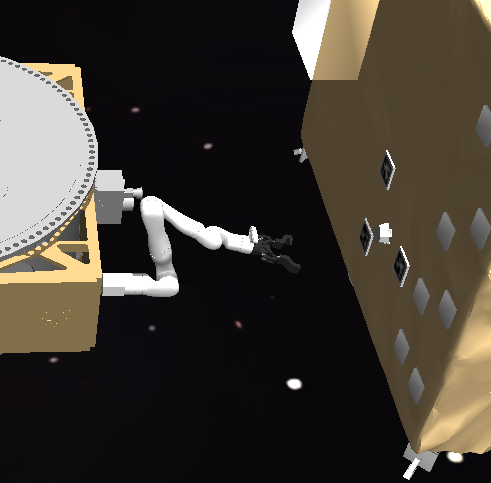
Before our change, the client satellite is close and rotating:
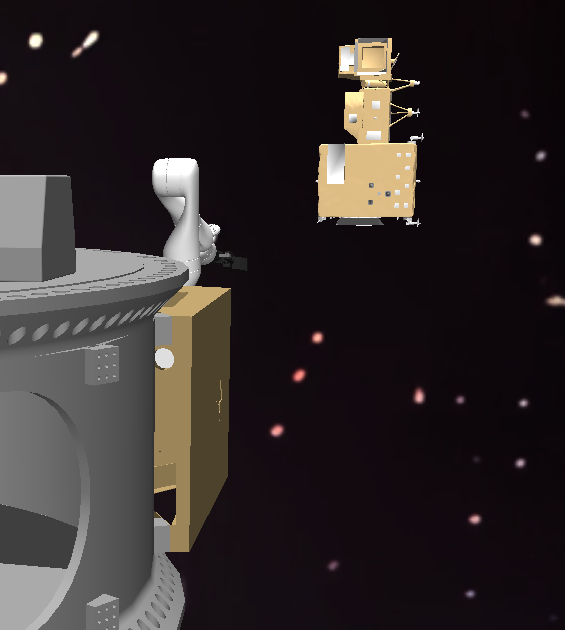
After our change, the client satellite is far away and moving toward the ego satellite:
The above example illustrates a common use case of keyframes. Adding many keyframes representative of common states is a good way to save time and be able to quickly integration test Behaviors on a variety of different states.
MujoCo Keyframes
You can start the simulation with a specific keyframe (including initial joint values) as specified in the MJCF file:
- Capture the keyframe
qposentry by launching with the MuJoCo interactive viewer, expanding theSimulationleft sidebar, and clickingCopy pose. - Paste the keyframe output to your MJCF file. Optionally add a name if you paste in multiple keyframes.
Name all your keyframes so they are accessible by the ResetMujocoKeyframe Behavior.
Name your first keframe 'defaut' to work with the Reset MuJoCo Sim Objective.
  <keyframe>
    <key
      name='default'
      qpos='0 0 0 0 0 0'
    />
    <key
      name='ones'
      qpos='1 1 1 1 1 1'
    />
  </keyframe>
  ...
</mujoco>
Some configurations may also require recording the ctrl values, but this is rare.
3. If keyframes are specified in the MJCF, the simulation will default to the first keyframe.
4. You can launch a specific, named keyframe by referencing it in the xacro defining your robot's <ros2_control>/<hardware> tag:
  <ros2_control>
    <hardware>
      <plugin>picknik_mujoco_ros/MujocoSystem</plugin>
      ...
      <param name="mujoco_keyframe">ones</param>
    </hardware>
  </ros2_control>
Alternatively, using the interactive viewer, you can load a specific keyframe by expanding the Simulation left sidebar, dragging the Key value to the index of the keyframe you want to load, and clicking Load Key.
For complex scenes with many objects, the keyframe can be quite large.
The starting joint values of the robot will be the last X items in the keyframe qpos, where X is the ordered list of joints in the interactive viewer's Joint right sidebar.
You can use this knowledge to quickly iterate additional keyframes from an initial keyframe.
Your example_robot_ws workspace should now look like branch step11, which is currently identical to step10.