Refactor your URDF Using Xacro
This is the start of a series of self-guided articles demonstrating how to go from a URDF to MoveIt Pro configurations for mock simulation, MuJoCo simulation, and physical hardware. We will walk through these guides using a reference robot arm and gripper URDF to provide a concrete example, but the steps are the same for your custom robot. At the end of each article is a new "checkpoint" of what the repository for our "example robot" looks like.
What is Xacro?
XML Macros (Xacro) is an XML macro language used to compose xml content such as URDF.
The URDF xml format does many things:
- Describes the collision geometry of the robot.
- Describes kinematic limits of your robot's actuators.
- Can be augmented by frameworks such as ros2_control to include information describing the method in which an actuator is commanded (position / velocity / torque / etc).
- Can be augmented by frameworks such as moveit2 to include information about which sets of joints are commonly used together to solve a particular motion planning problem.
However, having your entire robot in a single URDF file prevents you from doing other useful things:
- Swapping out end effectors without copy pasting a lot of text.
- Switching between using hardware drivers or a particular simulator without copy pasting a lot of text.
- Stitching together various commercial hardware.
XML Macros (Xacro) allow you to compose your robot model with the above context. We highly recommend leveraging vendor's Xacro files or wrapping your custom robot's URDF with Xacro
Xacro Capabilities
Below we will outline the most common Xacro commands you will encounter. For comprehensive documentation, refer to the Xacro GitHub wiki.
xacro:macro
-
Defines a reusable XML macro (like a function).
-
Can accept arguments and expand into XML blocks.
-
Example:
<xacro:macro name="wheel" params="prefix">
  <link name="${prefix}_wheel"/>
  <joint name="${prefix}_joint" type="continuous"/>
</xacro:macro> -
Usage:
<xacro:wheel prefix="left"/>
<xacro:wheel prefix="right"/>
xacro:include
-
Includes another Xacro/URDF file.
-
Helps modularize robot descriptions.
-
Example:
<xacro:include filename="$(find my_robot_description)/urdf/wheel.xacro"/>
xacro:property
-
Use
xacro:propertyfor constants and values that are defined within the Xacro file itself and are accessible globally. -
Macro names, property names, and substitution args all have their own namespace.
-
Example:
<xacro:property name="wheel_diameter" value="0.1518"/> -
Retrieve the value via
${wheel_diameter}
xacro:arg
-
Use
xacro:argto import ROS launch substitution args (<arg>in launch files). -
Macro names, property names, and substitution args all have their own namespace.
-
Example:
<!-- Provide a default arg value in case the launch file does not define it -->
<xacro:arg name="use_sim_time" default="false"/> -
Retrieve the value via
$(arg use_sim_time)
xacro:if
-
Conditional inclusion of XML content.
-
Example:
<xacro:if value="$(arg use_sim_time)">
  <rosparam param="use_sim_time">true</rosparam>
</xacro:if>
xacro:unless
-
Inverse of
xacro:if. -
Example:
<xacro:unless value="$(arg use_sim_time)">
  <rosparam param="use_sim_time">false</rosparam>
</xacro:unless>
xacro:insert_block
-
Lets you define a named block of XML and reuse it.
-
Example:
<xacro:macro name="wheel_block">
  <link name="wheel_link"/>
</xacro:macro>

<xacro:insert_block name="wheel_block"/>
Math & Expressions
-
Xacro supports inline math and string substitution with
${...}. -
Example:
<cylinder radius="${wheel_diameter/2}" length="${wheel_thickness}"/>
Xacro Debugging
Check out the ROS 2 Docs for an example of using Xacro to clean up your code.
We have additional tips and tools for Xacro debugging here.
Xacro File Naming Conventions
We use the following xacro naming conventions to improve readability and reusability of the files:
*.urdf.xacro: This is a "top level" Xacro file your launch file will use to generate the full robot description (as a URDF). As Xacro is simply an XML language that generates XML files, we prepend.urdfto indicate the generated XML file follows the URDF schema. You should only have a single*.urdf.xacroper complete URDF.*_urdf_macro.xacro: This file only containsxacro:macrodefinitions that can be invoked to generate URDF schema XML for use in*.urdf.xacroor other*_urdf_macro.xacrofiles. Simply including this file should not result in any generated XML.*_ros2_control_macro.xacro: Similarly, this file only containsxacro:macrodefinitions that can be invoked to generate ros2_control schema XML for a URDF. Including this file should also not result in any generated XML.
Xacro Composition Best Practices
Below are examples show how to reuse the provided descriptions files.
The tree structure reflects the xacro:include hierarchy of xacro files.
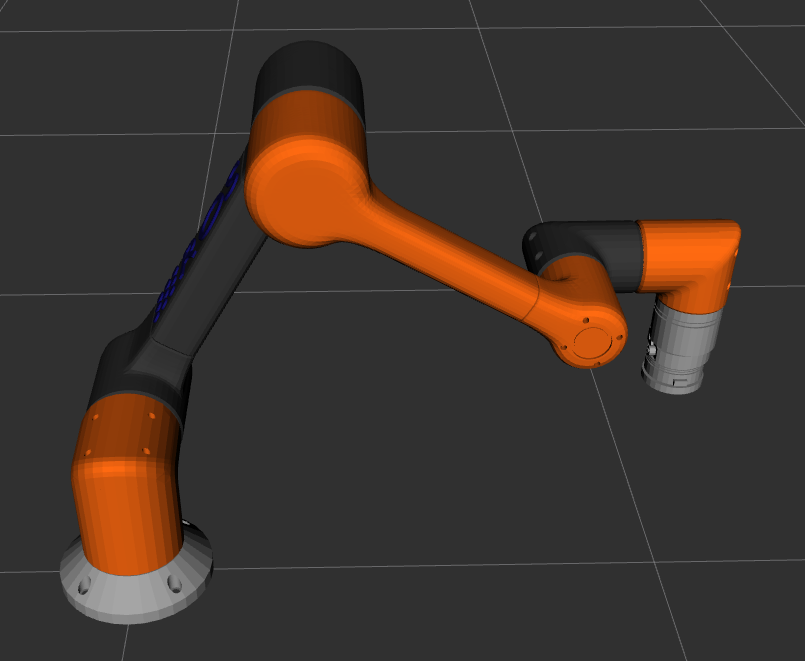
We will be using the packages example_arm_description and example_arm_driver to walk through an example of Xacro best practices for a 6 DOF arm (based on the ros2_control r6bot).
cd ~
git clone git@github.com:PickNikRobotics/example_robot_ws.git -b step1
cd example_robot_ws
git submodule update --init --recursive
src/external_dependencies/example_arm_description contents:
├── colcon-defaults.yaml
├── example_arm_description
│   ├── CMakeLists.txt
│   ├── launch
│   │   ├── view_robot.launch.py # Robot viewer launch file written in Python
│   │   ├── view_robot.launch.xml # Robot viewer launch file written in XML
│   │   └── view_robot.rviz
│   ├── meshes
│   │   ├── collision
│   │   │   ├── link_0.stl
│   │   │   ├── link_1.stl
│   │   │   ├── link_2.stl
│   │   │   ├── link_3.stl
│   │   │   ├── link_4.stl
│   │   │   ├── link_5.stl
│   │   │   └── link_6.stl
│   │   └── visual
│   │       ├── link_0.dae
│   │       ├── link_1.dae
│   │       ├── link_2.dae
│   │       ├── link_3.dae
│   │       ├── link_4.dae
│   │       ├── link_5.dae
│   │       └── link_6.dae
│   ├── package.xml
│   ├── README.md
│   └── urdf
│       ├── r6bot_urdf_macro.xacro # Xacro-only file that generates a r6 arm
│       └── r6bot.urdf.xacro # "Top level" xacro file for visualizing a r6 arm
├── LICENSE
└── README.md
The r6bot_urdf_macro.xacro file is a very simple Xacro-ification of a URDF, similar to what you might do with a custom robot.
Many commercial arm vendors that provide variations of an arm in different form factors will further extract common URDF XML elements to a Xacro to reduce duplication, such as patterns for generating links and joints given link lengths and joint limits.
For URDF visualization
Our package://example_arm_description/urdf/r6bot.urdf.xacro simply calls our r6 macro and attaches it to a world link.
The Xacro hierarchy is simple here:
- package://example_arm_description/urdf/r6bot.urdf.xacro
  - package://example_arm_description/urdf/r6bot_urdf_macro.xacro
We can call it from a launch file and view the r6 arm and publish joint states using slider bars.
Launching this requires a ROS 2 installation on your computer as we have not yet set this robot up in a MoveIt Pro container.
ros2 launch example_arm_description view_robot.launch.xml
For mock hardware
To move the robot, we will add very basic joint commands through ros2_control "mock" hardware.
Mock hardware is simple to set up as there is no physics simulation - when you command a mock actuator to move to a position, it moves there in one tick.
Many robot arm driver repositories include a configuration for mock hardware.
src/external_dependencies/example_arm_driver contents:
├── CMakeLists.txt
├── config
│   └── ros2_controllers.yaml
├── empty_hardware_interface_plugin.xml
├── launch
│   ├── view_robot.launch.py
│   └── view_robot.launch.xml
├── package.xml
├── README.md
└── urdf
    ├── r6bot_mock_ros2_control_macro.xacro # Xacro-only file that generates ros2_control tags for r6 arm mock hardware
    └── r6bot.urdf.xacro # "Top level" xacro file for commanding a r6 arm via mock hardware

├── colcon-defaults.yaml
├── example_arm_hardware_interface
│   ├── CMakeLists.txt
│   ├── config
│   │   └── ros2_controllers.yaml
│   ├── empty_hardware_interface_plugin.xml
│   ├── launch
│   │   ├── view_robot.launch.py
│   │   └── view_robot.launch.xml
│   ├── package.xml
│   ├── README.md
│   └── urdf
│       ├── r6bot_mock_ros2_control_macro.xacro # Xacro-only file that generates ros2_control tags for r6 arm mock hardware
│       └── r6bot.urdf.xacro # "Top level" xacro file for commanding a r6 arm via mock hardware
├── LICENSE
└── README.md
Our package://example_arm_hardware_interface/urdf/r6bot.urdf.xacro is very similar to package://example_arm_description/urdf/r6bot.urdf.xacro except it takes a ROS substitution argument hardware_interface to decide whether to add ros2_control tags to our URDF for mock hardware.
When hardware_interface is set to mock (the default value), the r6bot_mock_ros2_control_macro.xacro file is added, enabling us to send commands to move the arm.
The Xacro hierarchy is still simple:
- package://example_arm_hardware_interface/urdf/r6bot.urdf.xacro
  - package://example_arm_description/urdf/r6bot_urdf_macro.xacro
  - package://example_arm_hardware_interface/urdf/r6bot_mock_ros2_control_macro.xacro
Using this launch file, you can view the r6 arm.
ros2 launch example_arm_hardware_interface view_robot.launch.xml
With the launch file complete, we can command the mock hardware via a pre-configured controller. We will go into more detail about this configuration later in the ROS 2 Control Configuration guide.
ros2 topic pub /joint_trajectory_controller/joint_trajectory trajectory_msgs/msg/JointTrajectory "header:
  stamp:
    sec: 0
    nanosec: 0
  frame_id: ''
joint_names: ['joint_1','joint_2','joint_3','joint_4','joint_5','joint_6']
points: [ {"positions":[0.2, 0, 0, 0, 0, 0]} ]"
We do not recommend including driver code for your robot arm in your example_arm_description repository.
Instead, put it in a separate example_arm_driver repository.
Otherwise, workflows that only require the URDF files will waste time and space downloading the driver and its dependencies.
Even this best practice has its limitations - for our "mock" simulation workflow that we might run in CI we would still have to checkout the entire example_arm_driver repository with the driver and its dependencies to simply get access to the r6bot_mock_ros2_control_macro.xacro.
For description files and software available on the ROS build farm this is less of a concern as you can install the specific packages required in the workflow instead of cloning and building the repository.
For physical hardware
Most commonly, to switch ros2_control between talking to mock hardware, a simulator, and physical hardware, the hardware_interface value is used to load and call a particular ros2_control Xacro macro.
So instead of r6bot_mock_ros2_control_macro.xacro we would use r6bot_hw_ros2_control_macro.xacro:
- package://example_arm_hardware_interface/urdf/r6bot.urdf.xacro
  - package://example_arm_description/urdf/r6bot_urdf_macro.xacro
  - package://example_arm_hardware_interface/urdf/r6bot_hw_ros2_control_macro.xacro # This is the only change
For your custom simulation
This file structure enables simple reuse of URDF macros with custom ros2_control tags in the case you leverage other simulators.
In this case, your top-level xacro would expose additional xacro arguments to select the additional simulator and use the corresponding ros2_control xacro:macro definition file.
For your custom workcell with a gripper
Finally, as you incorporate additional URDF and ros2_control definitions to your robot, we recommend a file structure similar to the below. We will see a working example in the next guide.
For your custom simulator (hardware_interface:=CUSTOM_SIM):
- package://MY_WORKCELL/urdf/MY_ROBOT_GEN1.urdf.xacro # R6 arm with a gripper attached to world link
  - package://example_arm_description/urdf/r6bot_urdf_macro.xacro
  - package://MY_WORKCELL/urdf/r6bot_CUSTOM_SIM_ros2_control_macro.xacro
  - package://GRIPPER_VENDOR_DESCRIPTION/urdf/GRIPPER_urdf_macro.xacro
  - package://MY_WORKCELL/urdf/GRIPPER_CUSTOM_SIM_ros2_control_macro.xacro
Here we put all of our ros2_control Xacro macro files in the MY_WORKCELL package to avoid checking out the hardware driver and its dependencies.
For physical hardware (hardware_interface:=physical):
- package://MY_WORKCELL/urdf/MY_ROBOT_GEN1.urdf.xacro # R6 arm with a gripper attached to our workcell's table
  - package://example_arm_description/urdf/r6bot_urdf_macro.xacro
  - package://example_arm_driver/urdf/r6bot_hw_ros2_control_macro.xacro
  - package://GRIPPER_VENDOR_DESCRIPTION/urdf/GRIPPER_urdf_macro.xacro
  - package://GRIPPER_VENDOR_DRIVER/urdf/GRIPPER_hw_ros2_control_macro.xacro
Throughout these guides, we will be incrementally modifying our checkout of PickNikRobotics/example_robot_ws we used in this tutorial to visualize a robot.
As you (or your AI Assistant) work through each step of the guide, there is a corresponding "checkpoint" branch in the repository.
This enables you to git diff origin/step1 to compare your local changes to the guide's version or git diff origin/step1 origin/step2 to see the changes between two checkpoints.
Your example_robot_ws workspace should now look like branch step1.