Using Custom Behaviors in Objectives
Making the Hello World Objective
Tutorial Level: Intermediate
This tutorial will show you how to make an Objective in MoveIt Pro using the web app. This Objective will run the “Hello World” Behavior we created in the previous tutorial.
Note
The Making a Hello World Behavior tutorial is a prerequisite for this tutorial.
If you are creating an Objective that requires a new Behavior, refer to the above tutorial first for instructions about creating a custom Behavior.
1. Launch MoveIt Pro
Launch MoveIt Pro and navigate to the web app.
./moveit_pro run
You should see something that looks like this:
2. Create a New Empty Objective
By default, the Objective Builder section will be active in the web app. On the left side, next to Objectives, click the Create New button:
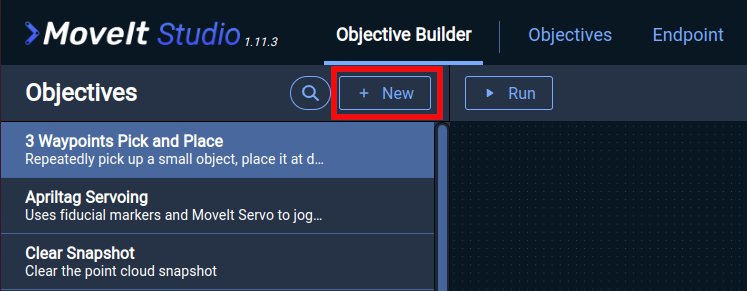
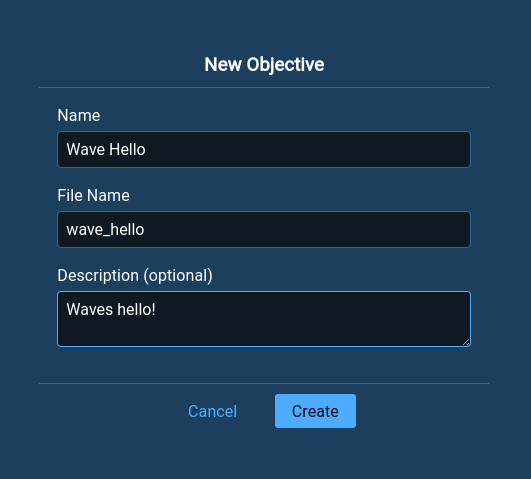
Enter descriptive information about your new Objective:
- Name: A name for your new Objective. For this tutorial, enter
Say Hello. - File Name: The name of the file which will contain the Objective. Typing in the Name field will fill in a file name by default, but you can modify it if desired.
- Description: An optional description that describes what the Objective does.
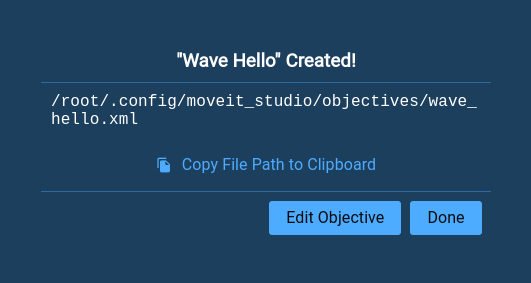
Click the Done button. You will see a success dialog that looks like this:

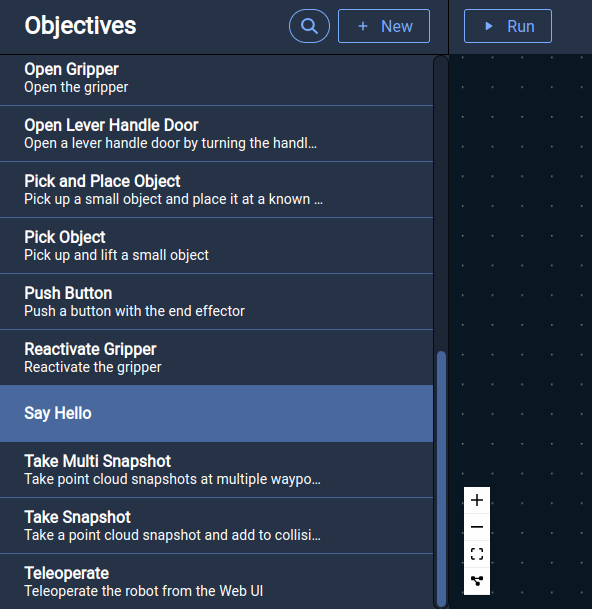
The newly created Objective now appears in the Objectives flyover:
Now you have a new Objective created and saved in MoveIt Pro!
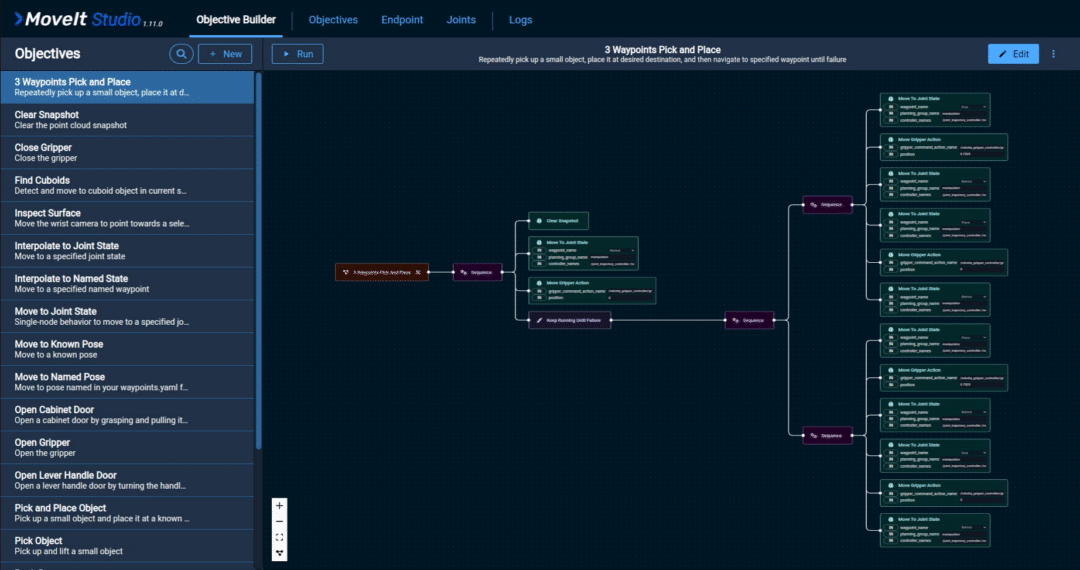
3. Add the “Hello World” Behavior to the Objective
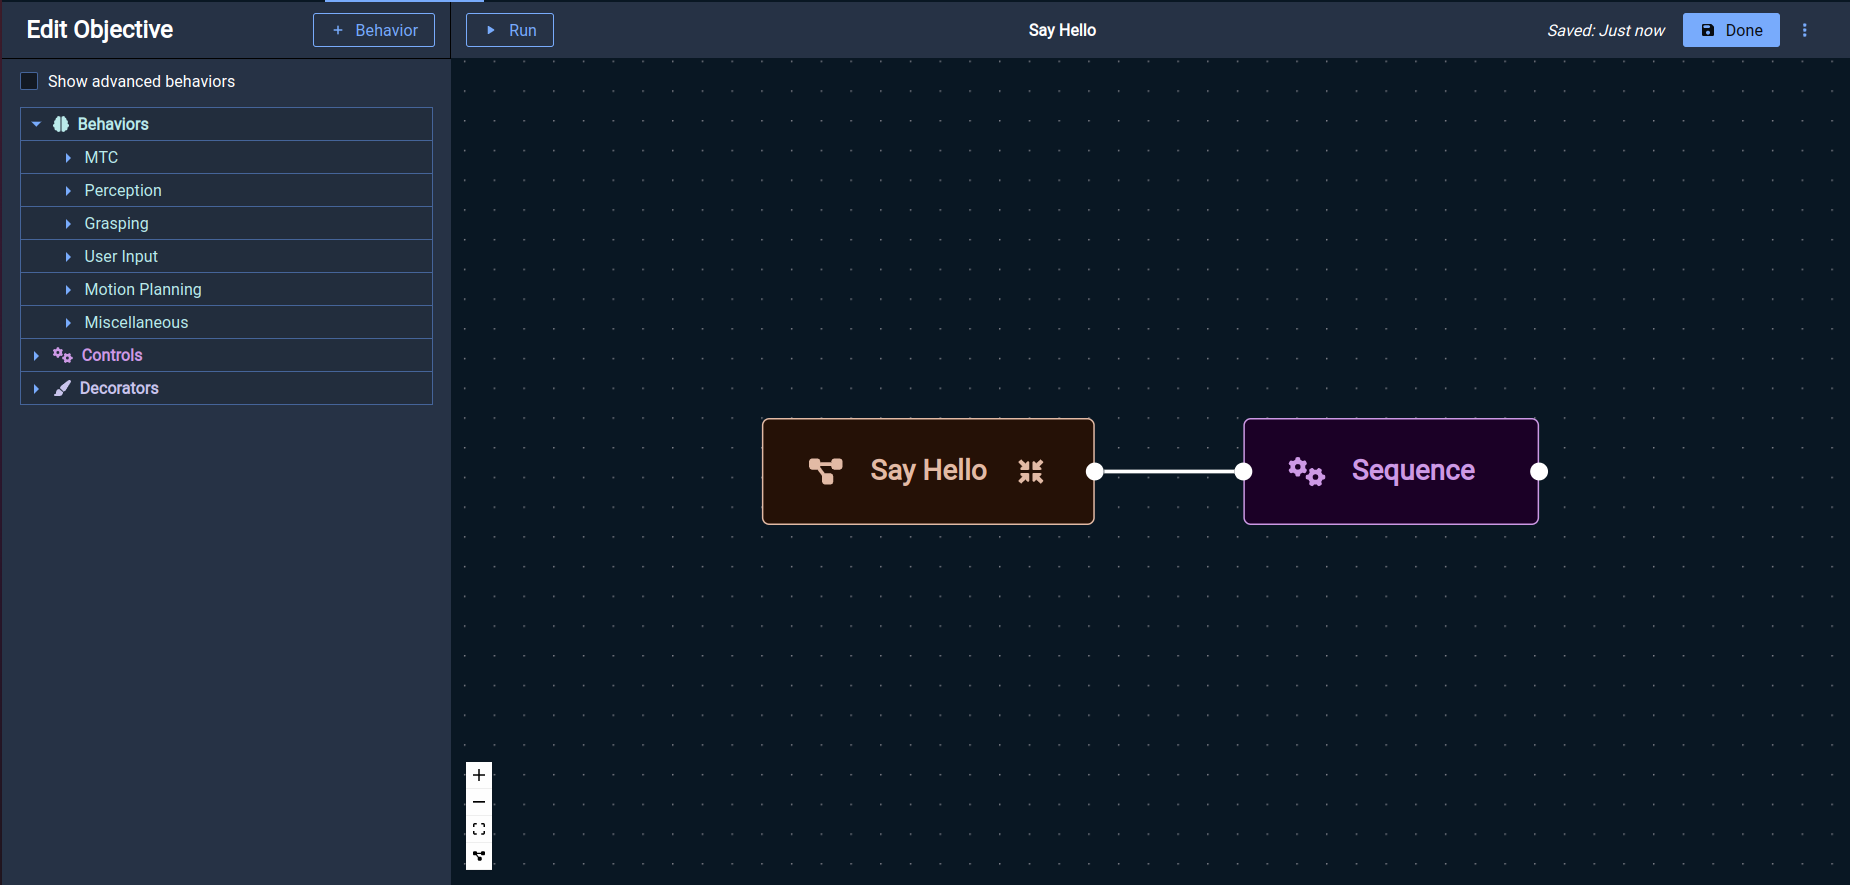
In the Objective Builder tab, select your Objective in the Objectives list. Then, click the Edit button on the upper right to modify the Behavior tree. Once in Objective editing mode, you should see a screen that looks like this:
While in editing mode, you can find your Behavior in the list of Behaviors on the left side of the screen:
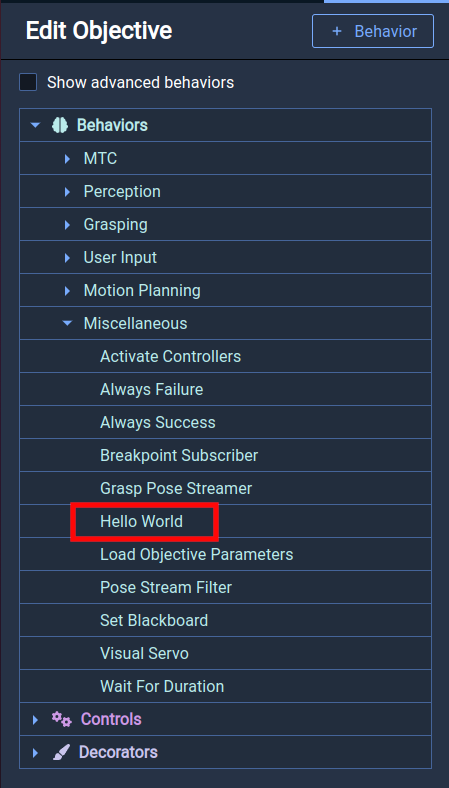
If you do not see your Behavior listed here, revisit the steps of the Making a Hello World Behavior tutorial and ensure that you included your Behavior in the tree so that it is visible.
Add your new Behavior into the workspace by clicking and dragging the Behavior from the list on the left side into the workspace. You can connect the Behavior to the Sequence node in the tree either by dragging it near the node, or by clicking the port on the right side of the Sequence node and dragging the line to the port on the left of your Behavior.
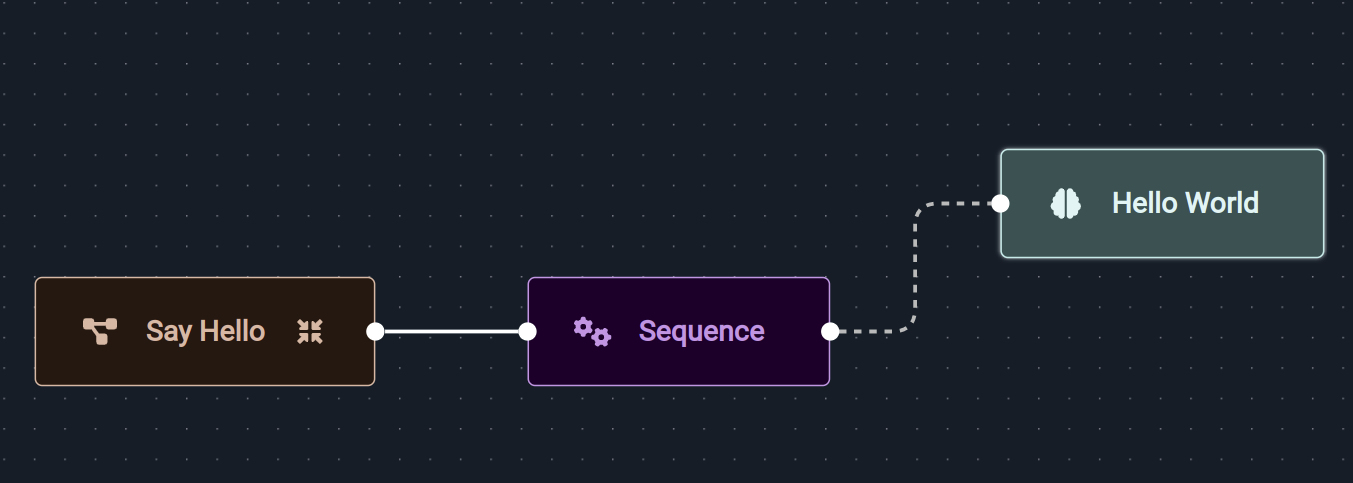
You have now connected your Behavior to the tree so that it can be executed from the web app. You can exit the Objective Builder section and return to the Objectives section to execute your new Objective.
4. Execute the Objective
You can now click the Run button on the upper left of the workspace to directly execute your Objective.
Alternatively, you can find your Objective on the right side of the Objectives section and run it from there:
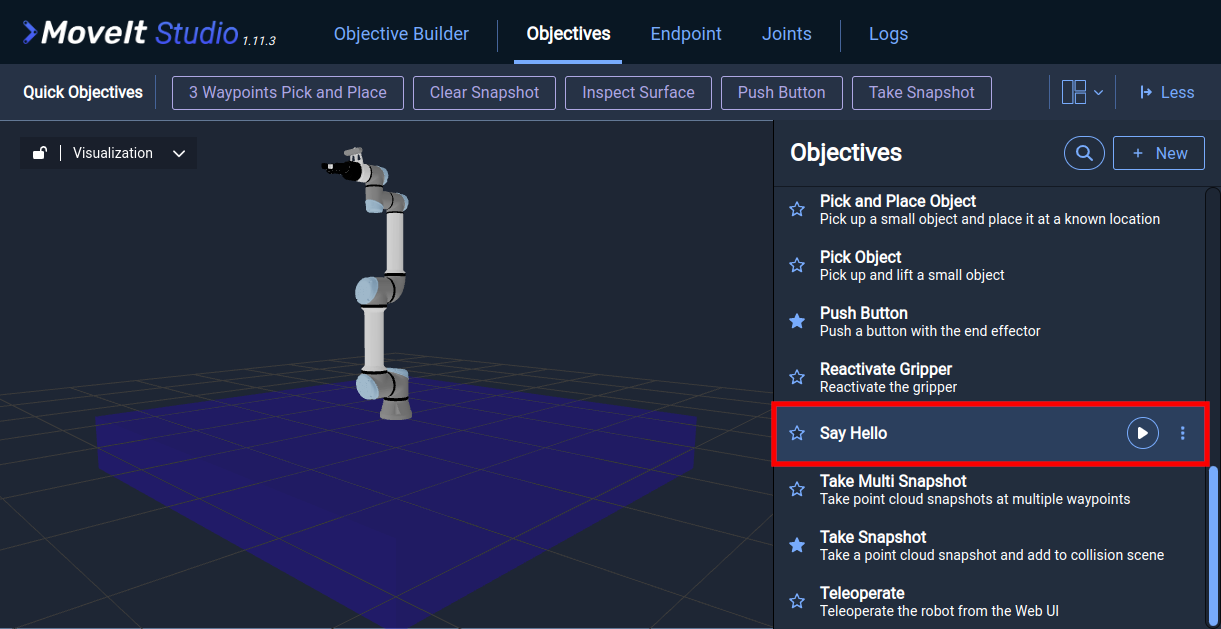
When the Say Hello Objective runs, a red notification will appear at the top of the screen containing the Hello, world! message.
Making the Wave Hello Objective
Tutorial Level: Intermediate
This tutorial will show you how to make an Objective in the Web UI that will set up and use MoveIt Task Constructor (MTC) to run the Wave Hello Behavior we created in the tutorial Creating an Asynchronous Behavior.
Note
The Creating an Asynchronous Behavior tutorial is a prerequisite for this tutorial.
1. Create a New Objective
In the UI, under Objective Builder click + New button to create a new Objective.
Enter the following information to configure the new Objective in the popup window:
- Name the new Objective
Wave Hello. - Enter a description that says what this Objective does.
- Click Create.
The Wave Hello Objective will now be included in the list of Objectives. Click Edit Objective to open it in the Objective editor.
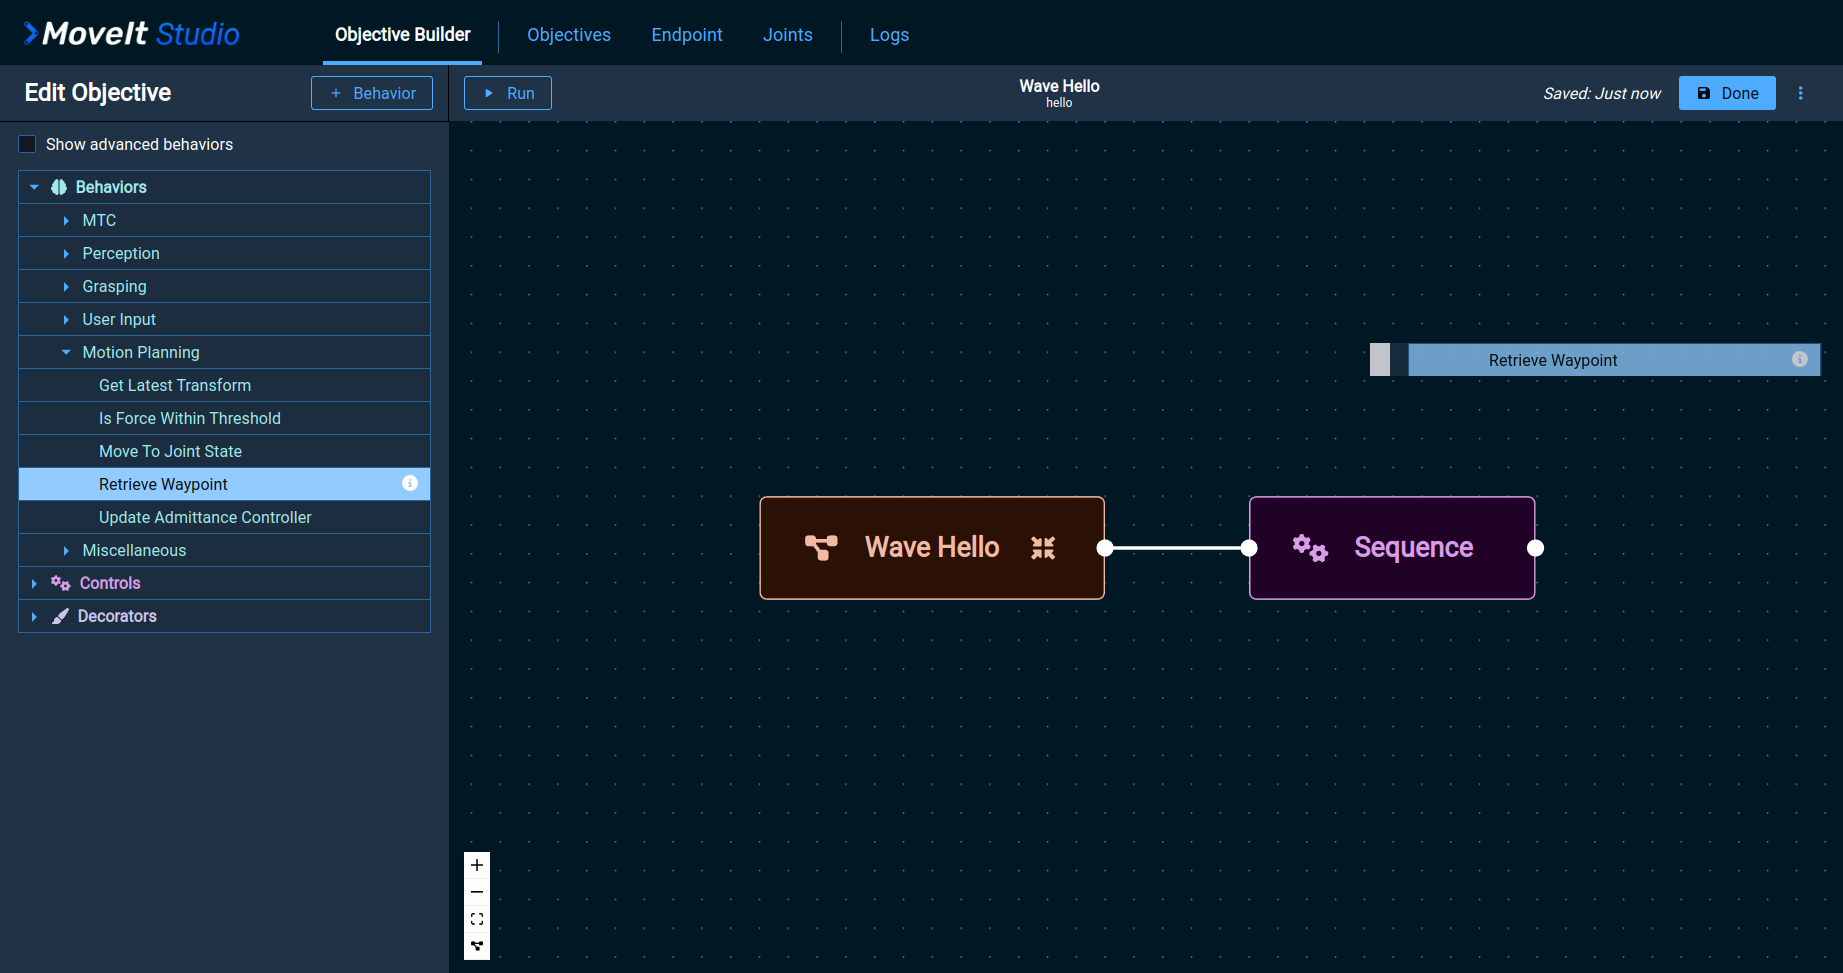
2. Add Behaviors
To implement our Wave Hello Objective, we will use both our custom SetupMTCWaveHand Behavior and the List of Core Behaviors provided with the MoveIt Pro SDK.
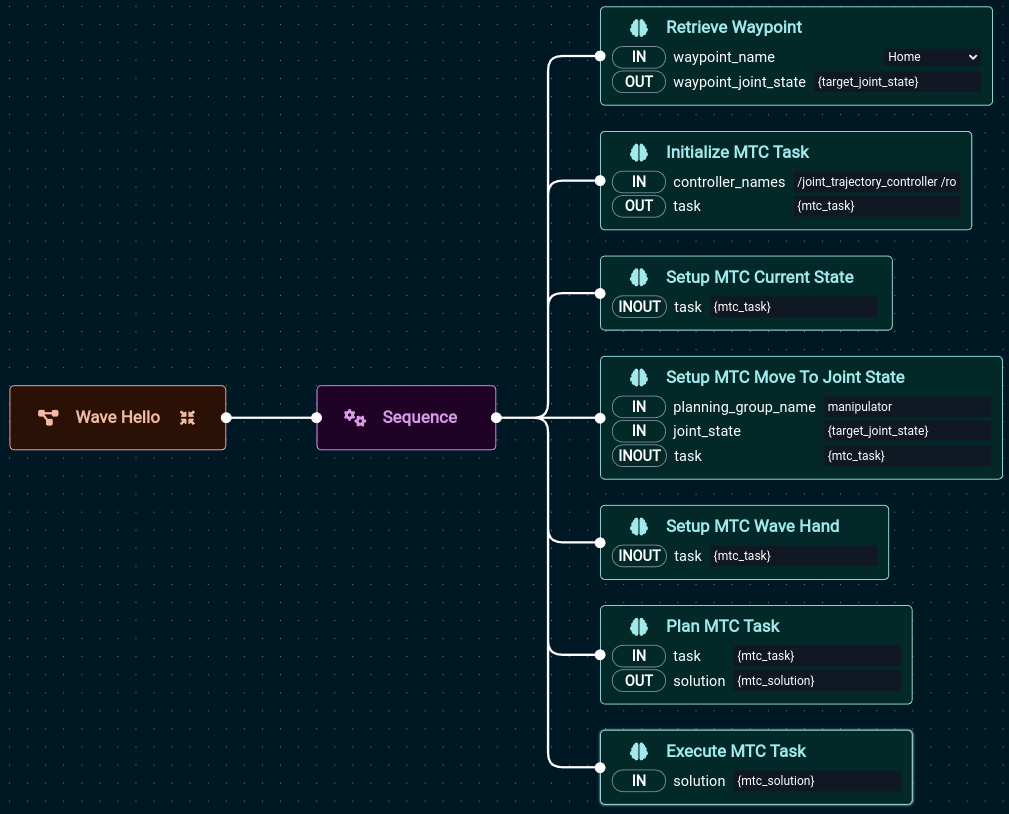
The completed Objective will look like this:
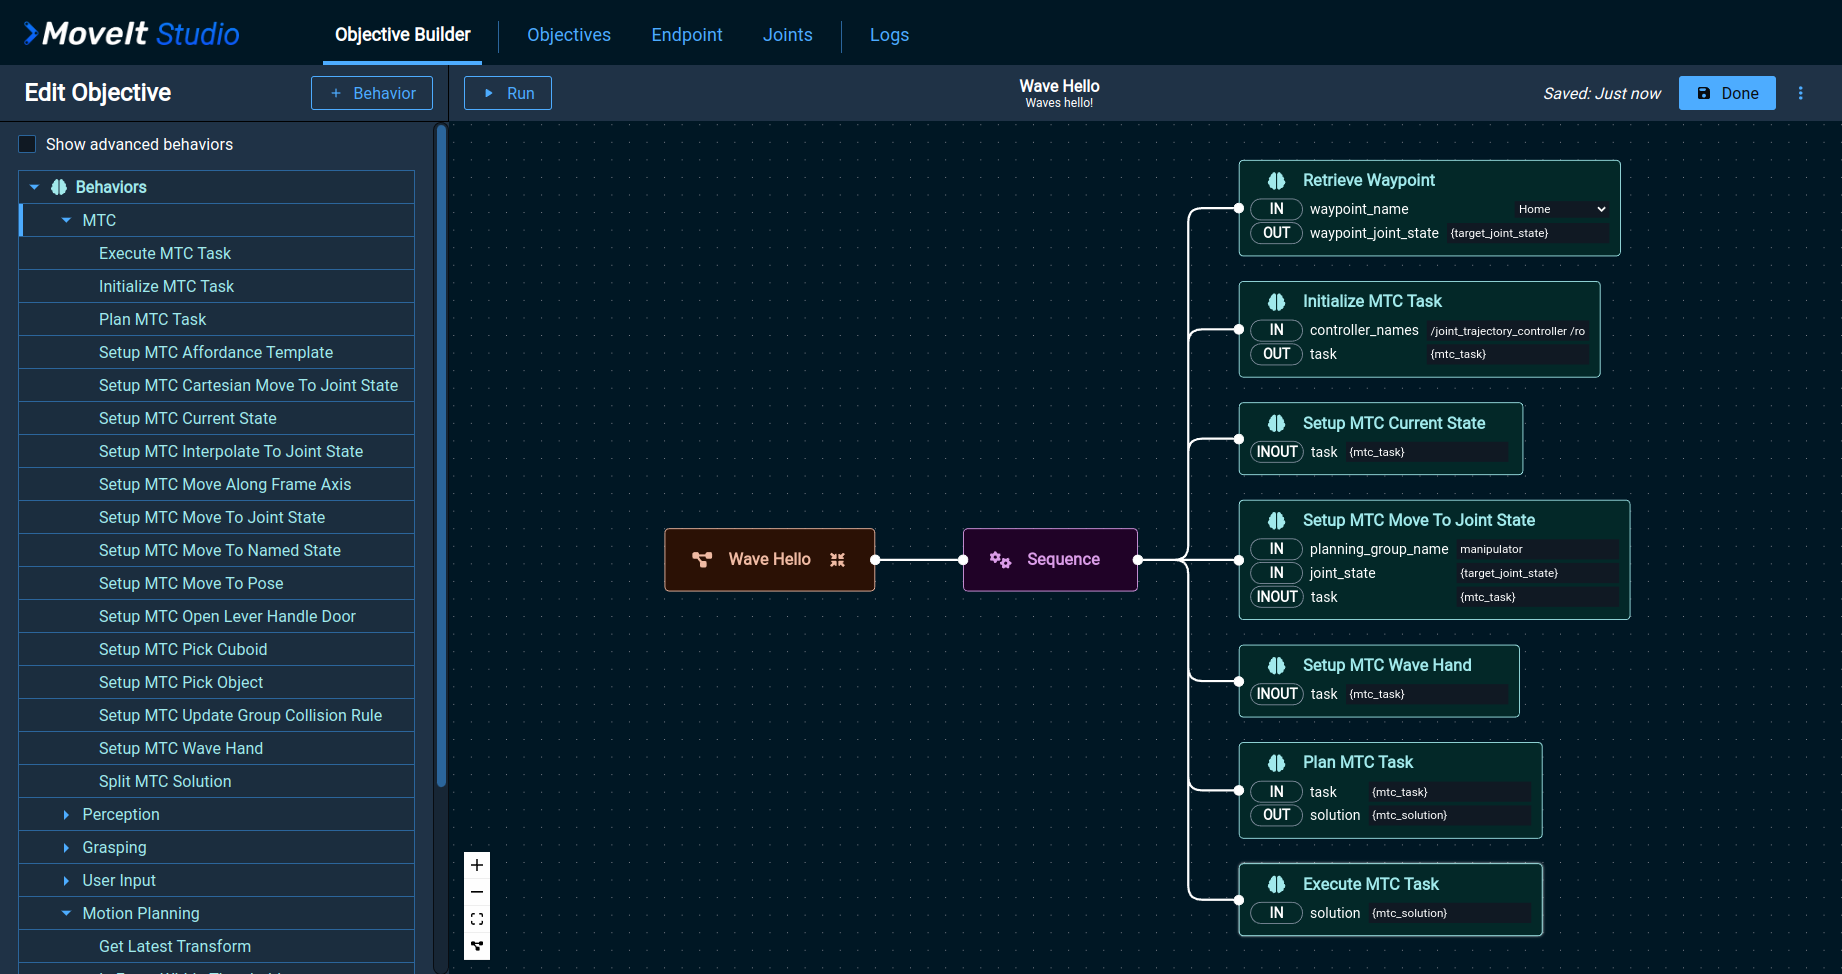
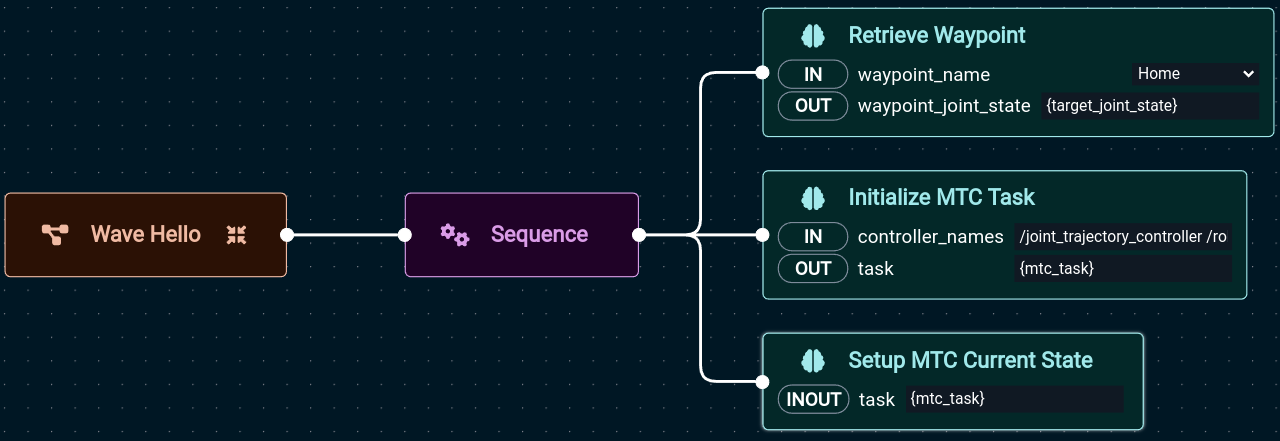
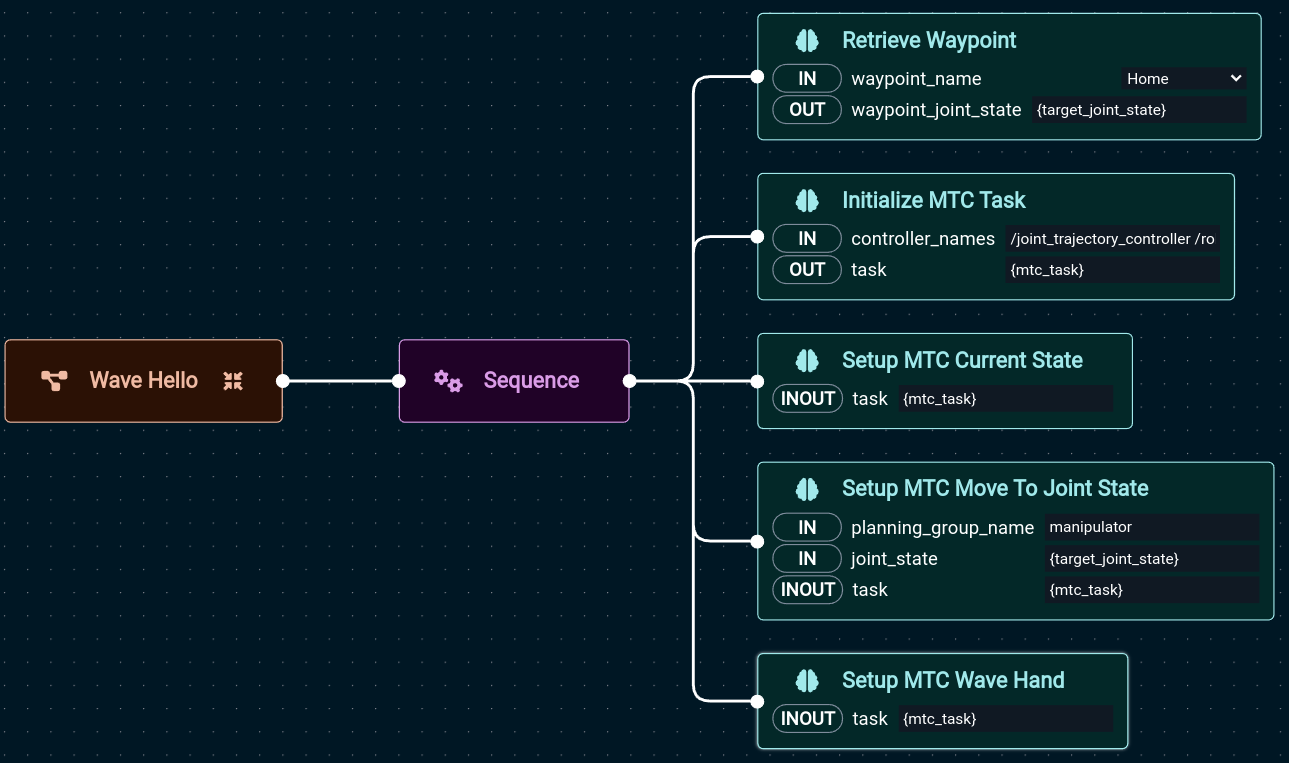
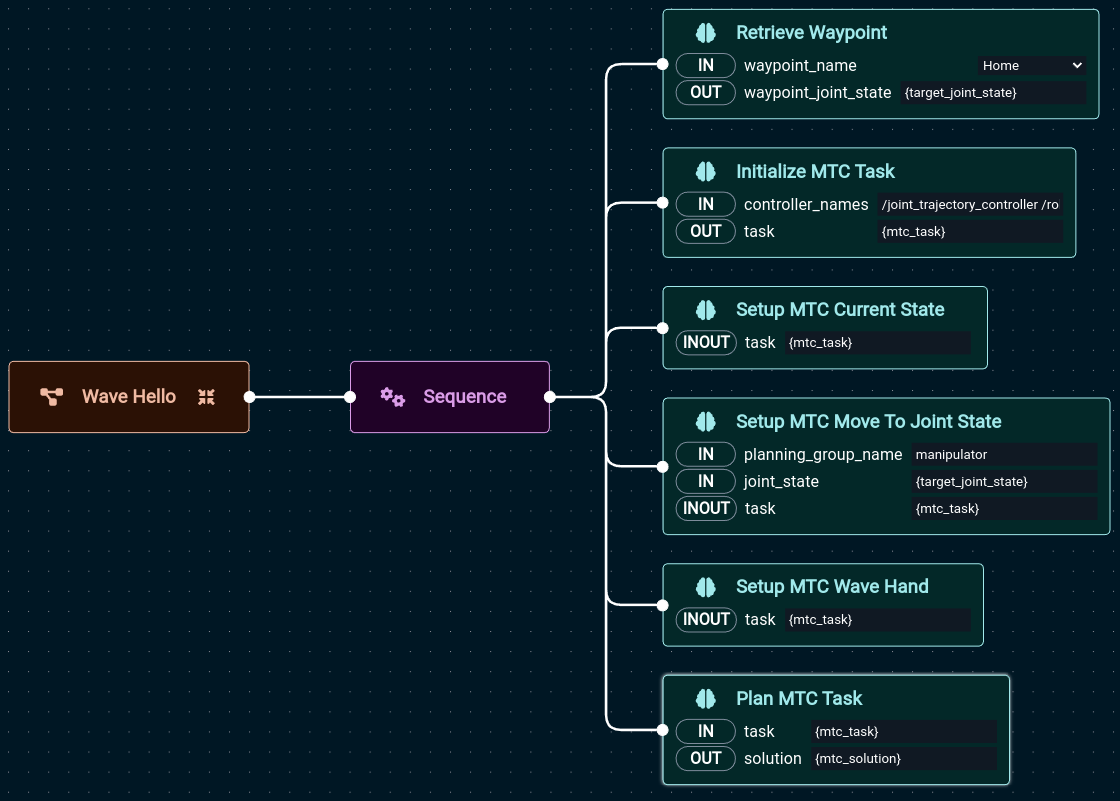
We start with a Sequence node under the root node of the Behavior tree.
This Sequence node will serve as the parent node of all other Behaviors we will add to the Objective.
Add the following Behaviors beside the Sequence node from top to bottom in the order listed below.
Edit the values for each data port to match the tree shown.
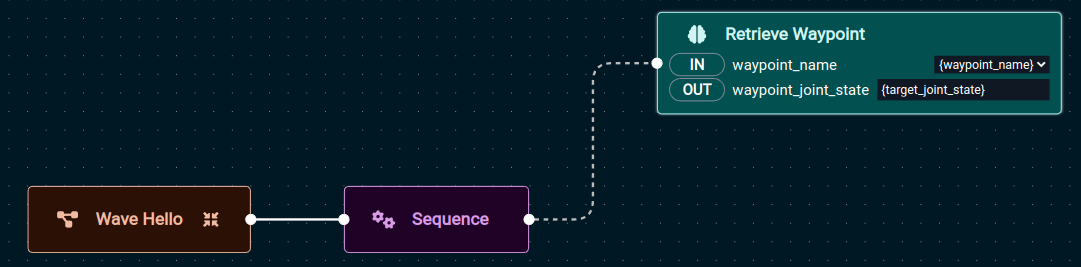
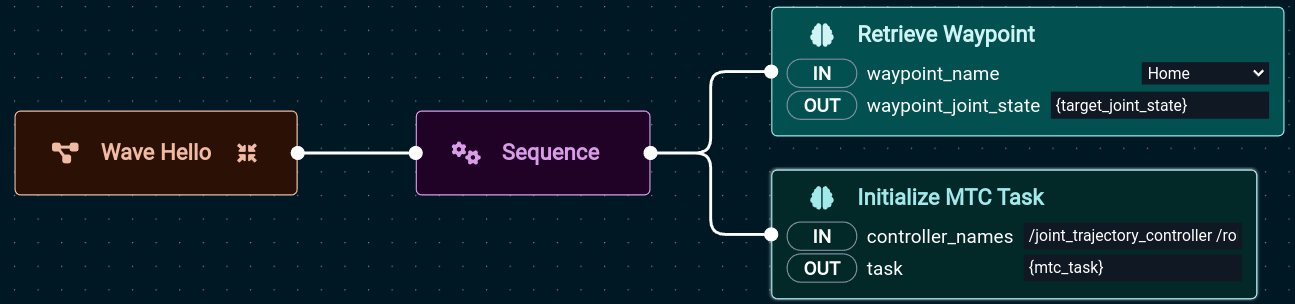
Retrieve Waypoint
Here we use our named waypoints and the Retrieve Waypoint Behavior to look up the waypoint name in the waypoint_name port and set the waypoint_joint_state port with the waypoint defined in joint space.
Find this Behavior under the Motion Planning category, drag it over to the editor workspace:
Set waypoint_name to Home and waypoint_joint_state to {target_joint_state}:
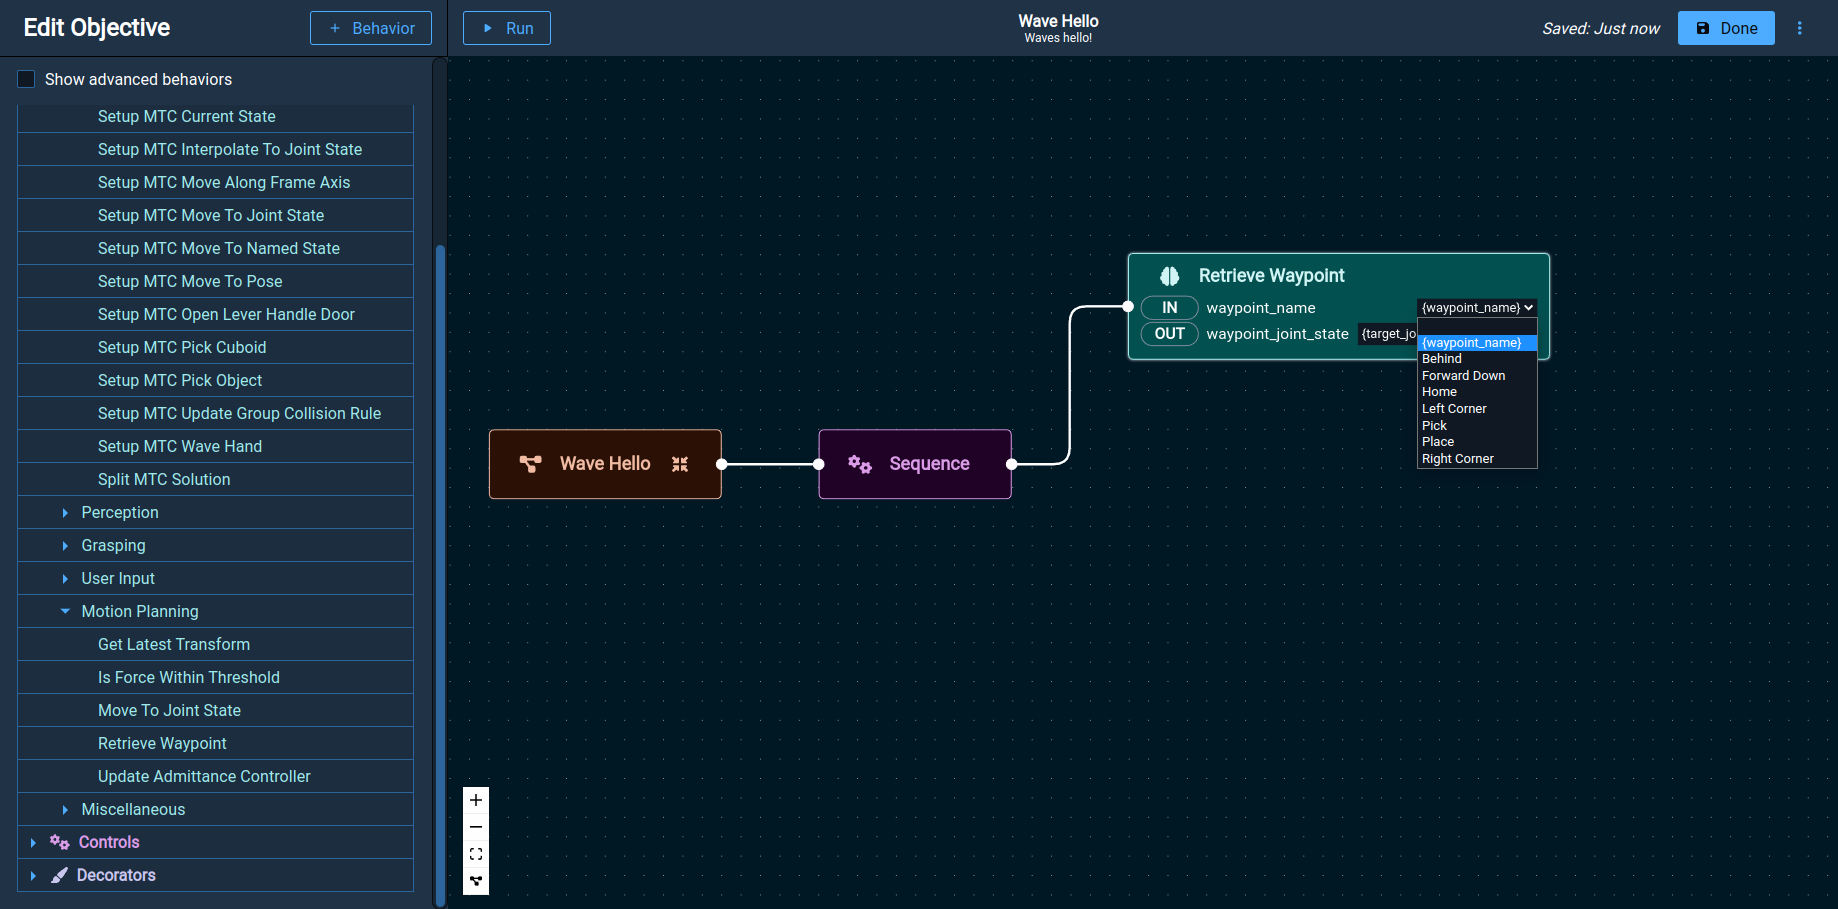
Tip
When repositioning a Behavior, MoveIt Pro will automatically make logical connections shown as a dotted line. Connections can be selected and deleted, or moved by grabbing the connection point.
Initialize MTC Task
MTC Behaviors can be found under the MTC category.
This Behavior sets up MTC and gives it the controller names it will use (in this example we use /joint_trajectory_controller /robotiq_gripper_controller).
It places the MTC task object {mtc_task} on the output port.
Setup MTC Current State
The Setup MTC Current State Behavior will take the MTC task created by the Initialize MTC Task Behavior and provide it with the current robot state.
It does so by modifying the {mtc_task} on the task port.
Setup MTC Move To JointState
In this Behavior we specify the planning group used by MoveIt, along with the desired joint state to start our wave from.
It uses the input {target_joint_state} on the joint_state port set by the Retrieve Waypoint Behavior, and the planning_group_name port is set to manipulator.
Just like Setup MTC Current State, this Behavior will update the MTC task {mtc_task} using the bi-directional task port.

Setup MTC Wave Hand
This is your custom Behavior, and will add the waving motion to the MTC task {mtc_task}.
Plan MTC Task
In the Plan MTC Task Behavior, planning occurs for the {mtc_task}.
If successful, it will place the solution {mtc_solution} on the blackboard using the solution output port.
Execute MTC Task
The final MTC task will execute the motion.
It requires a valid MTC solution on the blackboard, called {mtc_solution}.
Hint
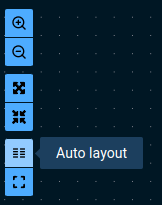
You can use the Auto layout button to align the Behavior tree for you. It can be found in the bottom left corner when editing Objectives.
Once you have finished editing the Wave Hello Objective, click the Done button to save and exit the Objective editor, or Run to try it out immediately.
3. Run the “Wave Hello” Objective
Click the Objectives tab and press the More button to see the Wave Hello Objective in the list.
Click the arrow to run the Wave Hello Objective.
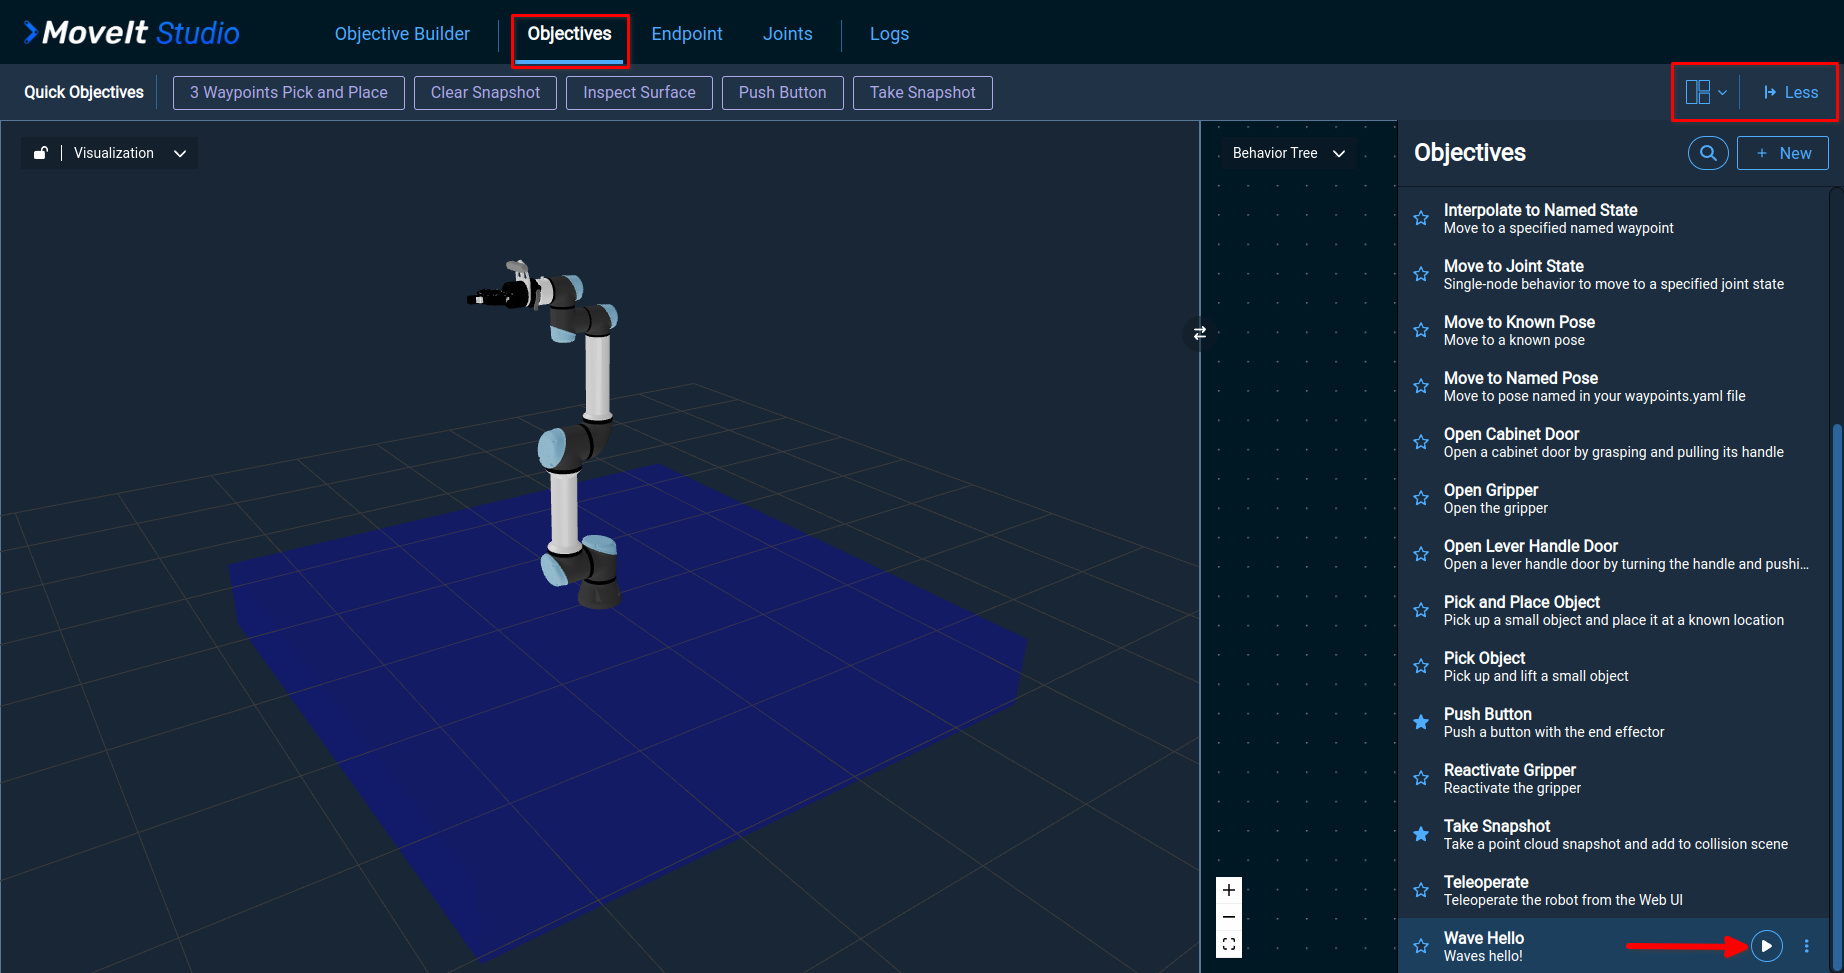
The robot will move to the Home named state, and then will move its gripper back and forth.
You will see the Behavior tree on the right and a visualization of the robot on the left.