Meta Quest for Teleop Setup Guide
The Meta Quest is a great tool for ML model data collection. It requires a little Unity app running on the Quest device. We will walk you through how to set this up in the following.
This setup guide is intended to be used with MoveIt Pro for best performance, though it documents a generic ROS 2 driver.
Enable Developer Mode
- Enable “Developer Mode” on your device so that it can run your own application.
- Run the “Meta Horizon” app on your phone
- Connect to the Meta device
- In the device settings->Headset Settings->Developer Mode, turn ‘Developer Mode’ on.
- Note: You may have to log in to your Facebook account and create an “organization” for you to be able to turn developer mode on.
Build Meta Quest APK from source
If you need to build the Meta Quest app from source, follow these steps.
The app has been developed using Unity, and therefore, you will need to install Unity to build it.
- Clone the app repository somewhere in your local system.
- Install Unity Hub following these instructions. Start the hub and log in, but do not install the Unity editor yet.
- Open the project from the github repository, or from a local folder if cloned already. It should prompt you with the requisite Unity Editor version you'll need to open the project. Install this version.
- The app needs the Android SDK to be built. In File -> Build Profiles enable “Android”. This may require downloading the Android SDK if you haven’t already.
- In Edit->Project Settings, go to the “XR Plugin Management” section and disable “OpenXR”, enable “Oculus”.
- Under XR Plugin Management->Oculus, make sure your device is checked in “Target Devices”. If you have a Quest 1, make sure to disable “Quest 3”, otherwise, support for the Quest 1 won’t be enabled 🤷
- In the main menu, Robotics->ROS Settings, set the IP address of the computer where you will be running all the ROS2 nodes, e.g., where MoveIt Pro runs.
- Connect the Meta Quest to your computer via a USB cable. You should see a message in your headset asking to confirm the debug connection to the computer and data sharing.
- Under File->Build Profiles->Android->Run Device, you should see your Meta Quest device listed. Select it.
- Click Build and Run, which should build the application, push it to the device, and run it.
Run the Meta Quest APK
To run the Meta Quest app after it has already been installed:
- Put the headset on
- Open the App Library
- Choose “Unknown sources”. That should show the app.
- Click on the app.
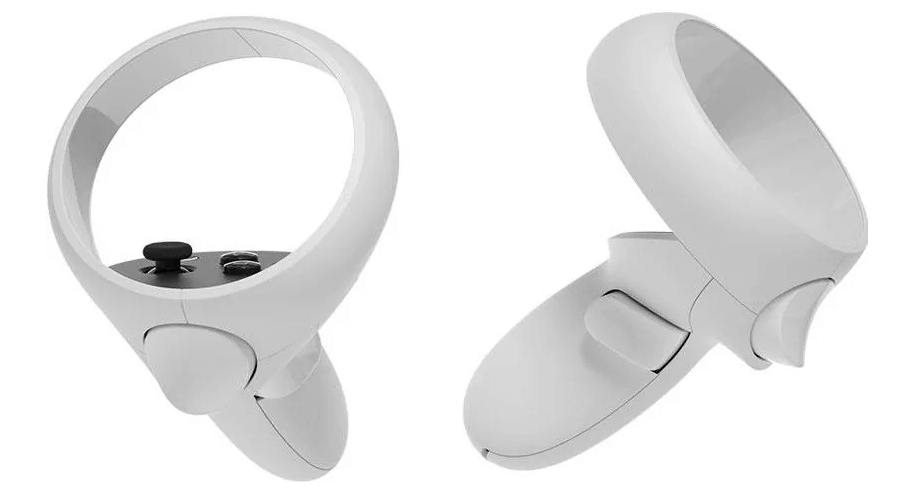
When you run the app, you should see a blue sky, a grid, and the two remote controllers.
Connect to ROS
This app collects the state of the Meta Quest controllers and publishes it to ROS via the Unity ROS TCP Connector.
To be able to see the topics and data published by the Meta Quest app, you will need a dedicated ROS2 node running on the host computer. This node will be the host endpoint for the connection to the Meta Quest.
-
Clone Unity’s ROS-TCP-Endpoint repo (main-ros2 branch) in your workspace and build it with the rest of your ROS2 packages.
-
If you are running a firewall, you will have to allow the port used by the Meta Quest. For example, with UFW, you can run:
sudo ufw allow 10000 -
Start the endpoint with the following command, using the IP of the host computer, where you are running the ROS ecosystem, e.g:
ros2 run ros_tcp_endpoint default_server_endpoint --ros-args -p ROS_IP:=192.168.86.25
You should now be able to see the topics published by the headset, including TF.
Get familiarized with the controller
Understand how the controller pose is reported
The controller pose is reported as an nav_msgs/msg/Odometry message in the /right_controller_odom topic. Its contents can be received in MoveIt Pro using the GetOdom Behavior.
The robot's initial controller pose is set near the VR world origin, adjusted for your height. In RViz, with TF enabled, you can visualize the target position relative to the world frame.
To manipulate this target position using the controller:
- Press the clutch button, which effectively "grabs" the moving target.
- Release the clutch to "drop" the target at its current location.
Use the Meta Quest for Teleoperation
After all the previous steps, you can now use the Meta Quest to teleoperate your robot.
Create an Objective that uses the SubTree Track Moving Frame either from the core objectives or below to track the controller pose in Cartesian space.
If you are using a version prior to 8.7.0, the Track Moving Frame SubTree will not appear in the core objectives.
<?xml version="1.0" encoding="UTF-8" ?>
<root BTCPP_format="4" main_tree_to_execute="Track Moving Frame">
  <!--//////////-->
  <BehaviorTree
    ID="Track Moving Frame"
    _description="Moves a given end-effector link to track a moving frame, e.g. to control the robot arm with a teleoperation device."
    _favorite="false"
  >
    <Control ID="Sequence" name="TopLevelSequence">
      <Action
        ID="CreateStampedWrench"
        reference_frame="world"
        stamped_wrench="{stamped_wrench}"
      />
      <Action
        ID="SwitchController"
        activate_asap="true"
        automatic_deactivation="true"
        controller_list_action_name="/controller_manager/list_controllers"
        controller_switch_action_name="/controller_manager/switch_controller"
        strictness="1"
        timeout="1000.0"
        activate_controllers="{velocity_force_controller_name}"
      />
      <Action
        ID="CreateStampedPose"
        reference_frame="{default_ik_frame}"
        stamped_pose="{target_pose_offset}"
      />
      <Control ID="Parallel" success_count="3" failure_count="1">
        <Decorator ID="KeepRunningUntilFailure">
          <Control ID="Sequence">
            <Action
              ID="GetOdom"
              odometry_pose="{odometry_pose}"
              subscribed_odometry="{target_motion_state}"
              odometry_topic_name="{odometry_topic_name}"
            />
            <Action
              ID="VisualizePose"
              marker_lifetime="0.000000"
              marker_name="pose"
              marker_size="0.100000"
              pose="{odometry_pose}"
            />
          </Control>
        </Decorator>
        <Decorator ID="Delay" delay_msec="100">
          <Decorator ID="KeepRunningUntilFailure">
            <Control ID="Sequence">
              <Action
                ID="ComputeVelocityToAlignWithTarget"
                end_effector_frame="{default_ik_frame}"
                output_control_velocity="{control_velocity}"
                output_pose_error="{pose_error}"
                proportional_gain_linear="{proportional_gain_linear}"
                target_motion_state="{target_motion_state}"
                target_pose_offset="{target_pose_offset}"
                proportional_gain_angular="{proportional_gain_angular}"
              />
            </Control>
          </Decorator>
        </Decorator>
        <Decorator ID="Delay" delay_msec="100">
          <Decorator ID="KeepRunningUntilFailure">
            <Action
              ID="PublishVelocityForceCommand"
              force_controlled_axes="0;0;0;0;0;0"
              publish_rate="10"
              twist_stamped="{control_velocity}"
              velocity_controlled_axes="1;1;1;1;1;1"
              velocity_force_controller_command_topic="{velocity_force_controller_command_topic}"
              wrench_gain="0.0"
              wrench_stamped="{stamped_wrench}"
            />
          </Decorator>
        </Decorator>
      </Control>
    </Control>
  </BehaviorTree>
  <TreeNodesModel>
    <SubTree ID="Track Moving Frame">
      <MetadataFields>
        <Metadata subcategory="Motion - Execute" />
        <Metadata runnable="false" />
      </MetadataFields>
      <input_port
        name="default_ik_frame"
        default="grasp_link"
        description="The frame to use for the inverse kinematics calculations."
      />
      <input_port
        name="odometry_topic_name"
        default="{target_odometry_topic}"
        description="The topic where the target odometry is being published."
      />
      <input_port
        name="proportional_gain_angular"
        default="2.0"
        description="The proportional gain for angular velocity control."
      />
      <input_port
        name="proportional_gain_linear"
        default="2.0"
        description="The proportional gain for linear velocity control."
      />
      <input_port
        name="velocity_force_controller_command_topic"
        default="/velocity_force_controller/command"
        description="The topic to publish velocity force commands."
      />
      <input_port
        name="velocity_force_controller_name"
        default="velocity_force_controller"
        description="The name of the velocity force controller."
      />
    </SubTree>
  </TreeNodesModel>
</root>
You will need to set the odometry_topic_name input port to the topic where the controller odometry is being published, e.g., /right_controller_odom.
This Objective will subscribe to the controller's odometry and move the robot end-effector in Cartesian space towards the pose defined by the Meta Quest controller.
Before initiating teleoperation in MoveIt Pro, it's crucial to manually position the target pose close to the robot's end-effector. This is because the Objective will immediately activate a control loop, guiding the robot's end-effector towards the controller target pose, so a close initial proximity is desired.
Summary
You should now have the Quest ready to talk to MoveIt Pro. Next, checkout our training data collection tutorial.