1. Create New Robot Config
This guide explains how to setup any brand of robot arm and associated hardware, including custom in-house designed robotic hardware. It walks you through setup of the robot configuration package, grasp orientation, teleoperation, cameras, and real-time robot drivers.
Onboarding a robot yourself is currently recommended for advanced users.
Due to the advanced simulation, perception, and control features available in MoveIt Pro, the process for setting up a new robot is complicated and assumes prior experience with CAD, URDF, ROS Drivers, and MoveIt. PickNik's Customer Delivery team provides services to rapidly onboard robots for our customers and then hand it off to you for ongoing modifications and enhancements. See our services pricing page for more details of the setup packages we recommend.
Some robots are already compatible with MoveIt Pro, see our full list of robots on our ROS 2 Hardware Ecosystem page.
Overview on Robot Configuration Packages
MoveIt Pro uses robot configuration packages to specify all configurations and parameters necessary for launching the application for example:
- The robot(s) being operated and the environment - their URDFs and optionally MJCF robot models.
- The simulated world or imported CAD file of your workcell.
- Configuration files describing included sensors, actuators, controllers, and settings for motion planning.
- The available set of Objectives, Behaviors, and waypoints for that specific configuration.
When the MoveIt Pro is launched, it loads robot description info and system settings from a specified configuration package. These configuration packages are implemented as ROS 2 packages.
MoveIt Pro includes a few configuration packages you can switch between. When you install MoveIt Pro, the configuration packages above are installed by default in a workspace cloned from the moveit_pro_example_ws repository. You can refer to this repository while reading this document, and later on when you decide to create your own configuration packages.
1. Create the ROS 2 Package
The structure of the package will be as follows.
We will be using the picknik_ur_base_config package as reference.
picknik_ur_base_config/
  config/
    control/
    moveit/
    config.yaml
  description/
  launch/
  objectives/
  waypoints/
  CMakeLists.txt
  package.xml
Fill in package.xml
If your configuration requires resources from other packages or is inheriting from another config, tag them as dependencies here.
Click here to see the picknik_ur_base_config package.xml with dependencies for configuring a UR5e arm with an Intel Realsense camera and a Robotiq gripper.
Use moveit_pro new config to quickly create a robot configuration package from a template, which automatically sets up the proper file structure and dependencies.
Key arguments include:
--package-name/-n: Name for the new package--based-on/-b: Base configuration to inherit from (e.g.,lab_sim)--output-dir/-o: Output directory (defaults to user workspacesrc/)
Use moveit_pro new config --help to see all available options.
Fill in CMakeLists.txt
The CMakeLists.txt defines the install targets for all the shared package artifacts.
If your configuration requires other packages or is inheriting from another config package, include them as find_package requirements here.
Click here to see the picknik_ur_base_config CMakeLists.txt which installs all the populated subdirectories to the package's share directory:
Generate Allowed Collision Matrix (ACM)
After creating your URDF/xacro and initial SRDF, generate the Allowed Collision Matrix. From inside the dev container:
moveit_pro dev
update_acm src/my_robot_config/description/robot.xacro --output src/my_robot_config/config/moveit/robot.srdf
Or from the host: moveit_pro update_acm <path-to-urdf> --output <path-to-srdf>
2. Create and populate a config.yaml file
Each configuration package requires a config/config.yaml file that defines various settings, including:
- URDF and SRDF files defining the setup's robot description and semantics.
- Configuration for robot drivers, controllers, and sensors
- Configuration for the MoveIt instance
- Definitions for MoveIt Pro Objectives and Behaviors
The config/config.yaml tells the MoveIt Pro precisely what resources to load and how to configure them at runtime.
The following sections describe how to prepare the resources and configure the config for MoveIt Pro to launch successfully.
For a comprehensive reference of all available config.yaml options, see the Complete config.yaml Reference Guide.
Configuring Robot Description and Semantics
The MoveIt Pro config requires the robot_description property to point to the robot description and semantics files using the urdf and srdf keys.
For the urdf key, either a XACRO or URDF file can be used.
If a XACRO file is used, the corresponding URDF file is generated with each launch.
Optional XACRO arguments can be defined using the urdf_params key.
URDF or XACRO files are typically placed in the description folder of a configuration package, the SRDF file is commonly placed inside config/moveit/.
However, it is also possible to point to an existing MoveIt configuration or other ROS 2 packages.
For an example, look at the robot_hardware section of the picknik_ur_base_config config.yaml.
Configuring Robot Drivers and Controllers
The MoveIt Pro config supports specifying the robot's runtime configuration, including hardware drivers, simulation backends and controllers.
Add robot and driver launch files
You can specify different launch files for simulation vs. hardware environments, which are controlled by the hardware.simulated option in config/config.yaml.
The robot_driver_persist_launch_file and simulated_robot_driver_persist_launch_file are intended to launch robot drivers (and other processes) that are expected to stay active the entire time MoveIt Pro is running.
For example, if you are using MoveIt Pro with a mobile manipulator, the robot_driver_persist_launch_file and simulated_robot_driver_persist_launch_file can be used to launch Nav2 via the launch file.
The simulated_hardware_launch_file can be used to launch a separate simulation process, such as a proprietary simulator.
For an example, look at the launch files listed in the picknik_ur_base_config config.yaml.
These entries are inherited in the lab_sim configuration.
Objectives
In this section you configure which Behaviors from MoveIt Pro core you can use in your configuration and where this configs Objectives and waypoints are stored.
Pre-packaged "Core" Objectives
MoveIt Pro makes available a selection of commonly used Objectives through the moveit_pro_objectives package.
You can use them by adding the following to your config.yaml:
objective_library_paths:
  core_objectives:
      package_name: "moveit_pro_objectives"
      relative_path: "objectives/core"
  motion_objectives:
      package_name: "moveit_pro_objectives"
      relative_path: "objectives/motion"
  perception_objectives:
      package_name: "moveit_pro_objectives"
      relative_path: "objectives/perception"
These default Objectives give you immediate and universal functionality to your robot config, namely:
Reset Planning Scene: Remove all runtime editions to the Planning SceneClear Snapshot: Clears point clouds from visualizationTeleoperate: Handles multiple modes of robot teleoperationRequest Teleoperationis the subtree which implements teleoperation
- Subtrees for planning and execution including:
Move to Pose: Plans and executes motion to a Cartesian coordinate pose using inverse kinematicsMove to Joint State: Plans and executes motion to a set of joint anglesMove to Waypoint: Plans and executes motion to a MoveIt Pro-created named Waypoint, which is saved in a yaml file
You can override any of the default Objectives by adding a custom Objective with the same name to your config.
Custom Objectives
You should also add an objective_library_paths entry pointing to your config's objectives directory where your custom and overridden Objective XML files will live.
  custom_objectives:
      package_name: "my_robot_config_package"
      relative_path: "objectives"
The last entry in the objective_library_paths list will be the location newly created Objectives are saved to.
For an example, look at objective_library_paths section of the lab_sim config.yaml.
It inherits the list of objective libraries from picknik_ur_base_config and adds a custom_objectives library entry.
3. Configuring Teleoperation
MoveIt Pro provides access to different control modes to move your robot. The different control modes are described in the Teleoperate Robot tutorial.
A Teleoperate Objective is included in MoveIt Pro's core_objectives path we added to objective_library_paths above.
It is triggered by the UI's Teleoperate button.
The core Teleoperate Objective calls the core Request Teleoperation Subtree using its default remapped port values.
The Request Teleoperation Subtree can be added to other Objectives that require hybrid autonomous/manual modes, remote recovery fallbacks, etc.
The Subtree by default enables all the teleoperation modes for a one arm robot given certain conventions are followed:
Teleoperation Conventions
hardware.robot_description
- Your SRDF defines a "manipulator" joint group with all your arm joints, a "gripper" joint group with all your gripper joints, and an
end_effectortag linking them together. - For the
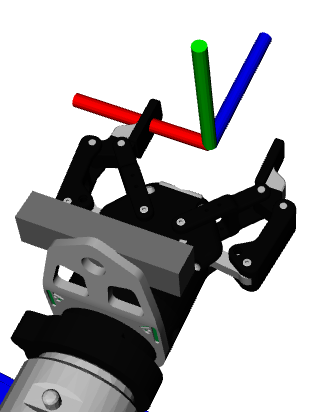
end_effectortag, thegroupshould be set to your "gripper" joint group andparent_linkshould be set a link the "manipulator" group (it does not matter which). - For the "manipulator" joint group, it should have a single tip link, which adheres to the following frame convention:
- Positive Z points out of the gripper.
- Positive Y points up towards the top of the gripper (where the wrist camera is, if present).
- Positive X points to the robots left and is parallel to the direction the fingers move.
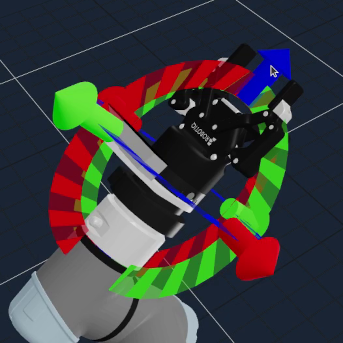
For IMarker teleoperation:
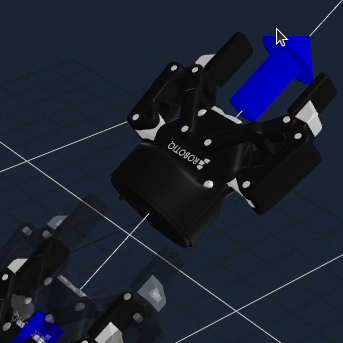
- The "IMarker frame" will spawn at the parent link of the "root" joint in the "gripper" joint group.
- The "IMarker ghost" will visualize the set of links in the "gripper" joint group.


For Pose Jog teleoperation:
- Pose jogging will be done relative to the tip frame of your manipulator joint group.

It is important to read the SRDF specification to understand how links are added to a group depending on if <link>, <joint>, <chain>, and/or <group> elements are used.
Incorrect specification can result in the IMarker frame appearing one link higher than you expect.
You can inspect the computed base and tip frames for the groups you create using ros2 service call /get_planning_groups moveit_studio_agent_msgs/srv/GetPlanningGroups.
If the joint group for your arm is not named "manipulator" you will need to duplicate the Teleoperate Objective and provide your joint group's name in the default_planning_group port exposed by Request Teleoperation.
ros2_control.config
- "joint_trajectory_controller" of type
joint_trajectory_controller/JointTrajectoryController- When running on hardware, this requires a ros2_control high-bandwidth streaming driver.
- This should be set to command all the joints.
- "velocity_force_controller" of type
velocity_force_controller/VelocityForceController- When running on hardware, this requires a ros2_control high-bandwidth streaming driver.
- This should be set to command all the joints.
- "servo_controller" of type
joint_trajectory_controller/JointTrajectoryController- When running on hardware, this requires a ros2_control high-bandwidth streaming driver.
- This should be set to command all the joints you want to show up in the Joint Jog panel.
- This must be named "servo_controller" and currently cannot be remapped.
If the JointTrajectoryController for your arm is not named "joint_trajectory_controller" you will need to duplicate the Teleoperate Objective and fill out the joint_trajectory_controller_name and controller_action_server ports exposed by Request Teleoperation.
If your hardware does not have a ros2_control high-bandwidth streaming driver, refer to the controller configuration guide.
moveit_params.pose_jog
- This file should map your "manipulator" joint group to your "velocity_force_controller".
- For details, refer to the pose jog configuration guide.
ros2_control.controllers_active_at_startup or ros2_control.controllers_inactive_at_startup
- Make sure each controller you defined in
ros2_control.configare listed in one of these.
moveit_params.servo
cartesian_command_in_topicshould be set to~/delta_twist_cmdsjoint_command_in_topicshould be set to~/delta_joint_cmds
Gripper Teleoperation
The core_objectives definitions for Open Gripper and Close Gripper do nothing.
You should duplicate and implement these Objectives.
Multi-arm, Mobile Manipulator, and Multi-tip Tool Teleoperation Considerations
Using the settings icon you can switch between groups defined in your moveit_params.pose_jog file when using IMarker or Pose Jog.
This is useful for when you want to control a specific arm or only the arm on a mobile manipulator.
The UI will report the currently selected group (for IMarker and Pose Jog), controller (for Pose Jog), and IMarker frame (for IMarker) in the {planning_groups}, {controllers}, and {tip_links} blackboard variables.
For a multi-arm configuration example, look at multi_arm_sim. For a mobile manipulator configuration example, look at hangar_sim.
IMarker control currently does not support switching between tip links if a planning group has multiple tip links. If you have an end effector with multiple tip links you wish to control, you should create separate planning groups (with only a single tip link) for each.