Pick and Place Using AprilTag Markers
AprilTags are a type of fiducial marker widely used in applications of robotics.
They enable the use of a single RGB camera to detect 3D poses by using high-contrast, easy-to-detect, markers of known size and unique identifiers.
In this guide, you will learn how to use MoveIt Studio to detect AprilTags and use the resulting poses for a simple pick and place example.
Setup
For this example, we will use a Universal Robots UR5e simulated in Gazebo. To launch this configuration, run:
./moveit_studio run -c picknik_ur_gazebo_config
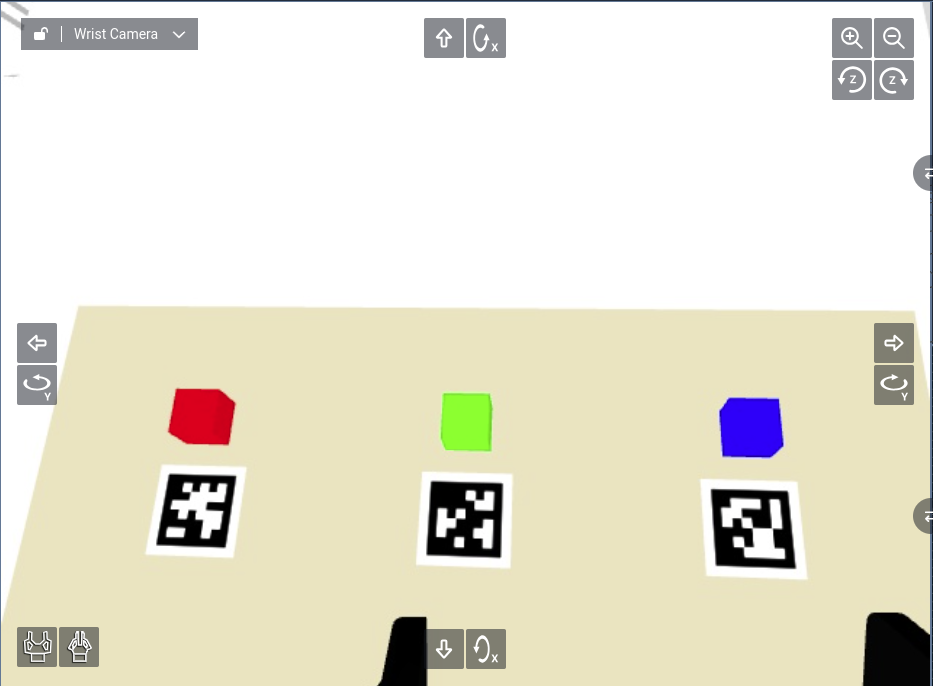
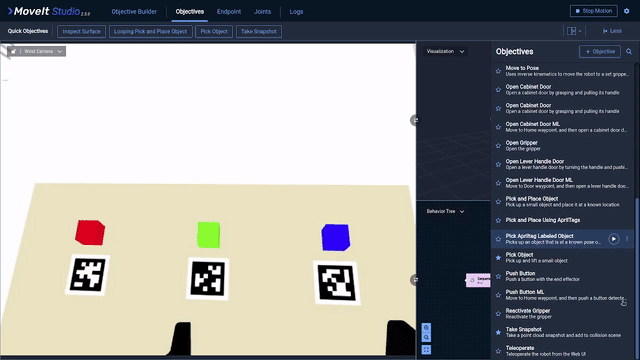
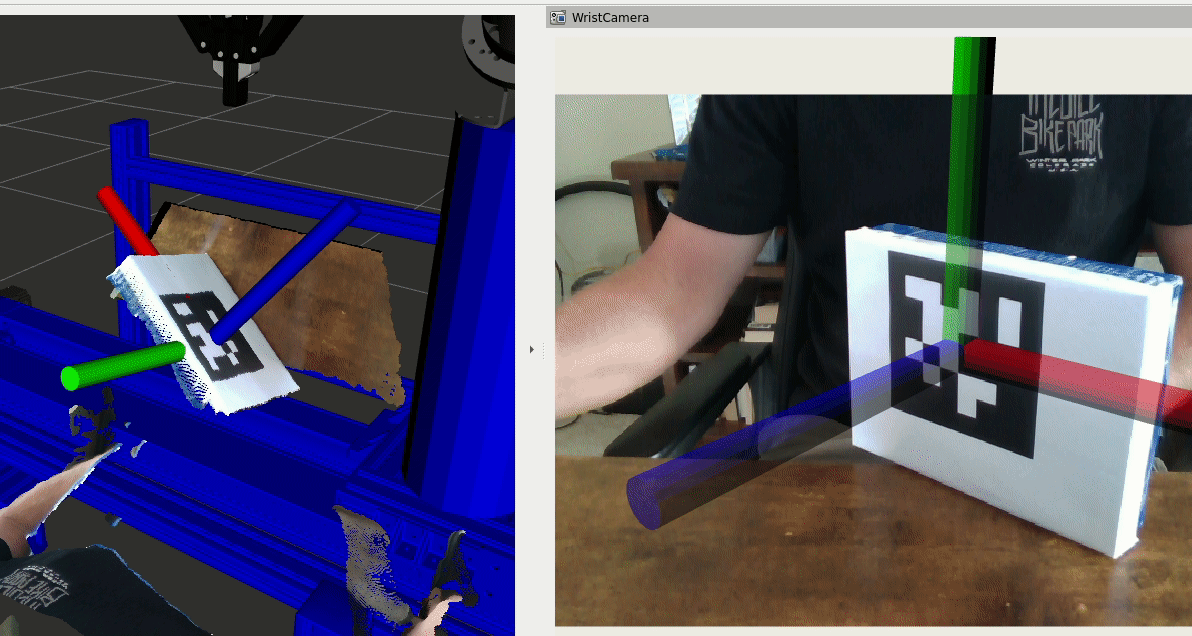
From the default starting position of the robot arm, you should see the following AprilTags from the wrist-mounted camera feed.
Detecting AprilTags
Create a new Objective named Pick and Place Using AprilTags.
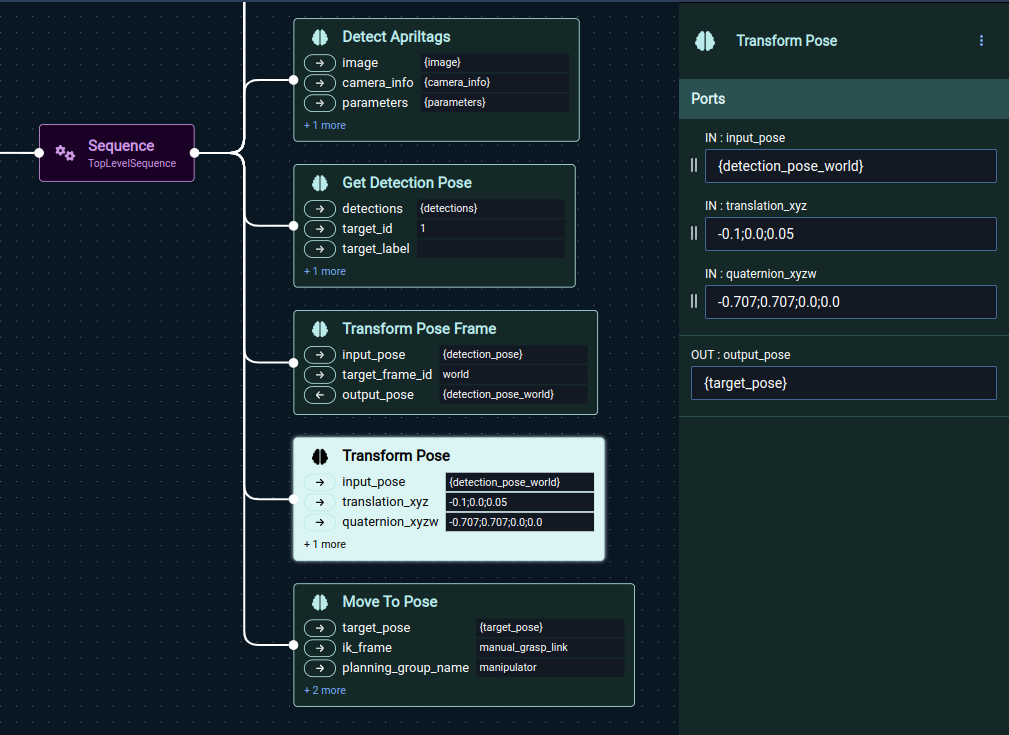
From the Perception section, add a Detect AprilTags Behavior.
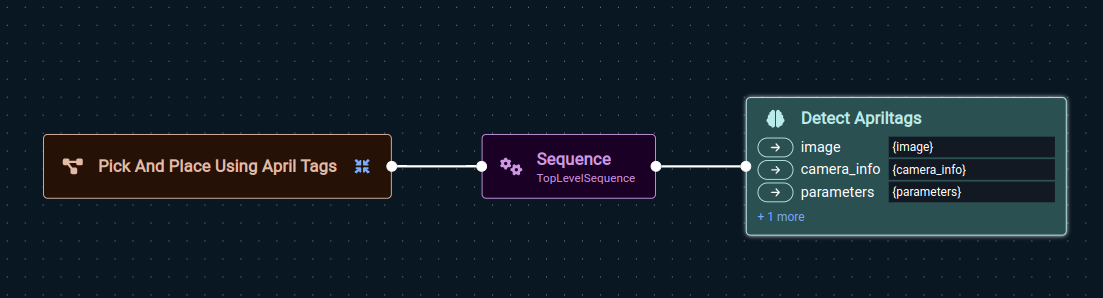
Notice that this requires an image and camera intrinsics as inputs.
You can find these Behaviors, Get Image and Get Camera Info, in the Perception section.
This Behavior also requires a set of YAML parameters defining the AprilTag detection settings. To set this up,
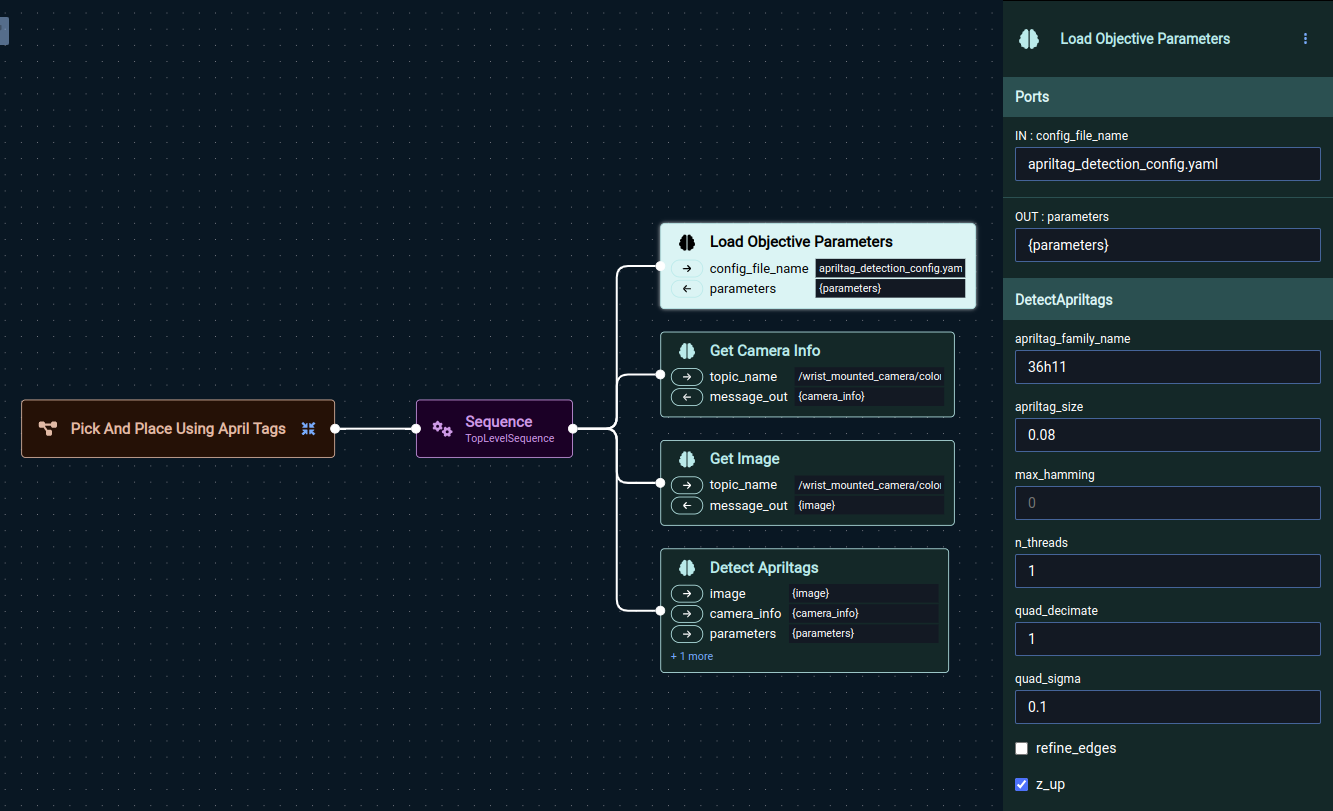
Add a
Load Objective ParametersBehavior from the Miscellaneous section.Specify
apriltag_detection_config.yamlas the file name. This file already exists in the configuration package.Select this Behavior node and inspect the options on the right pane. This expects AprilTags from the
36h11family of size0.08(8 cm).
Alternatively, you can create your own YAML parameter file by specifying a different file name.
The file will be created in the ${HOME}/.config/moveit_studio/picknik_ur_gazebo_config/objectives folder on your system.
Before running this Objective, open a separate terminal and launch RViz:
./moveit_studio rviz
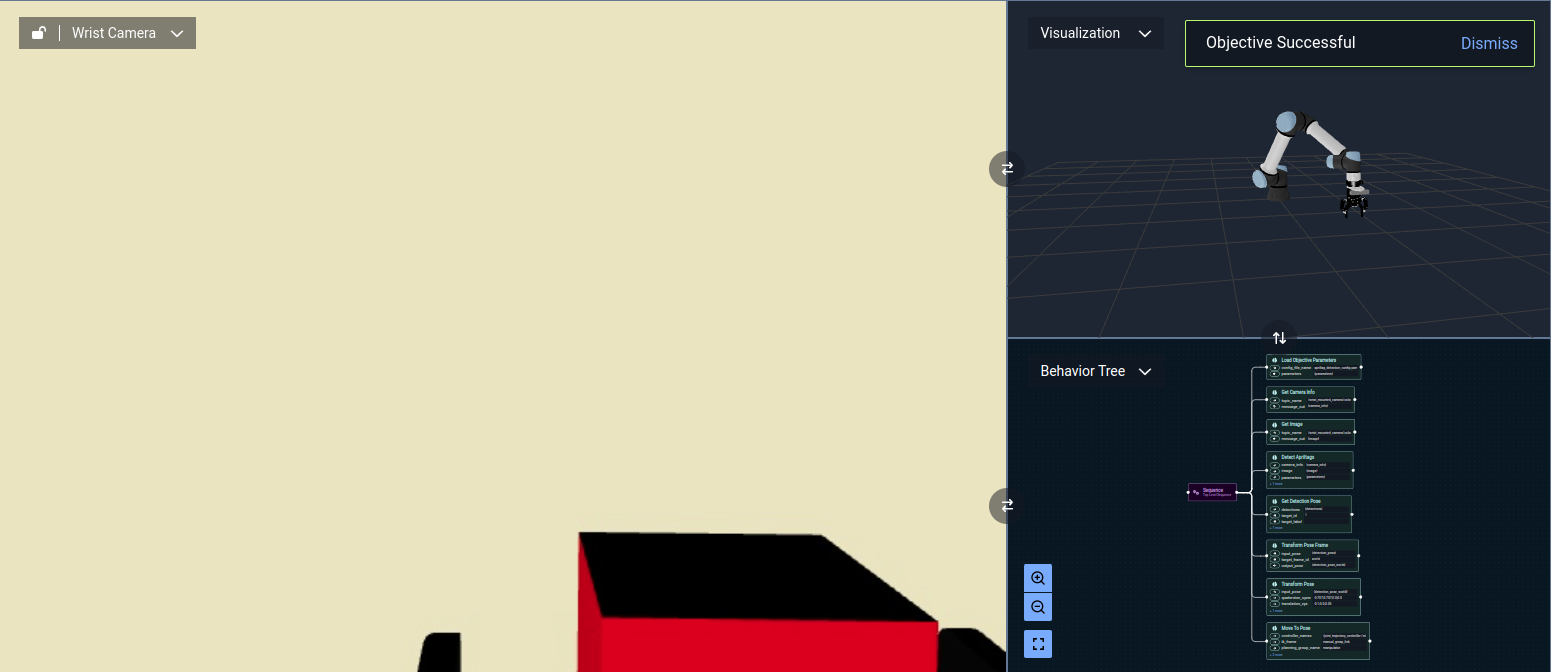
Now, run the Objective. Besides returning success, you should be able to see coordinate frames corresponding to the AprilTags using the TF widget in RViz. Make sure you set the Frame Timeout parameter to a large value so the frames do not disappear in a few seconds.
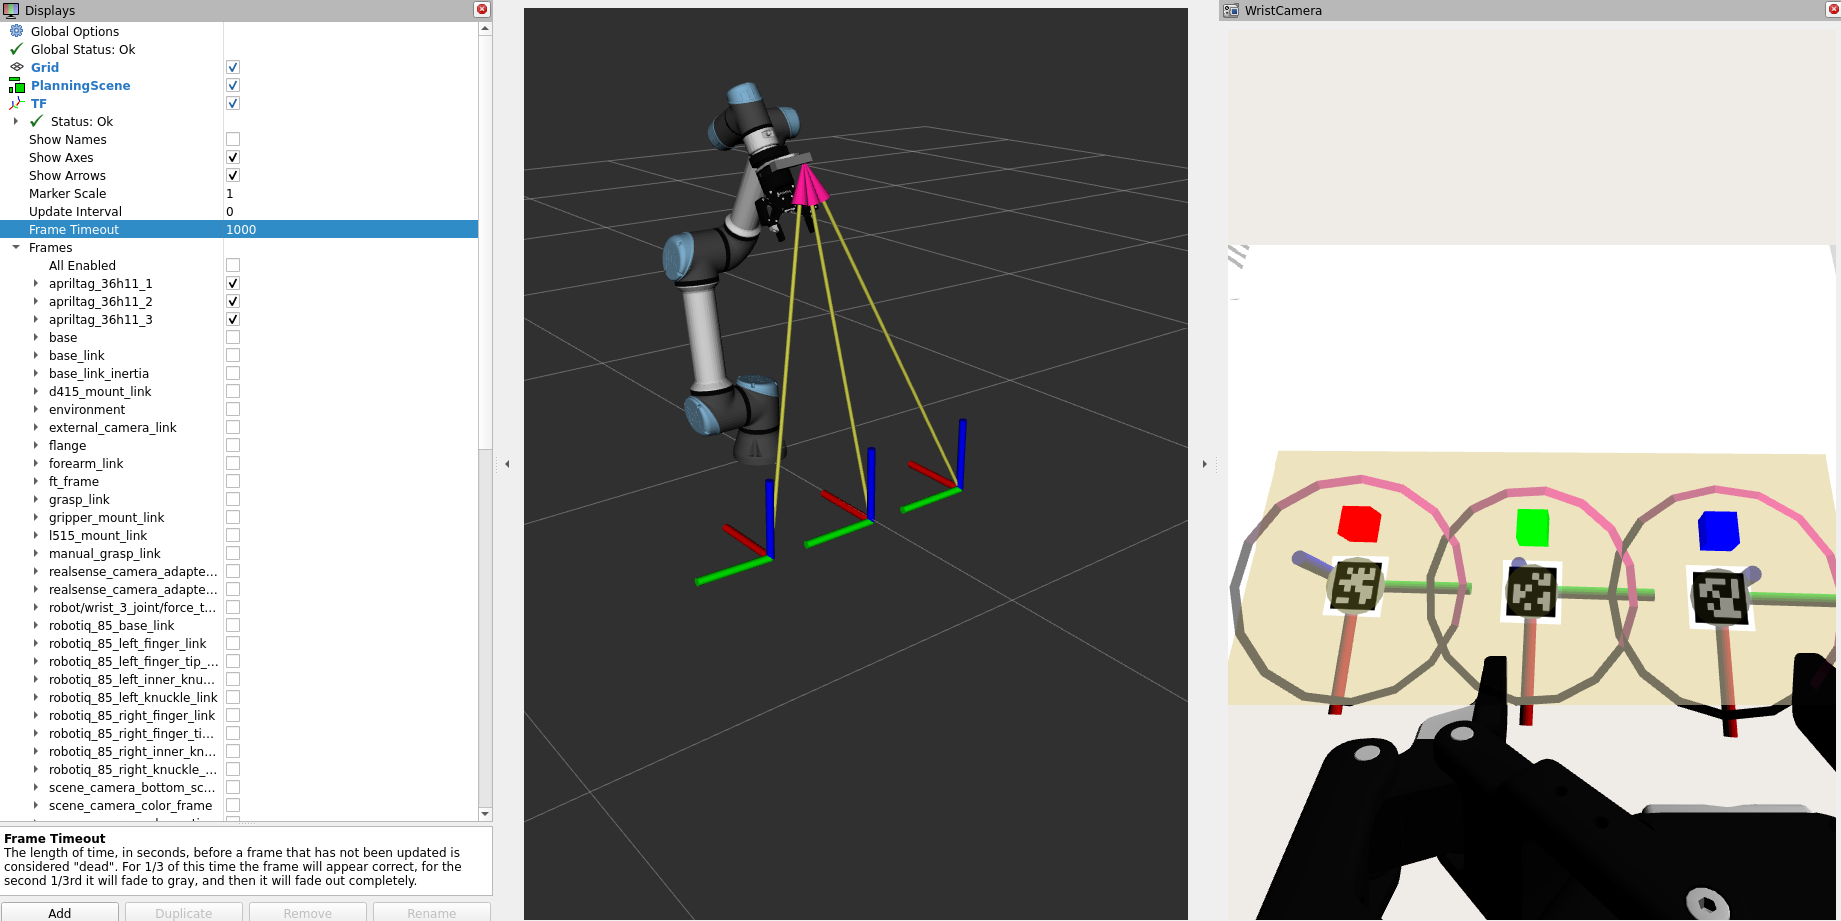
Based on the names of the frames generated, you can see that AprilTags with IDs 1, 2, and 3 were detected at the expected locations!
Working with Detection Poses
Typically, AprilTag markers require a pose offset that corresponds the exact marker location with the location of another object of interest.
For our example, suppose we want to pick the colored blocks next to the markers.
The blocks are exactly 10 cm behind their respective markers. Additionally, the markers are on the table and we need to ensure the target grasp pose is a few centimeters above the table.
To do this, we will do the following:
From the Perception section, add a
Get Detection PoseBehavior and set itstarget_idto1for the red block on the left.From the Miscellaneous section, add a
Transform Pose FrameBehavior. Settarget_frame_idtoworld. This will convert the detection pose from the camera frame to world frame for easier transformation.From the Miscellaneous section, add a
Transform PoseBehavior. Settranslation_xyzto-0.1;0.0;0.05andquaternion_xyzwto-0.707;0.707;0.0;0.0.From the Motion Planning section, add a
Move to PoseBehavior.Ensure that all the input and output ports corresponding to the poses are consistent. In our example, these are
{detection_pose},{detection_pose_world}, and{target_pose}.
Now, run your Objective and watch the robot arm move to the red block.
Building a Full Pick and Place Example
From here, you can extend this simple Objective towards a full pick and place application. Some ideas include:
Closing the gripper, moving to a place position, and opening the gripper.
Moving through approach and retract poses using
Transform PoseandMove To PoseBehaviors, orMove to Joint StateBehaviors with pre-saved Waypoints.Using more advanced capabilities like MoveIt Task Constructor to plan over entire pick and place motion sequences.
Looping through different objects using the AprilTag IDs
1,2, and3present in this simulated scene.
You can follow along with the instructions above, or start by cloning the existing Pick Apriltag Labeled Object example Objective.
Tips and tricks to using AprilTags
As shown below, the pose estimation returned from the AprilTag detector can have significant error or noise when observed at larger distances from the camera. For example here is a 50mm tag being rotated at a distance of 0.3m from the RGB camera.
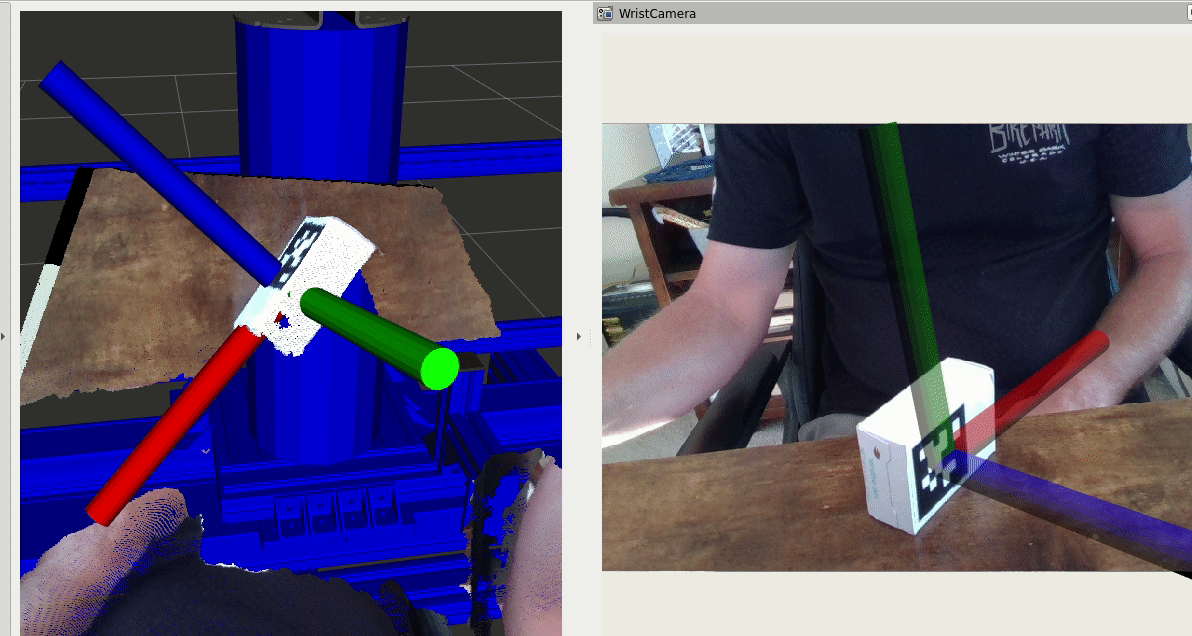
If you are experiencing noisy measurements, MoveIt Studio includes an Objective (“Sample April Tag”) that can sample the pose a specified number of times and return the average. Averaging multiple estimates can help increase the repeatability and accuracy of the pose. If you are experiencing large offsets between the pose and depth cloud produced by the 3D camera you should ensure you have the correct settings in your AprilTag configuration yaml (see this guide guide for tuning the detector parameters). You can also try to increase the camera resolution of the RGB image or increase the AprilTag size to reduce the error. For example you can see here a more accurate pose estimation when the tag is 100mm square and at the same distance of around 0.3m.
To experiment with the AprilTag detector behavior and visually inspect the accuracy, you can run the “Loop Detect April” objective and open up Rviz to compare the pose produced by the DetectApriltags behavior and point cloud from the desired camera.
If you need to create or test tags of different sizes/encodings, refer to this repository for a set of pre-generated tags.