Create a Custom Behavior
Making a Hello World Behavior
Tutorial Level: Intermediate
This tutorial walks you through how to create a new custom Behavior that can be loaded and run by MoveIt Studio.
The end result of this tutorial will be a new ROS package named hello_world, which contains a Behavior named HelloWorld.
The HelloWorld Behavior sends a log message to the UI containing the text "Hello, world!".
1. Set Up Your Environment
This tutorial assumes that you have already installed MoveIt Studio.
Follow the instructions in Software Installation if you have not already done this.
This will automatically install the example MoveIt Studio workspace and mount it as a user workspace.
This user workspace is where our created Behavior will live.
If you aren’t sure what STUDIO_HOST_USER_WORKSPACE is set to, it should be defined in the .env file, which can be found in your install directory.
If you used the default settings during installation, this should be located at ~/moveit_studio/moveit_studio_ws.
Within the user workspace you should have a src folder in which you can place any custom site configuration or Behaviors you want to use.
If using the example workspace, the src directory will initially only include the sample picknik_ur_base_config and the picknik_ur_site_config site configurations.
Otherwise, if creating a workspace from scratch, the src directory will start empty and be automatically populated during Behavior creation.
Note
The completed Behavior from this tutorial, and other example Behaviors, can be found in the MoveIt Studio Example Behaviors repository.
If you’d like to skip to the finished Behavior, clone this repository to your workspace’s src directory and skip to Build the Package to verify that the package builds and runs in MoveIt Studio correctly.
An example site configuration with Objectives that make use of these Behaviors can be found in the moveit_studio_ws repository.
2. Create a New Behavior Package
If you haven’t already, launch MoveIt Studio by running the following command from the directory that has the docker-compose.yaml file:
./moveit_studio run
Within the MoveIt Studio UI, under the Objective Builder tab, select an objective. In this tutorial, we choose Close Gripper.
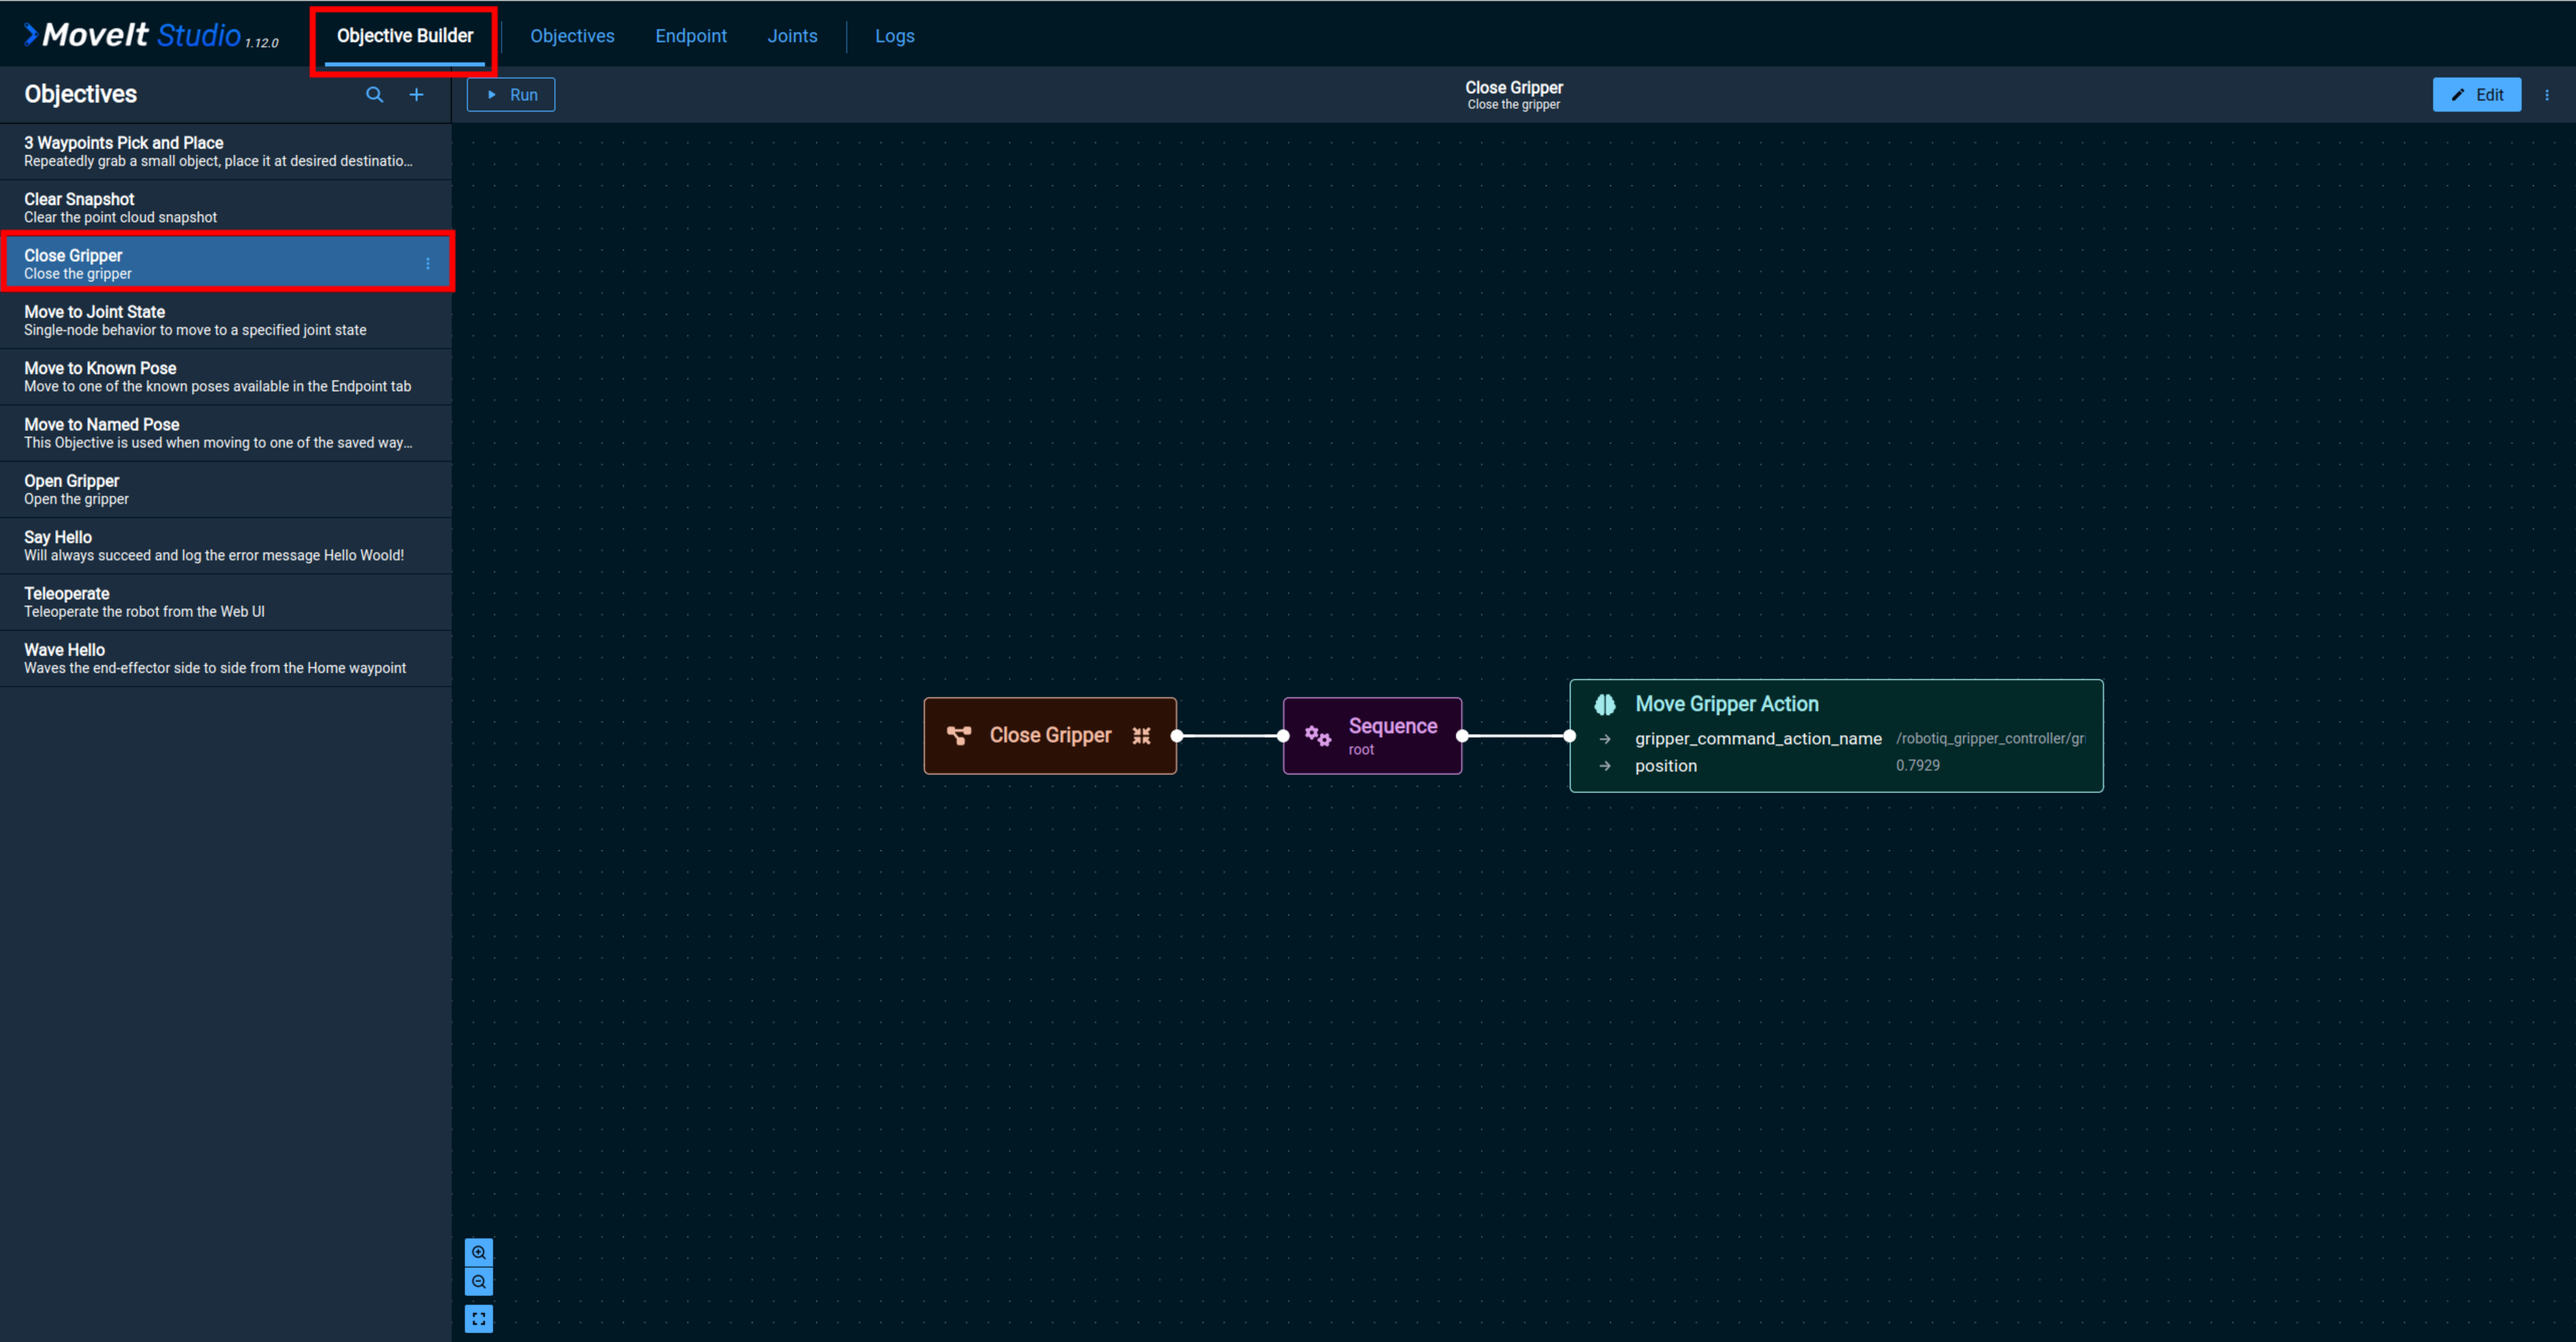
Click on the Edit button at the top right.
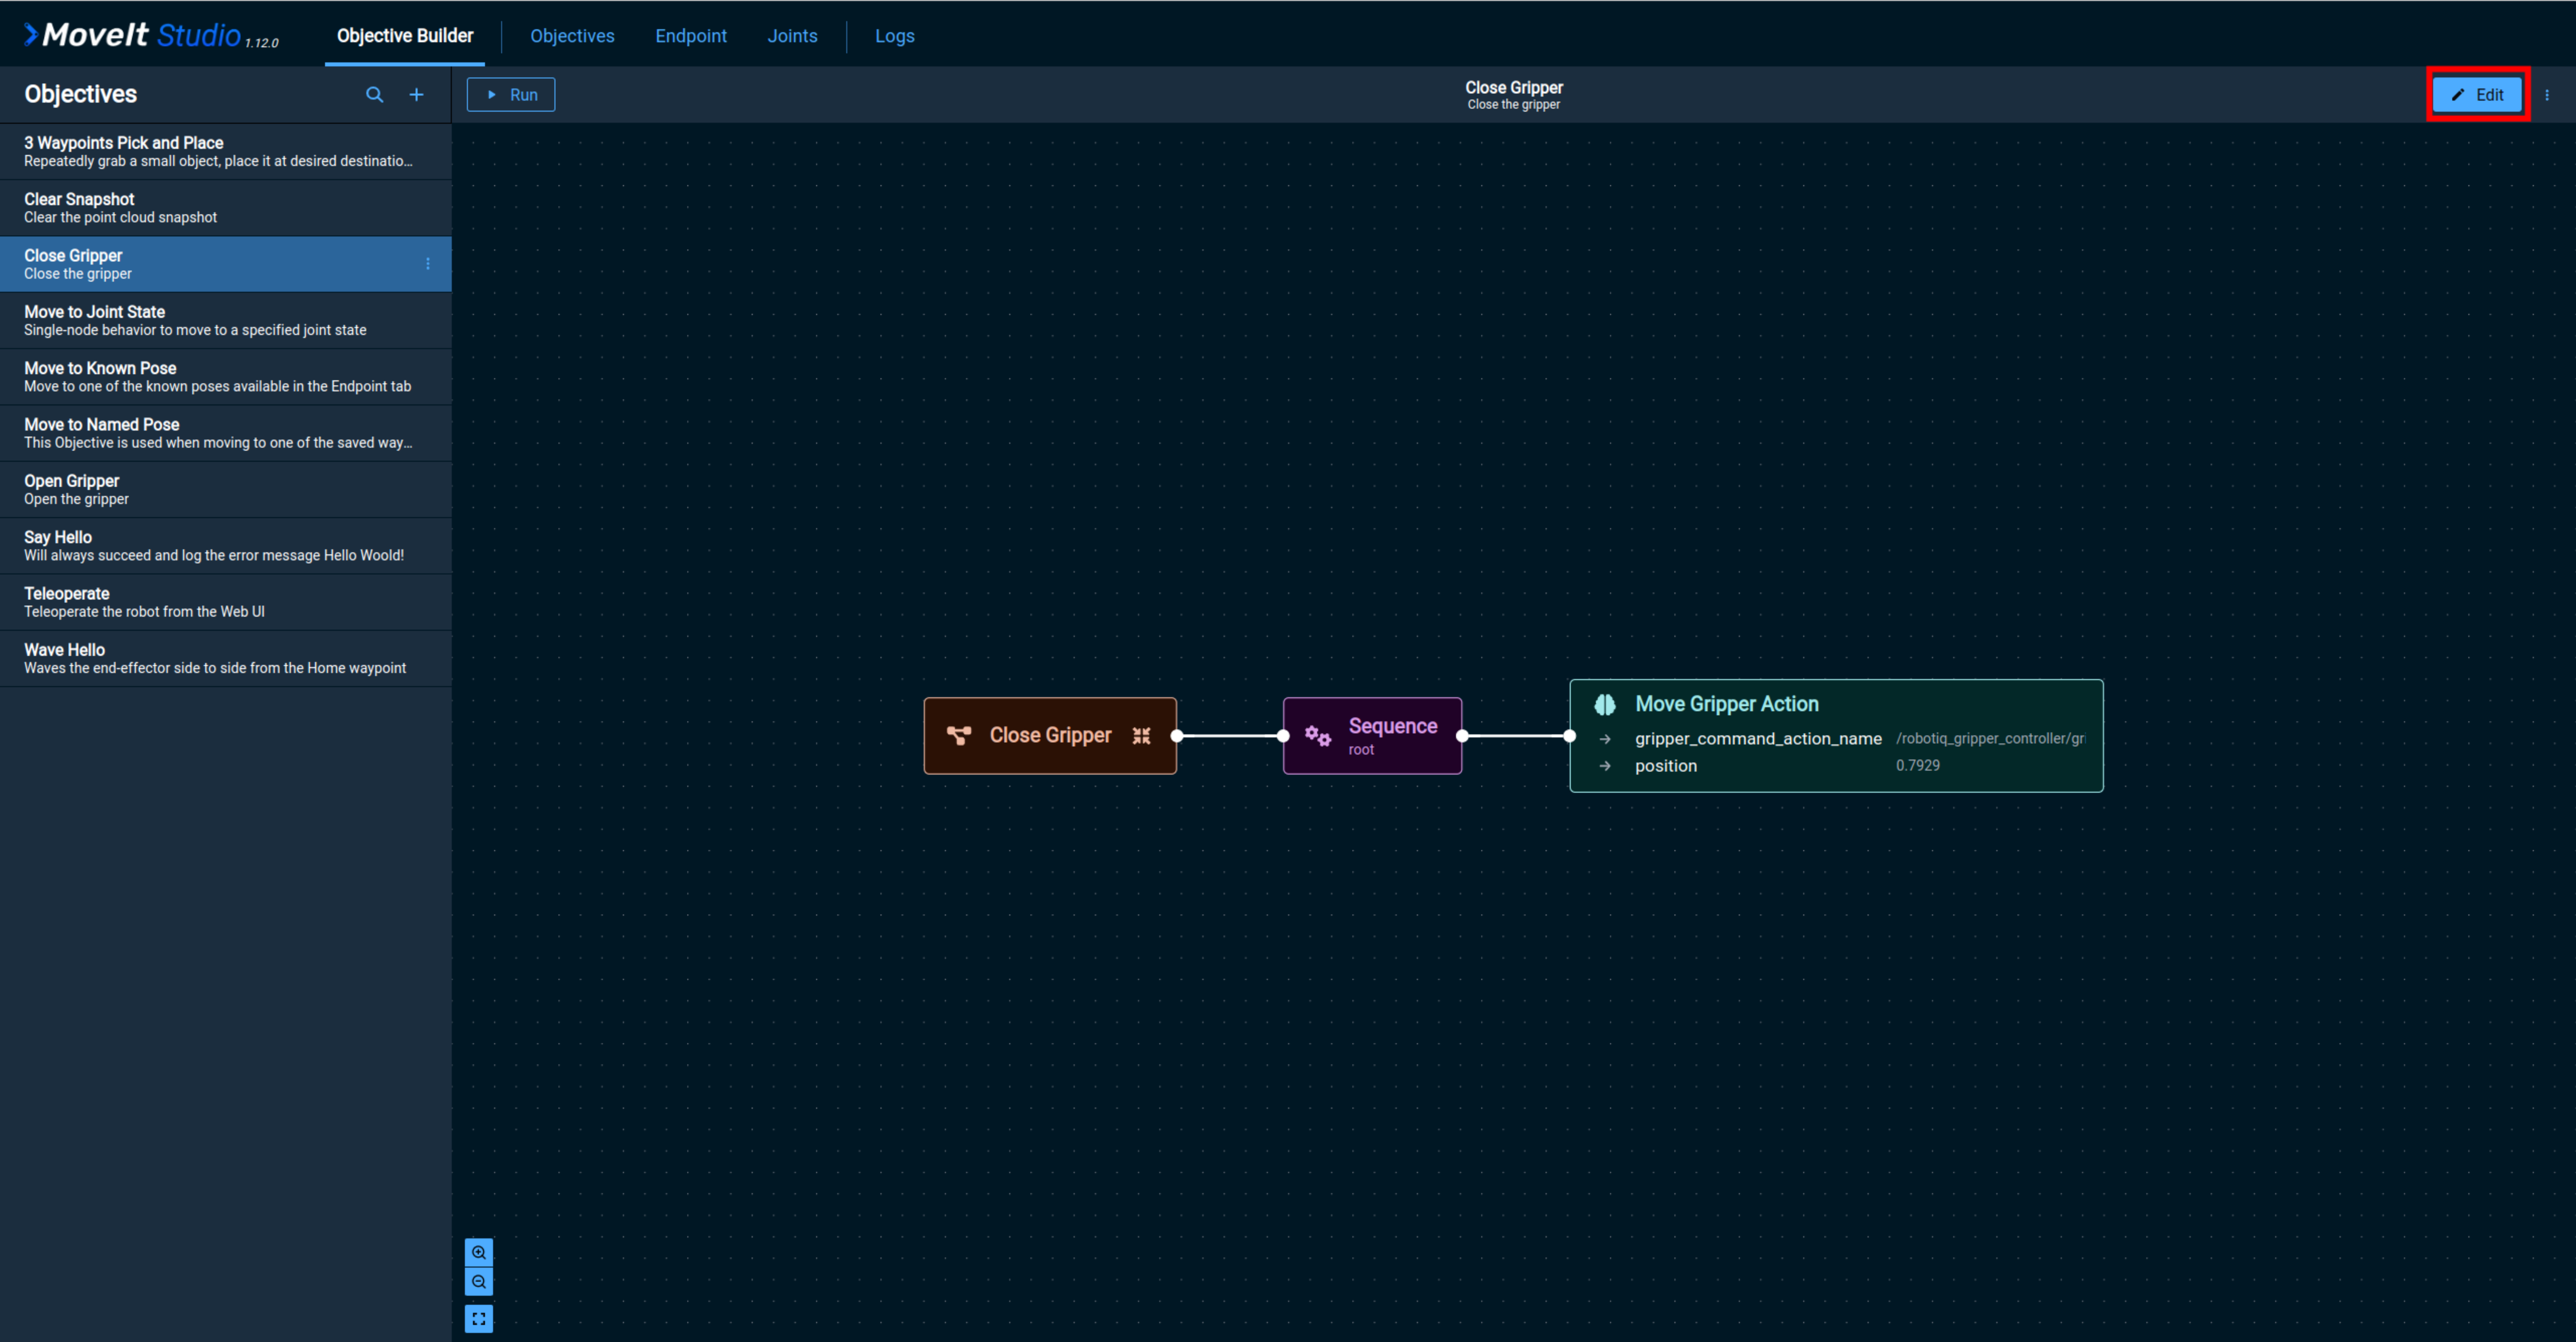
This will open the Edit Objective screen, which shows the Behavior tree of the Close Gripper objective.
Next, click on the + Behavior button at the top left corner to add a new Behavior.
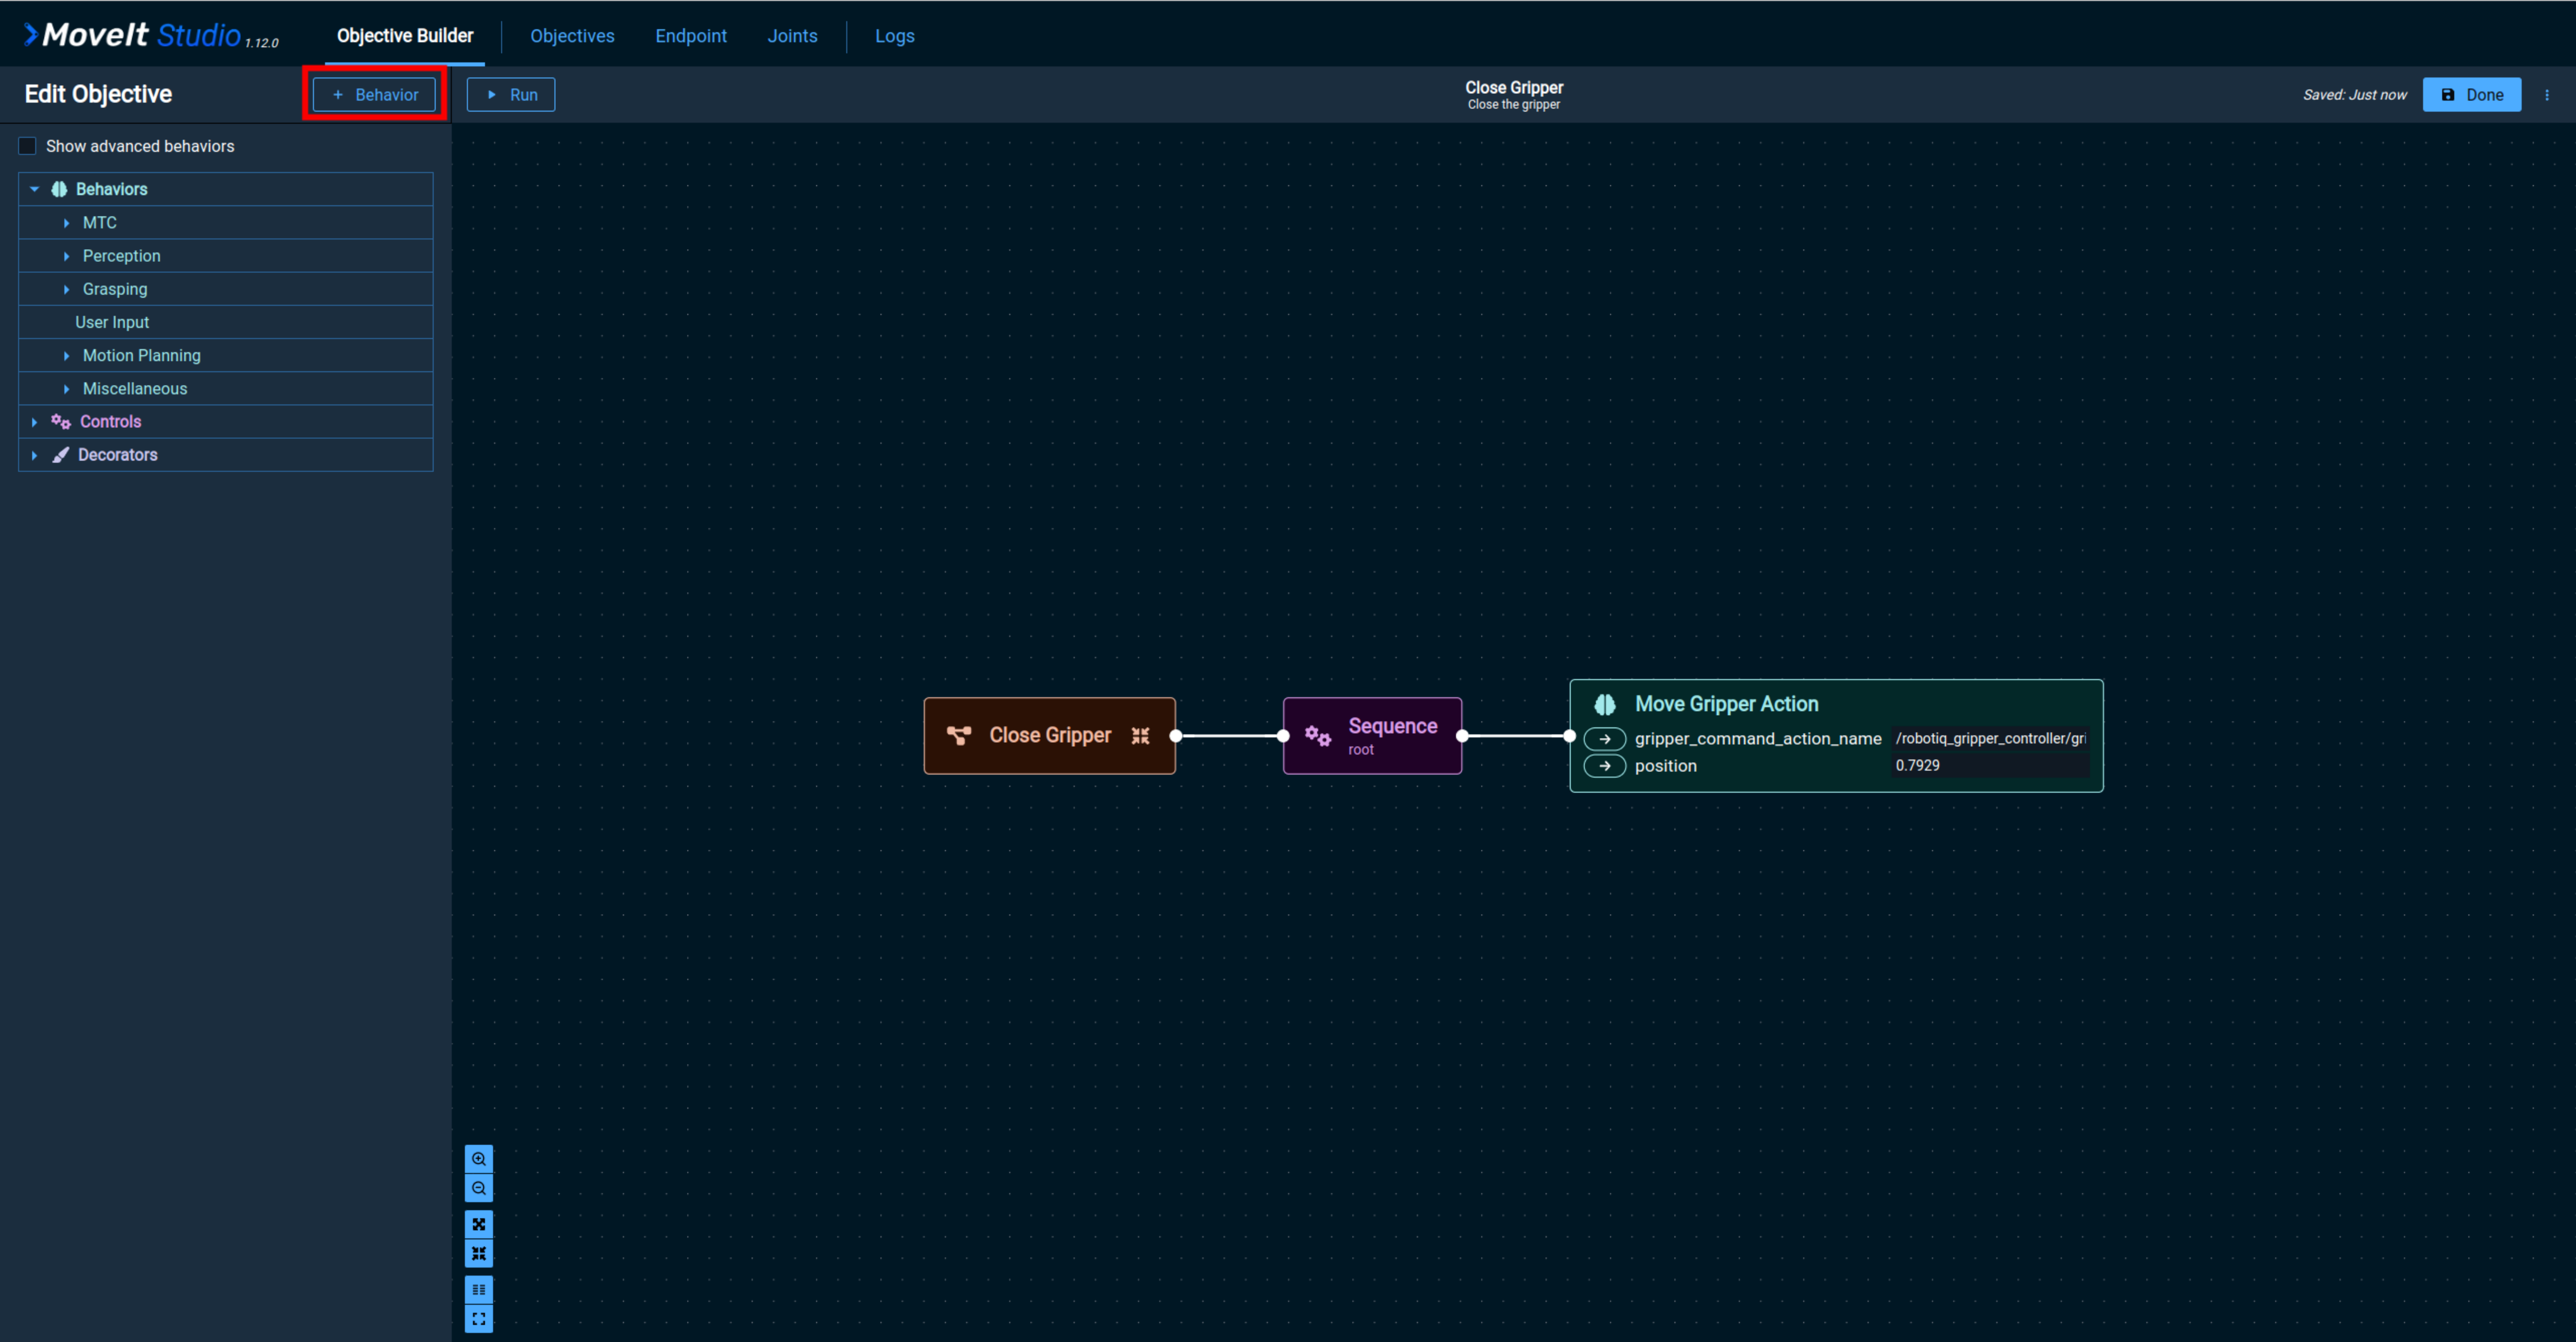
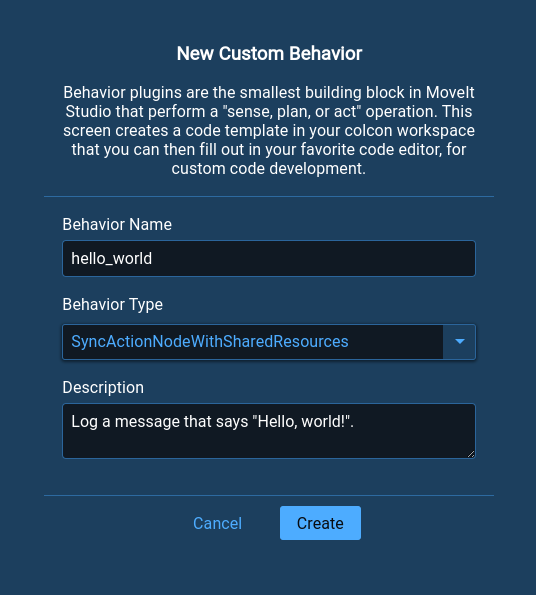
In the New Custom Behavior popup window, enter a name and description for your custom Behavior:
Name your Behavior
hello_worldEnter a description like
Log a message that says "Hello, world!".
In the Behavior Type dropdown, select SyncActionNodeWithSharedResources.
A SyncAction node is expected to tick once and exit very quickly.
A StatefulAction node is intended for longer running processes that the Behavior tree can continually tick until the Behavior status causes it to do otherwise.
The WithSharedResources suffix provides the node with access to ROS 2 resources, allowing it to create publishers, subscribers, loggers, and other ROS 2 constructs.
Finally, click the Create button to create the new Behavior.
A popup will appear containing the path to the newly-created Behavior package.
The location provided is the path that is used inside the moveit_studio Docker container.
The contents of the container’s /opt/moveit_studio/user_ws is shared with the container’s host (your system), at the location of your user workspace.
Click the Done button to finish creating your new Behavior.
In the following steps, we will add functionality to the Behavior and make it available for use in the Objective Builder.
3. Inspect the New Behavior Package Directory
Open the directory where the new Behavior package was created.
Within the MoveIt Studio container it is located at /opt/moveit_studio/user_ws/, or on the host it can be found in the src folder of your user workspace.
Tip
If you would prefer not to develop your Behaviors inside a Docker container, you can remove root ownership of the packages in the user workspace by running sudo chown -R $USER:$USER src/ from the root of your user workspace to recursively change ownership of everything in the src/ folder to the current user.
The hello_world package contains the following files:
hello_world/
  behavior_plugin.yaml
  CMakeLists.txt
  config
    tree_nodes_model.xml
  hello_world_plugin_description.xml
  include/
    hello_world/
      hello_world.hpp
  package.xml
  src/
    hello_world.cpp
    register_behaviors.cpp
  test/
    CMakeLists.txt
    test_load_behavior_plugins.cpp
The template Behavior package is ready to build and run by default, so we will only need to make a few modifications to make the Behavior log "Hello, world!".
Note
Throughout the remainder of this tutorial, we will refer to Hello World Behavior package files via relative paths such as include/..., src/..., test/..., and config/....
These paths are relative to the user workspace’s src/hello_world directory.
4. Edit the Custom Behavior Source Code
Open src/hello_world.cpp in a text editor or IDE.
First, add #include <moveit_msgs/msg/move_it_error_codes.hpp> at the top of the file to include the MoveItErrorCodes message type:
#include <hello_world/hello_world.hpp>

#include <moveit_msgs/msg/move_it_error_codes.hpp>

namespace hello_world
{
...
Then, edit HelloWorld::tick() so it matches the code shown below:
BT::NodeStatus HelloWorld::tick()
{
  // Do HelloWorld's useful work.
  // Setting the third argument to false ensures the message will be shown immediately
  shared_resources_->logger->publishInfoMessage(name(), "Hello, world!", false);

  return BT::NodeStatus::SUCCESS;
}
This code will log a message within the Agent with a code value corresponding to SUCCESS and a message containing the string "Hello, world", which will ultimately be sent to the UI and displayed to the user.
5. Build the Package
Run the following command from the directory that contains docker-compose.yaml to build the workspace that contains your new Behavior package:
./moveit_studio build_workspace
Building the workspace should succeed; if not, you will see a description of the issue in the terminal window.
6. Writing Unit Tests for your New Behavior
To confirm that our Behavior works as expected, let’s add a unit test.
Open test/test_load_behavior_plugins.cpp and update the test in this file so it matches the code shown below:
TEST(RobotTask, test_load_behavior_plugins)
{
  pluginlib::ClassLoader<moveit_studio::behaviors::SharedResourcesNodeLoaderBase> class_loader(
      "moveit_studio_behavior_interface", "moveit_studio::behaviors::SharedResourcesNodeLoaderBase");

  auto node = std::make_shared<rclcpp::Node>("test_node");
  auto shared_resources = std::make_shared<moveit_studio::behaviors::BehaviorContext>(node);

  BT::BehaviorTreeFactory factory;
  {
    auto plugin_instance = class_loader.createUniqueInstance("hello_world::HelloWorldBehaviorsLoader");
    ASSERT_NO_THROW(plugin_instance->registerBehaviors(factory, shared_resources));
  }

  // Test that ClassLoader is able to find and instantiate each Behavior using the package's plugin description info.
  auto hello_world_behavior = factory.instantiateTreeNode("test_behavior_name", "HelloWorld",
                                                           BT::NodeConfiguration());

  // Try calling tick() on the HelloWorld Behavior to make it print its message.
  EXPECT_EQ(hello_world_behavior->executeTick(), BT::NodeStatus::SUCCESS);
}
This test checks two important things:
The Behavior loader plugin that contains the
HelloWorldBehavior can be loaded at runtime using its name and registered with the Behavior tree factory to make its Behaviors available to the Agent.The Behavior tree factory can create an instance of the
HelloWorldBehavior and successfully calltick()on it.
Note
Calling the executeTick() function works as a test for HelloWorld because its tick() function is very simple, does not interact with ROS, and does not use any data ports. Further tutorials will discuss how to test Behaviors that interact with ROS topics and use data ports.
Run the new unit test by entering the following command from the directory that contains docker-compose.yaml.
This will build the user workspace to ensure that all packages are up to date, and then run all of the tests in the workspace:
./moveit_studio test_workspace
At the end of the console output, you should see something similar to this:
Finished <<< hello_world [0.65s]

Summary: 3 packages finished [0.80s]
Summary: 13 tests, 0 errors, 0 failures, 0 skipped
If you’d like to take a closer look at the test output for the particular test that we just modified, go to your user workspace and open log/latest_test/hello_world/stdout.log.
You should see something like this in the log file:
2: [==========] Running 1 test from 1 test suite.
2: [----------] Global test environment set-up.
2: [----------] 1 test from BehaviorTests
2: [ RUN      ] BehaviorTests.test_load_behavior_plugins
2: [INFO] [1681757216.864270180] [Logger]: Behavior: test_behavior_name. Error: Hello, world!
2: [       OK ] BehaviorTests.test_load_behavior_plugins (339 ms)
2: [----------] 1 test from BehaviorTests (339 ms total)
2:
2: [----------] Global test environment tear-down
2: [==========] 1 test from 1 test suite ran. (339 ms total)
2: [  PASSED  ] 1 test.
These logs show that the HelloWorld Behavior was successfully registered with the Behavior tree factory by loading the plugin, and that when ticked it publishes a log message containing the Hello, world! message.
Running Your New Behavior in MoveIt Studio
1. Restart MoveIt Studio
To use the new HelloWorld Behavior in a custom Objective, you will need to restart MoveIt Studio so that it loads your new plugins.
You can stop MoveIt Studio by navigating to the location of your docker-compose.yaml and entering:
./moveit_studio down
Once MoveIt Studio stops and the command prompt returns, you can restart it using:
./moveit_studio run
2. Run the Behavior in an Objective
You can now use your new Behavior when building Objectives.
If needed, refer to the Create a Pick and Place Objective tutorial for how to make an Objective.
Try it out by adding it to an Objective and clicking Run:
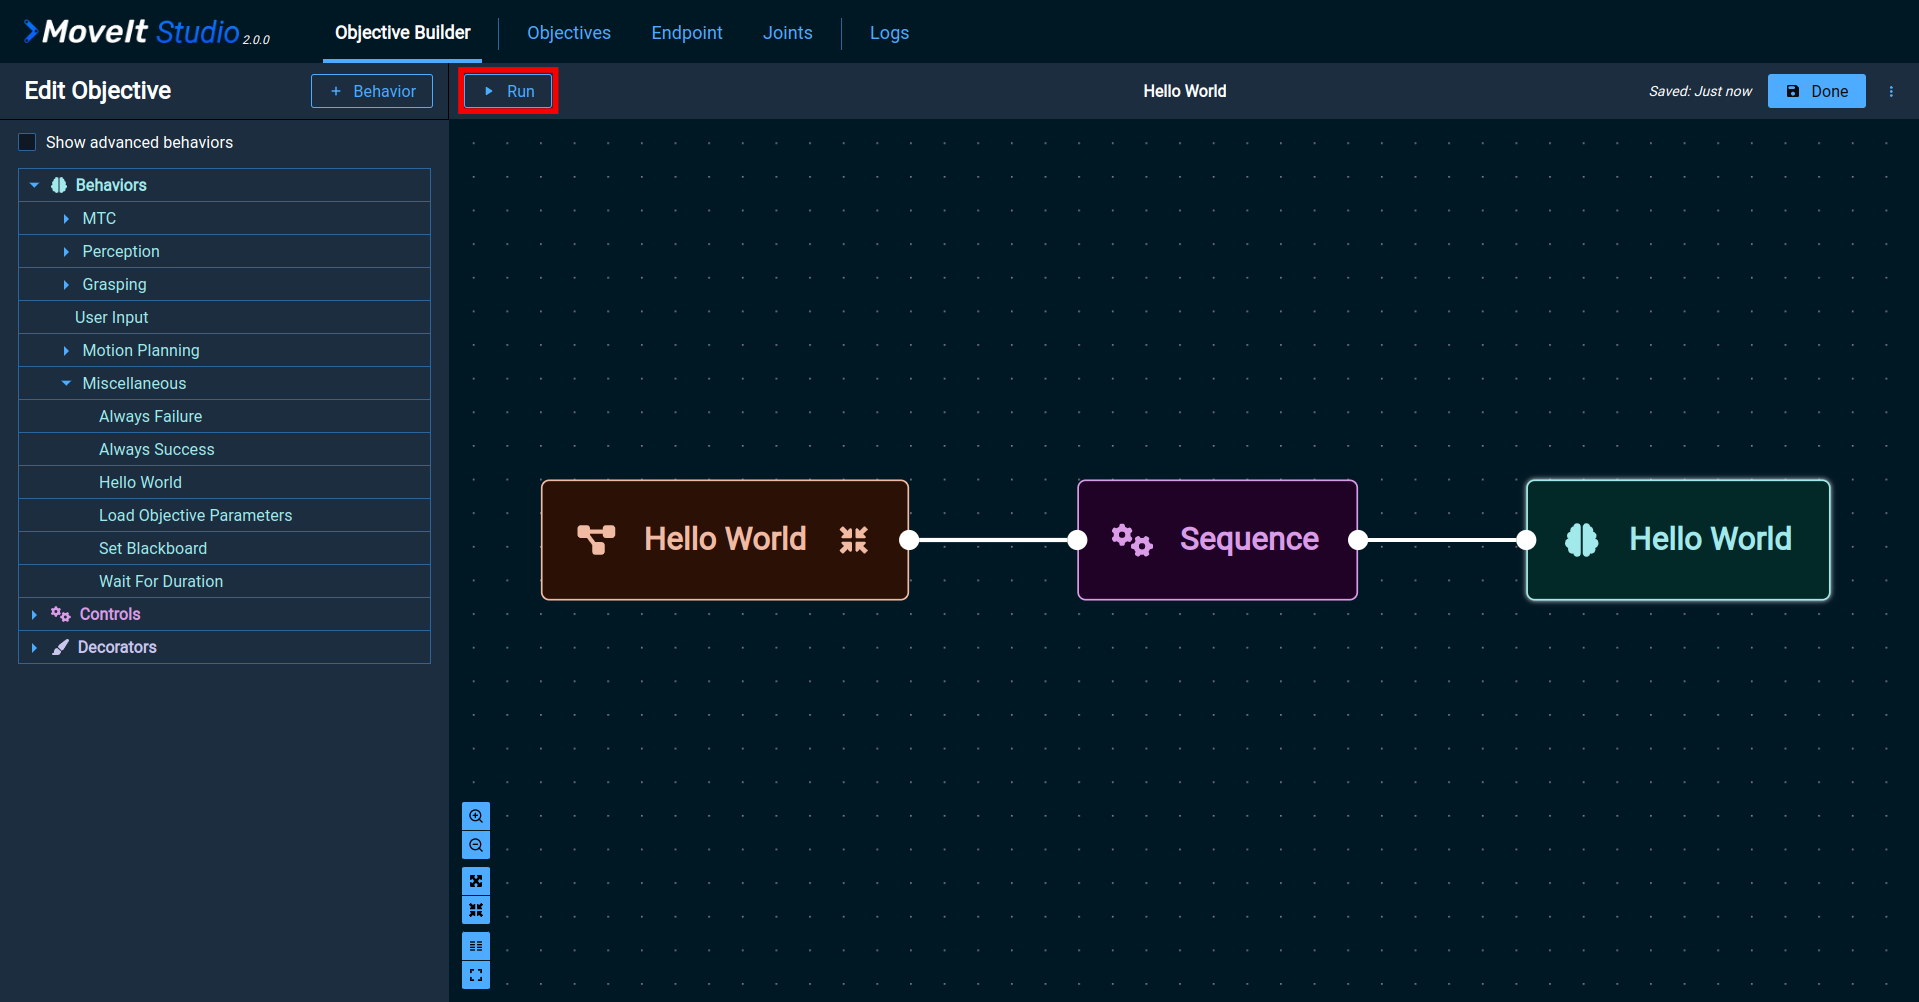
You should see the following in the top-right of the UI once the Behavior has finished executing:
