Execute Trajectories with Admittance Control
Many robotics manipulation applications require operating through contact. Some examples include:
- Pushing objects, such as buttons or latches
- Executing trajectories while in contact, such as opening or closing doors
- Inserting objects into slots ("peg-in-hole" problems)
MoveIt Pro contains Behaviors and controllers to help you execute trajectories in a compliant way. In this tutorial, you will learn how to use a joint trajectory controller with an admittance overlay.
Adding a 'Joint Trajectory with Admittance' controller
MoveIt Pro includes a special controller that can execute timed joint trajectories with a user-defined admittance behavior.
It's called the 'Joint Trajectory with Admittance' controller, or JTAC.
This controller is similar to the ros2_control joint trajectory controller (JTC), but with the following additional features:
- It lets the trajectory deviate according to the sensed forces and user-defined compliance.
- Implements smooth stop trajectories on exit conditions.
- Can stop on a force threshold exceeded, or a user-defined maximum allowed deviation.
- Real-time safe. No memory allocations in the real-time thread.
To execute trajectories with compliance, your robot needs a force/torque sensor installed at the wrist. Otherwise this controller can still be used, but it will behave as a standard joint trajectory controller, i.e. it won't exhibit an admittance behavior.
As with any other ros2_control controller, the JTAC can be configured in your MoveIt Pro configuration package, as described here.
A minimal configuration file for admittance control may look as follows:
controller_manager:
  ros__parameters:
    update_rate: 200  # Hz
    force_torque_sensor_broadcaster:
      type: force_torque_sensor_broadcaster/ForceTorqueSensorBroadcaster
    joint_trajectory_admittance_controller:
      type: joint_trajectory_admittance_controller/JointTrajectoryAdmittanceController


  force_torque_sensor_broadcaster:
    ros__parameters:
      sensor_name: tcp_fts_sensor
      state_interface_names:
        - force.x
        - force.y
        - force.z
        - torque.x
        - torque.y
        - torque.z
      frame_id: tool0
      topic_name: ft_data

  joint_trajectory_admittance_controller:
    ros__parameters:
      joints:
        - shoulder_pan_joint
        - shoulder_lift_joint
        - elbow_joint
        - wrist_1_joint
        - wrist_2_joint
        - wrist_3_joint
      base_frame: base_link
      sensor_frame: tool0
      ee_frame: grasp_link
      ft_sensor_name: tcp_fts_sensor
      # Acceleration to use for immediate stops (e.g. when cancelling a running trajectory).
      stop_accelerations: [0.523, 0.523, 0.523, 0.523, 0.523, 0.523]
Intuition Behind Admittance Control Parameters
Suppose you have a robot that must be compliant in one direction, but remain stiff (to effectively track motion trajectories) in other directions. The following image, credited to Prof. Alessandro de Luca, Sapienza University of Rome (2020), motivates the need for per-degree-of-freedom compliant control.
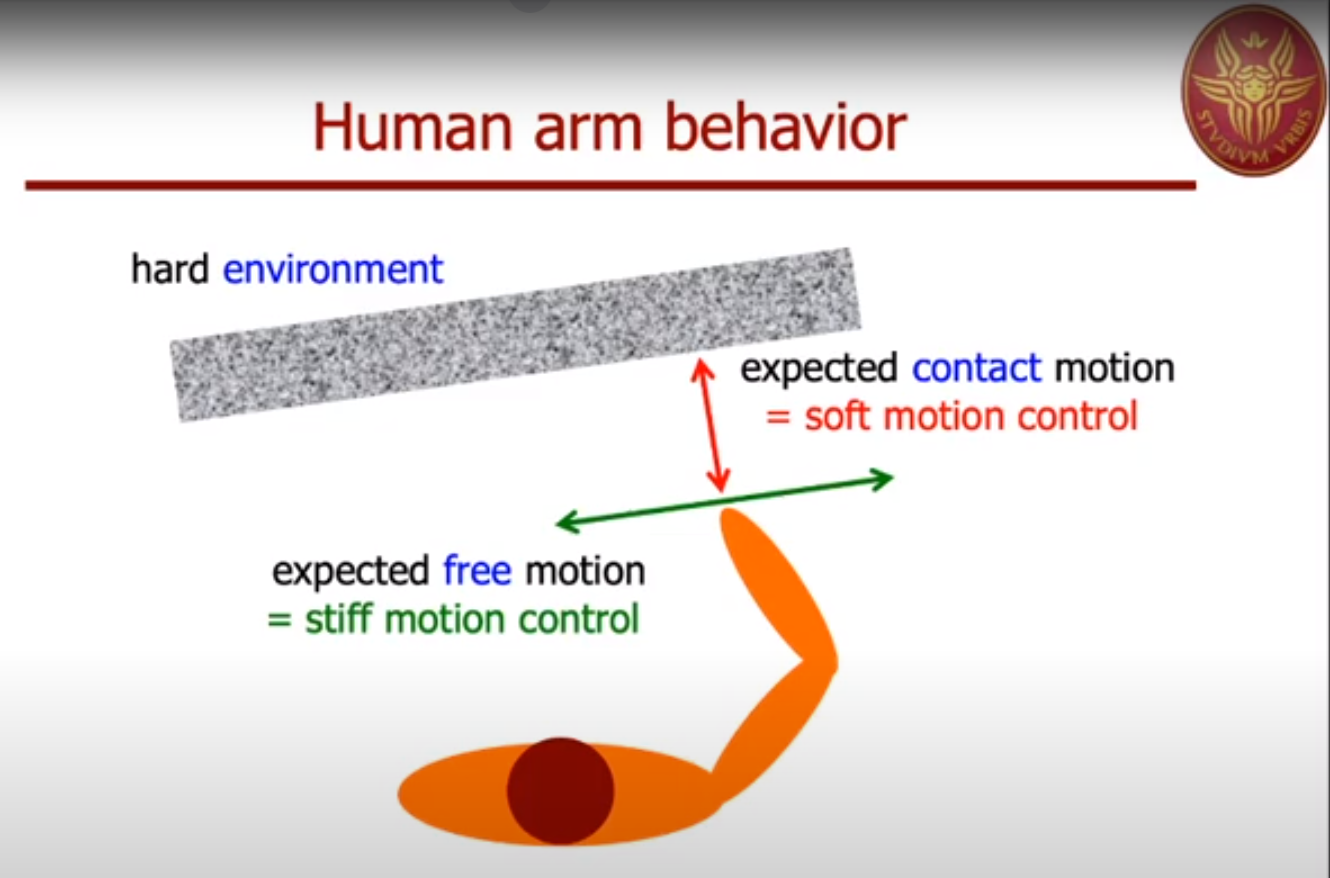
Admittance control changes the effective dynamics of a closed-loop system by modeling each of the (6) degrees of freedom (X, Y, and Z translation and rotation) as a linear spring-mass-damper system. These controllers are tuned by modifying the mass, stiffness, and damping (or damping ratio) for each degree of freedom. Intuitively,
- Large mass and small stiffness leads to more responsiveness to contact force, or "softer" control.
- Small mass and large stiffness leads to good trajectory tracking, or "stiffer" control.
- Damping coefficients can shape the transient behavior, offering a balance between response time (low damping) and smooth transient behavior (high damping).
It is worth noting that the JTAC uses the unitless damping ratio for its damping values.
This means that a damping ratio of exactly 1.0 describes a critically damped system, anything smaller is underdamped, and anything larger is overdamped.
Configuring Admittance Control Using the MoveIt Studio UI
Two Behaviors are needed to execute trajectories with admittance: SetAdmittanceParameters and ExecuteTrajectoryWithAdmittance.
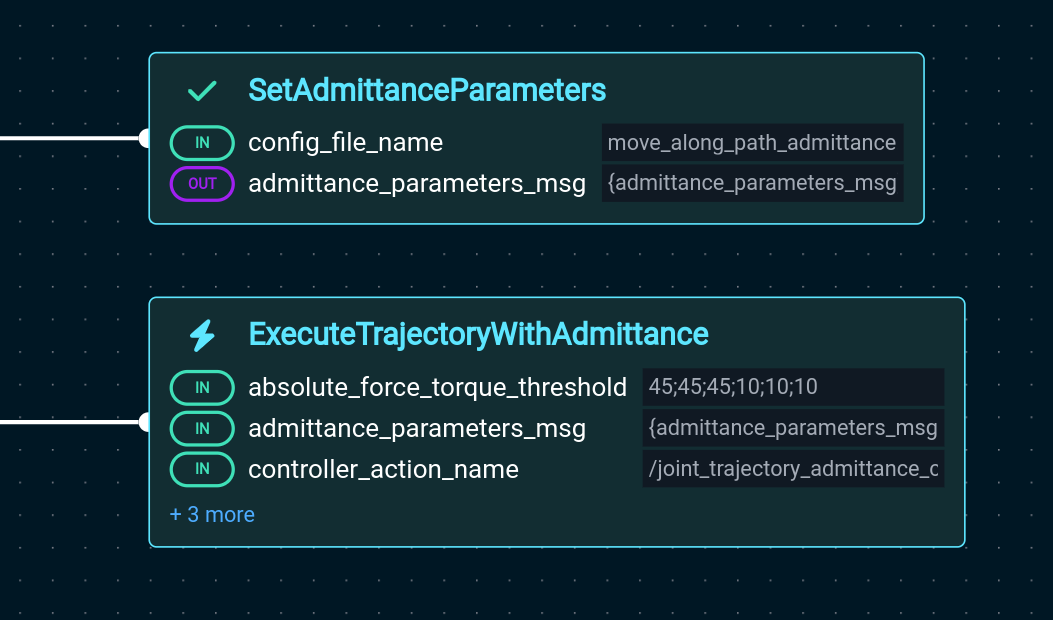
SetAdmittanceParameters lets you specify the admittance parameters that will be used when executing the trajectory, i.e. mass, damping and stiffness on each Cartesian axis.
These parameters can be loaded from a YAML configuration file if one exists already.
Otherwise, the parameters you set in the UI will be stored in the YAML configuration file to be reused next time, or in other Objectives.
Please refer to the Behavior documentation in the UI for additional details.
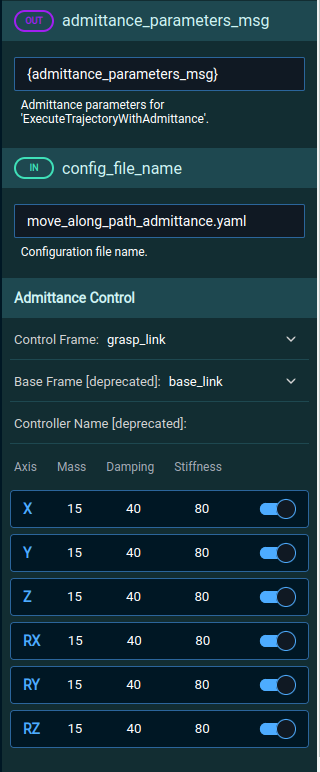
SetAdmittanceParameters creates a message with the admittance parameters in an output port.
This message will be used as an input in ExecuteTrajectoryWithAdmittance.
Executing trajectories with admittance
After the admittance parameters have been set, you should have the admittance parameters in a blackboard variable.
That variable needs to be given as input to ExecuteTrajectoryWithAdmittance, together with the joint trajectory to execute, e.g. e.g. {admittance_parameters_msg} and {joint_trajectory_msg} in this example:

Other parameters include:
- An absolute force threshold used to stop the trajectory if exceeded.
- Maximum joint position deviation to accept along the path.
- Maximum deviation to accept at the goal.
- The controller name.
The Behavior in the UI has documentation that explains each parameter in more detail.